Wednesday, December 26, 2018

How To Get Organized This Year - Includes A Free Printable 2019 Floral Calendar


Are you ready for the New Year? Do you have any goals or resolutions for this upcoming year? One of my goals this year is to be more actively organized rather than reactionary to the many activities and events that seem to fill up my calendar. I love the idea of a fresh start to a new year on January 1 where I can forget about the missed goals or mistakes made in the past and just start over with a clean slate. 

So how am I preparing myself this year that is different from previous years you might wonder? 

Planning ahead! 

I've already started filling in the calendar with upcoming scheduled events but this year I'm adding time each week to the calendar that is totally related to my personal goals. 

For example, one of my goals is to exercise more so I'm scheduling my weekly exercise time on the calendar in writing for all to see. I think this will help me be more mindful of exercising as well as keep me accountable for actually doing it. 

In addition to exercising more I am scheduling some time each week to craft or sew. My hobbies tend to fall to the back burner due to the many other activities that take up my time. I realized that when I spend time crafting or sewing it makes me a better mom/wife because the time I spent working on my hobby gives me a break from the daily demands of motherhood and life. Everyone can use a little break now and then. Finding the time for these little breaks is tricky so once again planning ahead - scheduling the time on my calendar will be key. 

Speaking of calendars you have to check out these beautiful FREE floral printable calendars from FTD.com. What a stylish and great way to ring in the new year! The calendars come in a full-page printout form and a smaller desktop size. Not only will these calendars look aesthetically pleasing in your kitchen or perched on your desktop but they will help you stay organized this year! There is plenty of room to write in your daily tasks as well as reminders about your yearly goals. 2019 looks like it's going to get off to a great start!

printable floral calendars


The calendars come in a full-page printout form and a smaller desktop size to help prepare you for a more organized 2019. You can choose between downloading the full page printouts (8.5″ x 11″) to hang on your wall or a desktop version (11″ x 17″) that can be folded into an upright calendar and placed in your workspace.

Pick your favorite size, print it out and you’ll be ready for a more organized 2019!

I’ve included a preview of next month below!

Click HERE for Free Printable Calendar


Aren't they so beautiful? You can check out the rest of them here: https://www.ftd.com/blog/share/printable-calendars


This post may contain affiliate links which means if you click and make a purchase you may receive a small commission at no additional cost to you. For more information please see my Disclaimer page.


New Year Resolutions & Solutions


Maybe one of your resolutions this year is to declutter your house or apartment. Need a little help getting the job done? No worries my friend, here is another great FREE printable to help you get the job done. This printable declutter checklist will help you decide what to keep or toss out! 


Now that you are feeling a little more organized and a little less cluttered why stop there? Did one of your resolutions include having a cleaner house? Great goal, but how in the world are your going to achieve this one for twelve consecutive months? Let me tell you how - a House Cleaning Planner from Sunny Day Family! I know when a task overwhelms me I don't even know where to start. This planner will help you divide up the many overwhelming cleaning tasks into manageable daily tasks so everything gets a good cleaning each week. 


You'll get:
  • 12 months at a glance: these undated calendars allow you to start anytime
  • Weekly cleaning schedule page
  • Weekly laundry schedule with deep cleaning checklist
  • Specialty cleaning checklists for decluttering, spring cleaning, laundry, and holiday cleaning. 

I hope you get your New Year off to a great start! Blessings & Peace to you!

Tools & Gadgets to Help You This Year

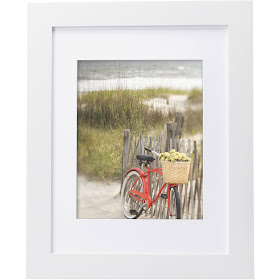
1. Frame your beautiful floral calendar pages.
find at Bed Bath & Beyond

find at Walmart
2. Cleaning Caddy to keep your cleaning supplies organized: 
find at Grove Collaborative
3. Metal baskets to store your stuff: 
find at World Market


Need A Good Laugh? 17+ Funny Road Signs That Will Crack You Up!


Does planning a trip or vacation stress you out? Do you break out into a sweat and suffer heart palpitations every time you look at your long pre-vacation "to-do" list! Don't worry, you are not alone. 

The thought of a relaxing vacation always sounds good but the preparation for it always feels like a frantic rat race to get everything done and everyone packed and ready to roll.

OK, deep breath, hibernating in a dark cave won't solve your problems and relieve your stress but here is an idea to help you find a little relief. You know the saying "Laughter is the best medicine"? How about a dose of laughter to lighten your stress load! 

I've put together a little road trip themed "dose of laughter" I'd like to share with you to help give you a little comic relief for your stress.


Hilarious Road Signs Worth Stopping For


Using symbols, images, and numbers, road signs are like a universal language. No matter what language you speak, you can usually understand what these signs are telling you. Helpful road signs made humorous? It’s true. We rely on signs along the road to help us navigate where we’re going – speed limits, directions, and hazards to watch out for. There are a few signs scattered throughout the world that do more than just provide drivers with relevant driving information. They entertain at the same time. In fact, they’re so entertaining that their existence is widely shared.

Just changing the wording on signs so they stand out makes you pay more attention to the road than you might otherwise. Other signs have additional cute images that make you think twice about what you’ll find on the road ahead. And still others warn you of something you never expected.

Road signs don’t always obey the rules of the road. Sometimes they go out of their way to be absolutely ridiculous. These road signs may be funny, but they do serve an important purpose – getting us to pay attention when there’s something important to tell us. How many times have you driven down the road, ignoring signs only to find out that you shouldn’t have? 


These 17 hilarious road signs are sure to amuse and make you look twice the next time you’re driving down the road. Read through the list to find out where you can find these signs and what their true meaning is.

These are real signs in real places! Trust me, these are worth slowing down for! Also, visit their blog to read more helpful tips.


Road Trip Funnies


When our family goes on vacation I always choose to travel by car! I love road trips because you get to see so many places along the way that you might miss if you were traveling by plane. Now you might think I'm crazy choosing to travel in a car with four kids and my hubby, and yes there are moments when I think "this is crazy!", but I'm always glad we drove. It gives us the freedom to stop whenever we want to and check out new places we may have missed if we weren't driving.

If you choose to "road trip it" this year be on the look-out for funny signs, billboards and other hilarious signs - they are everywhere if you watch for them! Here are some more silly signs I thought you'd get a kick out of!


I wonder what other slow animals this farm has? Worth stopping to check out don't you think?


All CAPS, this sign just screams out a warning to not even thinking about parking here but ends with a small little "Thank You". Manners are important, right?


If only this poor pooch could read! This might get a little awkward for the little guy's owner.


"Cat-ion" 


Fast Food

Maybe you get lucky and find some funny signs too while traveling! If you do, please take a picture and share it with me!


Road Trip Scavenger Hunt Free Printable

I have a free gift for you to take along on your next road trip! Here is a fun game to play in the car with your kids - Road Trip Scavenger Hunt. The first one to check off all the items gets a prize (of your choosing). Just print it off and bring it along on your next trip.


This post contains affiliate links which means if you click on a link and make a purchase I may receive a small commission at no additional cost to you. For more information please read my Disclaimer page.


Travel Games & Gear

Happy Trails my friends! Here are some other fun travel games and activities you might consider bringing along with you on your next trip as well as some great travel gear for parents:

1. Magnetic Travel Games
from Walmart
2. Cooler with AC adapter 
from Target
3. Kids Travel Desk 
from JCPenney


Wednesday, December 19, 2018

Easy DIY 3-D Christmas Tree Craft To Make This Holiday Season

mommysuburbia.blogspot.com

Christmas crafting is in full swing around here! Glitter, glue, cardboard, beads and many other kinds of craft supplies are strewn across our table this time of year. Christmas is just so inspiring and it is so much fun making holiday themed crafts with your kids at Christmas. Today I am going to share with you a craft my kids and I are currently working on together. We are making 3D Christmas trees! 

This craft requires minimal supplies and turns out looking amazing. I got the inspiration for this craft while my kids were helping their grandparents (my parents) decorate their Christmas tree. My mom pulled out a set of wooden 3D Christmas trees my sister and I had made way back in our childhood as a gift to her one year. My dad, a retired shop teacher, had cut out these Christmas tree shapes from wood had my sister and I paint and decorate them and we wrapped the up and gave them to my mom for Christmas. She still has them! I was just so inspired by those trees and the memories of making them I wanted to do something similar with my kids this year. 

In an effort to simplify the craft from the original wood tree I wanted to make our 3D Christmas trees out of corrugated cardboard. This type of cardboard is sturdy and seems to be in abundance this time of year due to all the boxes being delivered to my house (thanks Amazon) - and it is FREE!! 


mommysuburbia.blogspot.com

After creating a template to use for our 3D tree we got to cutting, painting, gluing and full on decorating to create the cutest 3D Christmas tree ever. If you are looking for a great craft project to do with your kids this one is perfect! These would also make great gifts to give to grandparents or aunts & uncles. 

To make this project super easy for you I created a tree template for you to use. I really like the rounded edges of the tree boughs but if you prefer a more triangular shape you can adjust the pattern to fit your taste. Also, if you want to make your tree taller or bigger simply enlarge the pattern or trace a wider line around the shape I created to make the three size you want. 

Shall we get started? 

OK, go print off the pattern below on 8 1/2" x 11" printer paper, grab a cardboard box, scissors or whatever you like to use to cut cardboard and let's get started. 


On a side note - do you do a lot of crafting with cardboard? We do! After many, many projects that required scissors or an exacto knife to cut cardboard my hand was getting tired! I was really getting tired of this but didn't want to stop crafting. The solution I found was a cardboard cutter! This handy tool is specially designed to cut cardboard effortlessly! Yes - effortlessly! And no need to worry about a super sharp exacto blade or box cutter blade injuring you or your child, this special tool is much safer and doesn't have a pointy sharp tip. This tool is awesome and I highly recommend you get one to use for this project and future cardboard cutting projects. 


This post contains affiliate links which means if you click on a link and make a purchase I may receive a small commission at no additional cost to you. For more information please read my Disclaimer page. Thanks!
mommysuburbia.blogspot.com


3D Christmas Tree Tutorial 


Supplies: (a list of what I used and links where I got them at at the end of this post)

Tree template - printed out and cut out of regular printer paper 

Cardboard - 2 pieces at least 9" x 8" (if using the template provided) 
Canary cardboard cutting tool (if you don't have this use Scissors or an Xacto knife)
Ruler or straight edge tool 
Craft paint 
Paint brushes 
Glue (hot glue or Elmer's will work) 
Decorations to decorate your painted tree with (sequins, buttons, pom-poms, string - the sky is the limit!)


Instructions:

After printing out the Christmas tree template onto a printer paper, trace the pattern onto two pieces of corrugated cardboard and cut out the two tree shapes from the cardboard. This is a step that an adult should do since it requires sharp tools - please use caution and be careful! 


In order to make our tree 3D we are going to have to cut slits in the center of each cardboard tree piece so we can slide each piece together to make a tree that stands up on its own. So now that you have the cardboard trees cut out it is time to measure for the slits that need to be cut out. 


See the slits I cut out of each piece above.

The slits only need to be as wide as the thickness of your cardboard. For each cardboard tree make a light pencil mark at the center of the tip of the tree and at the center point at the bottom of the tree. Take one of the tree cutouts and from the bottom center mark you just made in pencil measure up the middle of the tree 5 inches and make a pencil mark connecting these two points. Now with the second cardboard tree start from the top of the tree and measure down the middle of the tree 4 inches again connecting the two points with a pencil mark. Using a straight edge or ruler measure and mark in pencil a line just 1/16" over on each side of the center line you have marked on both cardboard tree pieces. Because the cardboard is probably 1/8" or less thick you are going to want to be careful not to cut the slits too wide otherwise the trees will be wobbly. 


With your cutting tool of choice cut the cardboard where you just marked creating one slit in each tree like I did in the picture below. Fit the two cardboard tree shapes together and make adjustments if necessary. If there is a small gap when the trees are connected don't worry! When the trees are sitting up right on a flat surface the bottom of each tree will make it flush. 


At this point you can choose to glue the assembled tree together but I recommend if you are going to glue it to set the tree up on a flat surface and glue it then so that the tree isn't wobbly and the bottom of the tree is flush against a flat surface. 


The tree is now ready to be painted and decorated! You could paint it whatever color you choose or maybe even use chalkboard paint so that you can write a message on your tree. The options are endless and so much fun for anyone making one of these 3D Christmas trees. 


I'd love to see your finished 3D Christmas trees! Please share in the comments section. Also, if you have any questions please ask!


Merry Christmas!


Looking for more fun holiday craft projects? Check out this tutorial for a mini sock snowman craft project! It is super fun and makes such a cute snowman!


for the full tutorial click HERE

Where I Got My Supplies:
If you don't happen to have the same supplies I used handy here is where you can find them at a reasonable price:

find HERE on Amazon

Acrylic Paint: 
find HERE at Walmart

Friday, December 7, 2018

DIY Mini Sock Snowman Craft Tutorial

Super Easy Winter Craft Project - Mini Sock Snoman!! 

mommysuburbia.blogspot.com

I just love holiday themed crafts for kids, especially kids' Christmas crafts. For the past several years my kids and I have hosted a pre- Christmas crafting party for our homeschool bible study class at our house. I love finding simple and fun crafts that work for a variety of ages and abilities. Oh, and the crafts have to be boy and girl friendly since this is a co-ed group.

I thought I would share with you one of the projects we did including a tutorial in case you want to make it too! 

Now onto the fun kids Christmas craft project and tutorial. We are going to make a sock snowman! Excited? Good, let's get started.


mommysuburbia.blogspot.com
This post contains affiliate links which means if you make a purchase I may receive a small commission at no additional cost to you. For more information please see my Disclaimer page.

Mini Sock Snowman Tutorial


Supplies Needed :(links included to help you find the supplies)

White tube sock
Hot glue gun & hot glue sticksFiberfill 
(I got mine at Joann Fabric Store)
Rubber bands
Fabric paint or markers (Sharpies work great)
Fat quarter of fleece fabric (used for scarf and hat)
Dry beans (any kind will do)
Thick thread or twine
Scissors
Buttons or flat rhinestones 

Instructions:
To begin you will need the dry beans, one white tube sock and the Fiberfill stuffing. Measure 1/4 cup of the dry beans and dump it into the bottom of the sock. 

Next grab a few hand fulls of stuffing and stuff it into the bottom of the sock on top of the beans. This section of the sock will become the bottom of the snowman. Shape the sock and stuffing to look round and full.

Once you have a shape that looks good to you take one rubber band and loop it a few times over the sock just above the ball of stuffing. This will ensure the bottom ball of stuffing stays put. Later we will be tying a scarf around this rubber band to hide it so don't worry if you can see it now.

Now we will start making the second body section for our snowman. Grab another handful of stuffing and stuff it into the sock above the rubber-banded section. This part will be your snowman's head. Shape the stuffed sock into a smaller size ball adding more stuffing if you need more. You will want this section smaller than the first body section. Once you are satisfied with the shape and size of the head secure a rubber band just above the stuffing. Trim off the extra sock material at the top of the sock.

It is now time to work on your snowman's hat and scarf. Take the fleece fabric and cut a long skinny rectangle from one edge of the fabric. It should be long enough to wrap around the snowman's neck and tie in the front plus a little extra length to allow the scarf to hang down a bit. Since the size of your snowman will vary, an exact measurement isn't possible. You will just need to eyeball it.  Feel free to trim several small slits at both ends of the scarf to give the scarf a frayed edge just like a real scarf.

For the snowman's hat take the remaining piece of fabric and wrap it around the snowman's head positioning it where it should sit on his head just above the forehead. With a pencil draw a light mark on the fabric where the edges meet. Take the fabric off of the snowman and with your hot glue gun place a small bead of hot glue on the fabric where you placed the pencil mark and match the fabric edges together creating a fabric tube. Turn up the bottom edge of the fabric to create a cuff for the edge of the hat and secure it with more hot glue. Try the hat tube on your snowman's head making adjustments if necessary. 

Once you are satisfied with how the hat looks it is time to hot glue it to the snowman's head. I find it is easier to leave the hat on the snowman's head and gently lift the hat edges up squirt a little bead of hot glue under the hat at a time and press it down with your finger. Continue to do this around the entire perimeter until the hat is securely glued to the snowman's head.

You should now have a fully stuffed two section snowman with a scarf tied around it's neck and a tall tube shaped hat glued to it's head. Depending on how tall or short you want the snowman's hat use the thick thread to tie off the hat tube at a length that looks good on your showman. Trim off the extra fabric 1/2 inch above the thread you tied it with. Cut small slits around the extra 1/2 inch of fabric to create a pom-pom end to your hat. 

It is now time to draw on a face to your snowman. Using the sharpie markers or fabric markers draw on eyes, a nose and mouth on your snowman's face. If you prefer using beads or other crafting supplies to create the facial features - go for it! Next glue on buttons or flat sided rhinestones to make buttons down your snowman's belly. 

Lastly, dab a spot of hot glue on each side of your snowman's body and stick a small stick into each dab of glue to make arms for your snowman. 

Feel free to add any additional embellishments to your snowman to make him/her unique! These little guys/gals make great gifts for Christmas too! 

So how did your snowman turn out? Please share pictures of your snowmen - I'd love to see them! This makes for a great project for kids of all ages and requires minimal supplies. It is also a fun group project if you need a group project to do for the holidays. Have fun with it and Merry Christmas!

Here is a list of some of the supplies I used in this project and where you can find them too!
find at Joann Fabric Store

find at JoAnn Fabric Store

find at Walmart


find at Walmart

Looking for a unique rustic holiday snowman to give as a gift or to use as a holiday decoration? I have just what you are looking for in my Etsy shop Sapucha! Check out these cuties!