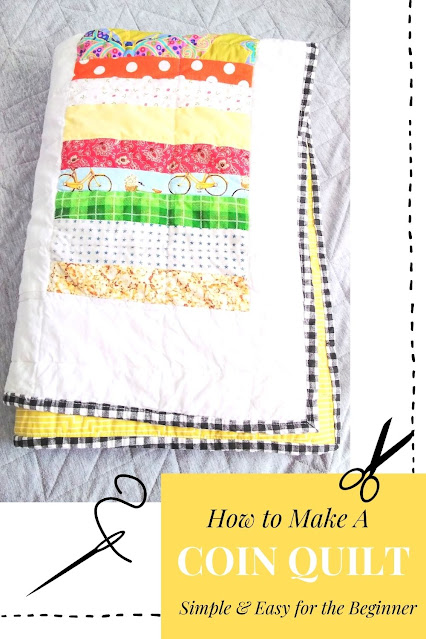
What is a coin quilt you ask? A coin quilt is a very simple quilt pattern that uses stacked rectangular-shaped pieces of fabric to mimic a stack of coins. Coin quilts are a great beginner quilting pattern because of their simplicity.
The coin stacks are colorful and completely customizable too allowing you to mix solids with small print fabrics. They are also the perfect solution to an out-of-control fabric stash! I love projects that use up those smaller pieces of fabric from other projects that I just couldn't throw away.
This post contains affiliate links which means if you click on a link and make a purchase I may receive a small commission at no additional cost to you. For more information please see my Disclaimer page. Thanks!
Choosing Fabric For Your Quilt
Another fabric option if your fabric stash doesn't have the colors you need is to use a jelly roll. Jelly rolls are precut strips of fabric that measure 2 1/2" x WOF (width of fabric). Most fabric shops (I love the Fat Quarter Shop!) as well as Amazon, carry a variety of jelly roll packs that are color coordinated so you don't have to do the hard work figuring out what fabrics match.
Coin quilts can be made into any size quilt. The number of rows of coin stacks can be adjusted to meet your needs along with the sashing size. Sashing is the solid fabric pieces sewn between each long coin row. On my quilt, I used solid white for the sashing.
Easy DIY Coin Quilt Tutorial
Today I am going to show you how to make a baby-size coin quilt. This is one of the easiest quilt patterns to make, perfect for a beginner, and still lots of fun for a seasoned quilter. Gather up the following supplies and follow the instructions below to get started.
Supplies:
Here's How To Make A Coin Quilt:
1 - Cut your fabric into strips that measure 2 1/2" x WOF. If using your stash fabrics then you might have a variety of lengths - that is OK as long as the strips are 2 1/2" wide! If you use jelly roll fabric cut the strips in half which will make them easier to work with.
Tip - you might notice from the pictures of my quilt that my "coins" are not all 2 1/2" wide. I wanted the "coins" within the strips to be a little different for this quilt. This is another fun variation option you can play with on a coin quilt!
2 - Pick 4 strips of fabric and sew them together along the length of the strip using a 1/4" seam allowance alternating fabrics between dark and light-colored strips. Press the seams to one side with an iron. Repeat this step until all of your fabric strips are sewn into sets.
3 - Next, use your rotary cutter to cut the strip sets into the desired length you want the coin stack to be. For the baby quilt I made, I cut my strip sets 8 1/2 inches wide.
On a large flat surface like a table or the floor, lay the cut coin sets into rows until it is the length you want the coin strips to be for your quilt. Make sure to alternate the stack sets so the color combinations look good. Sew the coin sets together into several long rows and iron the seams flat. My quilt has 4 coin stack rows that measure about 30 1/2" long.
4 - For the sashing cut your solid fabric into strips the length of your coin stack rows. The width of your sashing will depend on how much space you want between your coin stack rows. I cut my sashing 3 1/2" wide by the length of my coin stack rows. Sew the sashing onto the coin stack rows with a 1/4" seam allowance then press the seams towards the coin stack rows.
After the rows are sewn together measure and cut two pieces of sashing to sew to the top and bottom of the quilt. Congrats! Your quilt top is done!! My finished quilt top measured 36" x 51".
5 - Are you hungry - because it is time to make a quilt sandwich! Cut your backing fabric and batting the same size as your quilt top. Place the backing fabric right side down on the floor. Then put the batting on top of the backing and finally put the quilt top on top of the batting right side facing up so you can see your pretty quilt top. I like to use big safety pins to pin the three layers together all over the quilt top so the layers stay put when I start quilting them.
To keep this quilt simple I quilted the layers together with straight lines making sure to quilt in the ditch around the perimeter of the coin stack rows. If you like curvy squiggly quilting you might want to quilt with a stippling stitch. To learn how to stipple a quilt check out Leah Day's video on Youtube.
6 - Lastly, to finish the quilt you need to bind it. I like to make my own binding because it is so easy to make and I can use whatever colorful cotton fabric I want (or have on hand!). If you don't have time to make your own you can purchase precut and folded binding at your local fabric store too.
When I first started making quilts I found this amazing tutorial on how to bind a quilt with step-by-step instructions from Diary Of A Quilter. I highly recommend it!
Congratulations! You just make a coin quilt! I'd love to hear how it turned out.
Easy Beginner Quilts You Are Going To Want To Make


.png)