
Rag Strip Quilts are the perfect starter quilt for beginners. Rag quilts are very forgiving and actually look best when made with a few crooked stitches. They whip up fast and look fabulous when done!

My husband's boss is having a baby in a few months and he asked me to make a baby gift for her. After pouring over various baby blankets and quilt ideas on Pinterest I decided to make a soft and cuddly rag strip quilt. Rag strip quilts are easy to make and always turn out beautiful. Rage quilts are a perfect project to do if you are a quilting or sewing beginner.
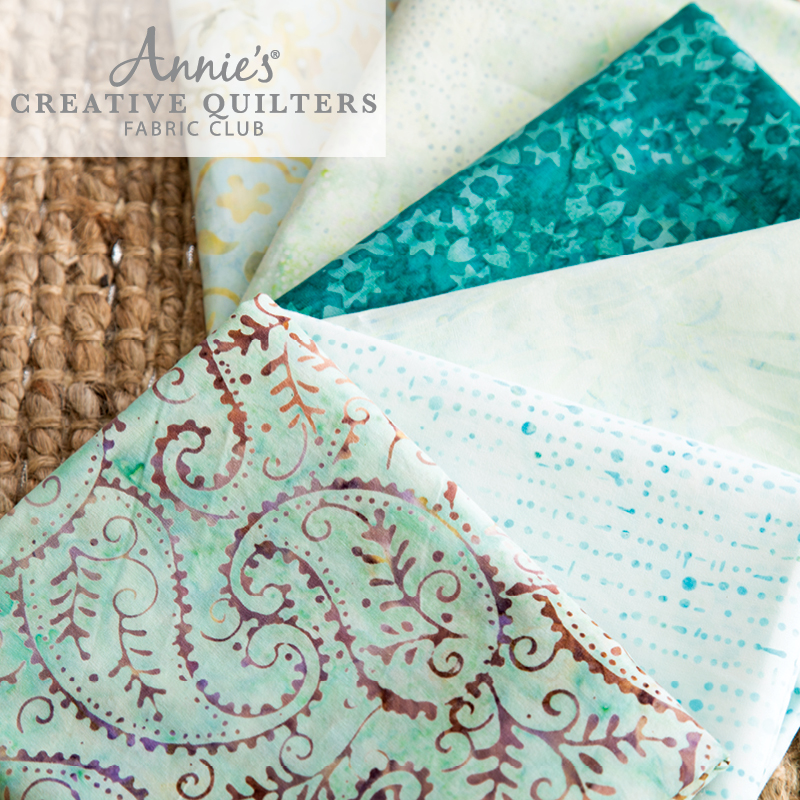
Since I don't know the baby's gender I stuck to gender neutral fabric colors for the quilt. My favorite part is picking out the fabric! Here are my choices:

There was one more additional print fabric that I also included in my rag strip quilt that isn't pictured here. It was a last minute addition! The missing fabric has mini mint green stars on a white background. You can look for it in the completed pics of my quilt!
Not sure where to get color coordinated quilting fabric? I suggest giving Annie's Creative Quilters Club a try. Annie's offers color coordinated fat quarter kits! They also offer a monthly subscription club option that includes 6 fat quarters (18" x 22" inches) of 100% cotton coordinating quilting fabric from top American fabric companies. Also included is a bonus pattern that includes a step by step instructions.
Not sure where to get color coordinated quilting fabric? I suggest giving Annie's Creative Quilters Club a try. Annie's offers color coordinated fat quarter kits! They also offer a monthly subscription club option that includes 6 fat quarters (18" x 22" inches) of 100% cotton coordinating quilting fabric from top American fabric companies. Also included is a bonus pattern that includes a step by step instructions.
To see where I found my inspiration check out my Pinterest board HERE and follow me so you can see what else inspires me. I loved the rag strip quilts that had varying size strips so I decided to do that with this quilt.
Want to make your own rag strip quilt? Don't worry if you have never made a quilt before - you can do this! This is a great quilt for beginners because it is such a forgiving kind of quilt. Follow along with me as I take you step by step through the process of making a strip rag quilt.
Supplies needed:
- 1/2 yard printed cotton or flannel (color #1)
- 1/2 yard printed cotton or flannel (color #2)
- 1/2 yard printed cotton or flannel (color#3)
- 1/2 yard printed cotton or flannel (color #4)
- 2 yards solid color cotton or flannel for backing
- 2 yards thin batting or fleece (optional)
- Sewing notions (supplies on hand):
- Sewing machine
- Pins
- Cutting mat
- Rotary cutter
- Quilters ruler or regular ruler (you just need a good straight edge)
- Thread (I prefer white)
It is debatable as to whether you should or shouldn't pre-wash your fabric. You will hear pros and cons for both. I prefer not to pre-wash my fabric especially for this kind of a quilt partly because I just don't have the time and don't want to press it out after washing. This is your choice as to whether you want to pre-wash the fabric or not.
1. Cut Your Fabric Strips
To begin we will be cutting the fabric into long strips. I chose to make my rag strip quilt with two different fabric strip widths. If you choose to make your quilt with fabric strips that are the same width then you will want to cut your printed fabrics all the same width. Otherwise if you choose to make the strips vary in sizes then you can mix up the widths of the fabric strips. Make sense?

Tip - the wider your strips the faster the quilt will be finished since there will be less sewing and cutting
Here is a chart to show the sizes I cut each of my fabrics. I only used two different widths, 5" and 7".
I had a total of 15 strips so that the total width, once they were all sewn together with enough seam allowance to trim the edges to get that lovely fray was 44". My finished quilt measured 44" x 40" (standard crib quilt size is 40" x 42").

When cutting strips of fabric it is easiest to fold the fabric with the longest sides matched up and then measure your desired width and cut a straight line with your rotary cutter down the fabric using either a quilters ruler or a durable straight edge as a guide. You may have to fold the fabric twice to get it to fit on your self healing mat or table. Just make sure there are no wrinkles in the fabric when it is folded or you will have uneven strips.
2. Cut The Backing Strips
Now that you are finished cutting strips from the printed fabrics it is time to cut strips from the solid fabric that will become the backing to your quilt. You will need the same quantity of strips in the same sizes you cut from your printed fabrics. For example my quilt has 7 strips that are 5" wide and 8 strips that are 7" long therefore I cut a matching number of strips for each width for a total of 15 strips.
3. Cut The Batting/Fleece Strips (optional)
This next step is optional. Since I live in a state that gets super cold in the winter I wanted to add extra warmth to the blanket which means it needed an extra layer. I used white fleece fabric sandwiched between the printed top layer fabric and the bottom solid layer fabric. You could use a thin layer of batting (I recommend this one by Warm & Co.) instead of fleece but I just like the feel of the fleece so that is what I used. If you choose to add this extra layer you will need to cut the fleece or batting into the same number of strips as you have for the the top layer of the quilt - for my quilt I needed 15 strips of batting. The batting should be cut 1 inch narrower than the printed fabric so if you follow the same widths as I used you will need 7 pieces cut into 4" x 48" and 8 pieces cut into 6" x 48".
4. Time To Sew - Quilt Your Strips
Place one 7" strip of solid backing fabric face down then spread the correct size batting/fleece (6") on top of it in the center and finally take a 7" print strip and lay it face up on top of the batting matching the edges of the bottom layer to the edges of the top layer. Pin the layers together in several places down the center of the strip to make sure the layers don't shift when you bring it over to your sewing machine or while you are sewing. Sew straight down the middle of the strip long ways. I love the look of more quilting so I sewed two more lines down every strip about 1" apart from the center stitched line. This stitching will keep your layers all together and give the the quilt that quilted look. Do this for all of the strips.
5. Sew The Strips Together
I like to lay our my quilt strips into the pattern that I plan on sewing them together. It helps me stay organized as the quilt starts to take shape.

Grab the first two strips from one end of your quilt. Place the strips with the solid bottom sides facing each other. Pin the two strips together matching the outside edges together. Sew the strips together with a 1" or 1/2" seam allowance (or however much you want to leave and snip for the rag effect). I used a 1" seam allowance for the blanket I made because I wanted a lot of soft rows of texture. Repeat this step sewing the third strip to the second strip and continue sewing the strips together until all of the strips are sewn together.

6. To Bind Or Not To Bind
No Binding Method:
Remember how I said this quilt was super easy for a beginner? To keep it simple you can choose not to add binding to the quilt and instead allow the edges of the quilt to have that same great rag quilt look that the strips will have. The quilt will still look great if you choose to leave it binding-less.
If you choose not to bind your rag strip quilt you still will need to sew around the perimeter of the quilt with a 1/2" to 1" seam allowance (again your preference). This adds a little more stability to all of the sewn together strips and gives you a guide line to use when cutting the little slits.
After sewing around the perimeter it is time to cut the slits into all the seam allowances and outside edges of the quilt. I recommend using these wonderful spring action rag quilter scissors to save your poor hand from all the squeezing it will have to do to snip all the slits. If you don't have these scissors make sure whatever pair you use are super sharp! Cut small slits about 1/2" apart on all edges and all seam allowances between each strip. Make sure you do NOT cut through the stitches!!
Binding Method:
I chose to bind the perimeter of my quilt and to do so I made my own quilt binding from the same yellow fabric I used in the quilt strips. If you have never made your own binding before I recommend following this tutorial HERE from Simple Simon & Company. After your binding is finished it is time to sew it onto your quilt. Again, if you have never sewn binding onto a quilt don't worry I found this great tutorial HERE from Love Patchwork and Quilting that will walk you through it step by step.
Once your binding is attached you will need to start cutting the slits into all seam allowances between the quilt strips. See above (in the not binding section) for instructions on how to do this.
7. Wash, Dry, Repeat
Yeah, you made it to the last step! It is time to let your washer and dryer do their magic and start to turn your quilt into an actual rag quilt. This step will create A LOT of lint and small bits of fabric thread - be warned! I recommend washing and drying your quilt in cold water on the normal cycle at least twice so that all the stray threads come off and the slits you cut in the seam allowances begin to take on the classic soft rag quilt qualities that make this quilt a real rag quilt. The rag effect will continue improving every time the quilt is washed and dried.
**Make sure to clean your lint trap out after you dry the quilt since it will probably be full and you don't want the extra lint to become a fire hazard.
Congratulations! You did it - you made a Rag Strip Quilt.
I'd love to hear how your quilt turned out! Please leave your comments below and a picture of your final quilt would be great too. These quilts make great baby gifts, Christmas presents and birthday gifts.
More Rag Quilts + Tutorial
If you liked this tutorial, head on over to this popular post I wrote about a different type of rag quilt. Now that you have conquered the rag strip quilt it is time to try the traditional rag quilt with squares.
 |
| click to read entire post |
First, I just LOVE this blanket : ) However, I was wondering where my calculations are going wrong. According to the directions, you have 15 48" strips in widths of 5" (x7) and 7" (x8). With a 1/2" seam allowance,this should reduce the finished quilt size by about 15". However, this leaves you with a quilt that is 64" long. You mention your finished quilt was 40 x 44. What am I miscalculating?
ReplyDeleteI love this blanket too and so did the friend I gave it to as a newborn baby gift! I love giving home made gifts that are useful and practical - like a blanket. I am sorry if my directions are misleading. I went back to look over my calculations and I actually used a 1" seam allowance to give the blanket more texture on the cut strips. I think this should then come out to the proper dimensions. (Math is not my strongest gift!) Thankfully these types of blankets are very forgiving and look great every time you make one!
ReplyDeleteThanks for the clarification, Erin : )
ReplyDeleteThis comment has been removed by the author.
ReplyDeleteThanks for passing your recommendation along! Happy crafting!
DeleteThanks so much for taking time to visit my blog! I sure did enjoy browsing and reading your blog - great job on your rag quilts too! They are so much fun to make :) Have a great day!
ReplyDeleteI love this quilt idea. I do have a couple questions tho. How did u get a 48” long strip; most material is 42-44 inches wide. Also, since you recommend 1” seams when sewing the rows together (to give it that nice rag look) would you recommend cutting the batting strips
ReplyDelete2” narrower? If we cut the batting only one inch narrower, using a 1” seam, at least a half inch of batting would be included in the seam on both sides when doing the snips-wouldn’t it? You don’t want batting showing in the snips, right?Math isn’t my strong suit either… 😂
Thanks so much for visiting and leaving a comment! Regarding your comment about fabric widths - fabric comes in a variety of widths. The standard width is 45 or 60 inches, the most common width in the US is 54 inches. To address the batting question, there will be a small amount of batting in your seam allowance if you do use the 1" narrower batting than your top fabric strips. The batting isn't really seen since the fabric strips are longer but I think it adds extra softness and a little bulk to the frayed sections. I would test it out on a small sample to see what you prefer before committing to an entire quilt. I just prefer a little bit showing :) . Have a great day, and thanks for reading my rag strip quilt tutorial! I'd love to see what you made too.
DeleteI loved your blanket and various sized. Thanks for all the instructions. I made one for my granddaughter.
ReplyDeleteGreat! I am sure she will love her new blanket!
DeleteCaution! You need more fabric than the directions state. One half yard of fabric for some of the fabrics is not enough. For example, you will need almost one yard of Fabric #1 if you follow the directions --with four 7" strips and one 5" strip that's 33" of fabric so a half yard will not be enough unless you cut the width of your strips down.
ReplyDeleteThanks for stopping by and leaving a comment. I am sorry if the measurements didn't work out for you however those are what I used to make my quilt. Hopefully yours turns out great! Thankfully rag quilts are very forgiving and allow for many different sizes! Happy quilting!!
Delete