Tuesday, October 30, 2018

How Worksheets Helped Our Homeschool - Includes FREE Downloadable Worksheet

photo credit: freepik.com

Worksheets have been a very useful tool in our homeschool journey. I view them as a supplementary aide to our regular curriculum as a way to provide additional practice in areas that my children might need extra help mastering.

Sometimes worksheets can give my kids a little "break" from our regular curriculum. I like to slip in a cool worksheet like a crossword puzzle with spelling words or a fun math facts coloring page as a way to start their day with something different. They enjoy the change of pace and new challenge and I love finding cool worksheets!

Good quality worksheets are what I'm always on the hunt for especially ones with a lot of variety in the way they present the materials. Themed worksheets are so much fun too since they can easily be added to our schedule as a way to celebrate upcoming holidays.  I don't have time to make my own so finding a great website that has all I need in one place is game changing!

Recently, I found a great fall themed subtraction worksheet for my youngest to enjoy. He has been working hard at mastering addition facts and is ready to start learning subtraction. He loved the one I found and can't wait to do more.


(Please note that I am not an affiliate for Education.com however I did receive one free worksheet to share with you on this blog in exchange for an honest review of the worksheet. If you choose to join Education.com I do not receive any additional products or commission. The following is my honest review of the product I received)

You might be asking where I found this super cool worksheet - the answer: Education.com! If you like worksheets that offer a ton of variety you will definitely love this website. Education.com has worksheets for a variety of subjects, with various themes and activities for you to choose from that will best fit your child's learning style. Isn't that cool? I think so.

Access to the worksheets via the website does cost a little bit but it is quite reasonable! I was really blown away when I clicked on the pricing and saw how inexpensive it is to join. There are three options to choose from -1) pay as you go, 2) pay annually or 3) a lifetime access option. All are very affordable and I love that Education.com is sensitive to the fact that I may only need their worksheets intermittently so the month to month plan option is available. No big commitments requiring a big cash outlay - now that is my kind of service. I personally like to test out the materials we use in our homeschool before make a big financial commitment so this option works great for us.

Are you wondering what types of worksheets are available? Here are some of the worksheets to choose from: (I told you there were a lot didn't I?)

  • Maze
  • Word search
  • Word search with images
  • Crossword puzzle
  • Word scramble
  • Addition
  • Subtraction
  • Division
  • Multiplication
  • Spelling Test
  • Matching words to images
  • Word Tracer

There are also a variety of themes to choose from such as seasonal, holiday, crawly bugs, back to school, dinosaur, outer space and many more.

Now for some more good news! Education.com is giving you a FREE subtraction worksheet with access only through my blog! How exciting! The worksheet you have FREE access to is the fall themed subtraction worksheet my youngest worked on and now your child(ren) can use it too! The worksheet and link will be at the end of this post.

If you find it useful and want to see all that Education.com has to offer you can let your kids practice subtraction as the season "falls" in! Find more fun math resources and activities at Education.com


Link to access Worksheet


Link to access worksheet answers


I really hope you find the FREE worksheet helpful and get a chance to learn more about other worksheets available on Education.com. How do you use worksheets in your homeschool? Have any great resources you would like to share - I'd love to hear from you.

More Cool Tools We Use In Our Homeschool: 

find on Amazon


find at Walmart


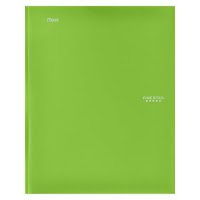
Folder from Walmart


Friday, October 26, 2018

Fight The Blues With These Amazing Mood Boosting Foods

mommysuburbia.blogspot.com

You got a good night sleep but you find yourself feeling a little down in the dumps, grumpy and irritable. Ever happen to you? It can be so frustrating when your emotions get the best of you and you find yourself feeling moody, snappy and short with everyone - especially your kids. Or worse yet, your children are acting moody, grumpy and a little worn out!

What do you do about this?

I've been doing a lot of research lately trying to find some ways to naturally boost my mood, feel more energetic and have a more positive outlook in my daily life.  Did you know that the food we eat not only serves as a way to feed our bodies but different types of food can have an impact on regulating our mood, help fight symptoms of depression and reduce anxiety. I guess the saying "You are what you eat" has some truth to it! Fill yourself with junk and you are bound to feel junky.

Something I came across recently while learning about the impact food has on our mood really peaked my interest and I wanted to share it with you. We all know what comfort food is right? That big tub of Ben & Jerry's or that gooey pan of rich chocolate brownies - ring a bell? Yeah, I thought so. When you're feeling blue comfort food is where most of us go to find a little consolation but what if this comfort food is really making the blues worse.

However I learned that a little tweak to what you grab out of the fridge to comfort yourself could be the perfect solution to getting yourself out of that funky mood. This great info-graphic I found on Berries.com has a big list of mood-boosting foods and the impact they have on us when we eat them.


I've included a small snapshot of the info-graphic to whet your appetite but if you want to read more head over to the original blog post on Shari's Berries Blog for the full article! I know after reading it I wanted to stock my fridge with these mood-boosting foods and teach my kids about the wonderful benefits of these tasty treats.

(Note - Please know that I do realize that there are people who require daily medication to help them with clinical depression, anxiety and many other disorders and I am grateful that the medications are available to help. Please consult a doctor if you think your symptoms are serious)
mommysuburbia.blogspot.com

Chocolate, The Super Hero We All Know And Love

While you are checking out the Shari's Berries blog make sure you read the article on the 12 health benefits of dark chocolate! I knew dark chocolate was amazing and now I have 12 more reasons supporting my hunch! Yeah!! 

A little while back my husband and I participated in a health assessment through his employer. The feedback was somewhat shocking to me since I've always been quite healthy aside from a few colds each year. The results showed that my bad cholesterol was high and my good cholesterol was too low. Heart disease does run in my family so I was definitely paying close attention when I had my one-on-one consultation with a health advisor. 

The advisor suggested I incorporate salmon twice a week into my diet. I love salmon, who doesn't but UH, have you checked the price of salmon lately? For a middle class suburban family of 6 this just isn't a realistic weekly menu item based on our current grocery budget. One meal would cost us more than $50! That is 1/3 of my total weekly budget for one meal. Fish sticks, we could afford fish sticks but who wants to eat that junk! No thanks! 

The health advisor suggested that if I couldn't afford to eat salmon regularly to try to incorporate avocado, raw nuts like almonds as well as dark chocolate into my weekly diet! 

Wait - did she just say dark CHOCOLATE? Cue the music, dim the lights, this party is about to get serious!! 

Since chocolate is one of my most favorite things in the world I was relieved to hear this as an option to help improve my health. I know eating dark chocolate makes me happy but the fact that it is good for me (in moderation of course) is a double bonus!

Where To Find Mood Boosting Foods


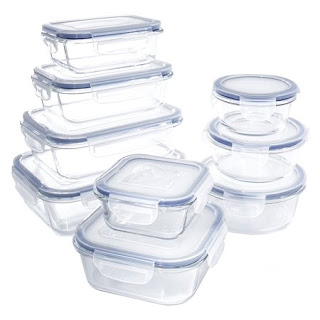
Here are some great mood-boosting foods & containers I am stocking my fridge and pantry with to help ward off the blues and keep my body strong and healthy!

find at Cost Plus World Market

find at Cost Plus World Market


find at Walmart

find on Amazon


find at Walmart


What are your favorite healthy mood-boosting foods? I'd love to hear what helps you chase away the blues and keeps you in a positive state of mind.


Wednesday, October 24, 2018

How To Make A Simple & Easy Bird Feeder

mommysuburbia.blogspot.com

Bird feeders come in all sorts of shapes and sizes. My dad made wood bird feeders for all of my kids last year for Christmas. Actually he gave them all the cut out parts and hardware for a bird feeder -kind of like a homemade "kit". Then one wintry post-Christmas afternoon he spent time with the kids in his wood shop teaching them how to assemble the kits into a finished bird feeder. The kids loved this and couldn't wait to hang them up when they got home. Even in the winter there are still hungry birds who love a full bird feeder!

This fall my boys really wanted to make a bird feeder but due to their age and my limited woodworking skills I had to find a way to make a bird feeder that didn't involve power tools. I was contemplating what to use as a bird feeder while taking out the recycling bin and I noticed two empty plastic juice containers and decided right then and there that these would make great bird feeders!

This post contains affiliate links which means if you click on a link and make a purchase I may make a small commission at no additional cost to you. For more information please read my Disclaimer page.
mommysuburbia.blogspot.com

Simple & Easy Bird Feeder Tutorial


Materials needed to make our recycled bird feeders:

plastic juice container (cleaned out and dry)
bamboo skewer (break off pointy tip)
twine or yarn (about 30 inches long)
scissors
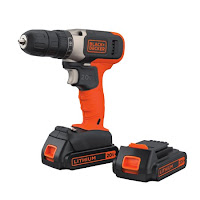
power drill (or large nail & hammer)
sharpie marker
xacto knife or utility knife
bird seed
tape


Instructions on how to make a simple recycled bird feeder:

Lay the empty plastic container on it's side and mark a spot about one inch up from the bottom with your sharpie marker. Drill a hole through the marked spot. Flip the container over and on the opposite side drill another hole. This is where you will slide the bamboo skewer through the container as a perch for birds to land when at the feeder.

find here at Walmart
(Note - if you don't have a power drill or aren't comfortable using one you can use a large nail and hammer to make holes in the container)

Next, starting at the hole you just drilled measure 1 inch up and place a mark. With an xacto knife cut a small 2 inch circle through the container. This is the spot where birds can get the food out of the feeder.

Grab your drill and from the top of the container measure down 2 inches and drill holes on both sides of the container. Feed the yarn or twine through each hole and tie the ends securely together. Use this to hang your feeder up once it is filled with seed.

find it at Walmart
Lastly slide the bamboo skewer perch through the two holes at the bottom of the container. Wrap a small piece of tape around both sides of the skewer close to the container to ensure that the skewers do not slide out of the container.

Fill your bird feeder with seeds up to the bottom of the feeding hole. If you fill the feeder fuller than this the seeds will just fall out. Place the juice container cap on your feeder and go hang it outside!

found at Walmart

Since I like to make our projects "school friendly" I'm always looking for a way to incorporate our crafts and projects into what we are learning. This project fit right in with my son's science lessons on bird identification and behavior so I created a fun bird observation form for him to fill out as he watches birds visit his bird feeder. Here is the bird observation record printable I created that I thought you might find useful. Click the link to open the document.

Free Printable - Bird Feeder Observation Record!


click to open
I'd love to hear about any cool birds you see! What is your favorite kind of bird? Snap a picture of your feeder and share with me in the comments. I'd love to hear from you.

My kids are having a blast watching for birds at our new feeders. It took a few days for the birds to find the feeders and start visiting them regularly but now we have quite the crowd of birds eating at our feeders. Oh, and we have a squirrel who is doing his best to find a way to get to the new feeders too. He is such a funny creature to watch too.


Here are some of the supplies I used with my kids to make our bird feeders:
find on Amazon

find on Amazon


find on Amazon


Thursday, October 18, 2018

Don't Let The Holiday Season Overwhelm You Get Organized With This Amazing Tool

mommysuburbia.blogspot.com

"You better not shout! You better not pout! You better not cry I'm telling you why -  Christmas is just around the CORNER! Yikes!!

It might seem like Christmas is still far off but in a short weeks and another flip of the calendar page it will be just around the corner! Does that scare you? It does me. Fall seems to fly by every year. Maybe because it gets darker out earlier and the shorter daylight hours makes if feel like the days fly by.

Every year I promise myself I am going to be ahead of the game and ready. My goal is always to have most of the Christmas shopping done by Thanksgiving and have my Christmas menu sketched out by December First. As hard as I try it just seems like the holiday season is stressful and rushed and frankly I don't like it. It is always busy and when the parties and holiday stress overwhelm me I forget to enjoy the moment. I don't like this feeling and this year I'm going to change it.

How? 

Well with an organized holiday planner of course. I know that if I don't write something down I'm will forget it especially when my to-do list is a mile long with all of the extra Christmas items on it.
Fortunately for me I don't need to even create my own holiday planner. Instead I will be using the ready to go planner from Sunny Day Family.

This post contains affiliate links which means if you click on a link and make a purchase I may receive a small commission at no additional cost to you. Please read my disclaimer page for more information.
All I have to do it print it out! Simple and easy especially when I'm already swamped with countless other holiday activities. This festive printable planner will help you organize your holiday schedules, plan your budget, coordinate your holiday parties and dinners. Won't this help you feel more in control and less stressed so you can actually enjoy the holiday season? I know it will be a big help to me!
Christmas Planner from Sunny Day Family

The Christmas Planner has 140 planning pages to organize your entire holiday. Here is a peek at what is included in this awesome planner? 
  • Undated Month at a Glance Calendar (start planning anytime!)
  • Weekly To Do List (2 page spread)
  • To Do Checklist
  • Holiday Budget
  • Activity and Acts of Kindness Planners
  • Christmas Card Planner
  • Wish List (for adults or kids)
  • Gift Giving Planners (a general checklist and a detailed list by person)
  • Shopping List
  • Online Shopping Tracker
  • Gift Tags
  • Letters to Santa (2 versions - a generic letter or a "Something I Want, Something I Need, Something to Wear, & Something to Read" version)
  • Decorating Plan & Project Planner
  • Party Planning Sheets
  • Menu Planner, Baking Planner, & Grocery List
  • Recipe Cards
  • Baking Labels for Gift Giving
Wow! I think Sunny Day Family covered it all, don't you? Don't wait any longer - go get this printable and start making your holiday season amazing (and less stressful). 


Holiday Traditions

Does your family have a special holiday or Christmas tradition? Our family's holiday tradition is our annual Christmas morning breakfast of homemade cinnamon rolls . My kids LOVE this tradition. I can't take credit for starting this though. My mom, years ago started this fun tradition. When my sisters and I grew up, married and moved away she still made sure we had a pan of cinnamon rolls to enjoy on Christmas morning. Now my kids request (ok, demand) that we have cinnamon rolls for breakfast every Christmas morning. 

I have experimented with various cinnamon roll recipes over the years trying to find just the right one. I insist on using my bread machine's dough cycle since this is a time saver for me. All I have to do is dump in the ingredients, turn on the machine and select the dough cycle and let it do it's magic. Once the dough is ready I can roll it out, fill it with the cinnamon sugar mix, roll back into a log, cut it and let the dough rise. It is just that simple. 

Bread machines are the best! I got mine at Walmart and just love it. I use it all of the time. 
click to find at Walmart


Currently my favorite cinnamon roll recipe is the Pioneer Woman's recipe. Following her recipe has never failed and always results in amazing cinnamon rolls. If you haven't read or used any of her cookbooks - what are you waiting for? Her recipes are so good!


click to recipe link


Friday, October 12, 2018

How a Vinyl Tablecloth And A Pair Scissors Saved My Day


Car trips with infants and toddlers can, at times, be tricky. Timing your departure around nap time, feeding them before you go, making sure the diaper bag is stocked with all the necessary supplies and packing for yourself can be so overwhelming!

There are always the unexpected events that happen along the way especially if your child is in the early stages of potty training or an infant who has regular "blow outs".

I remember a trip we took when our oldest was about 10 months old. We were only going an hour away to visit grandparents but you wouldn't know this if you looked into our trunk! I thought I was totally prepared - I had the stroller, the pack-n-play, extra diapers and wipes, extra outfits and a million more baby supplies. I was prepared!

At the start of our trip she fell asleep cozily strapped into her car seat but when we were about half way there I started to hear a little noise coming from the back seat - little grunts, then a big rumbling sound (we all know what that means!) followed by an awful smell.

Of course we had to pull over and assess the damage. What I hadn't expected was the massive blow out my little angel would have as we were halfway to our destination. Yikes, it was bad!

As rookie parents we didn't know what to do so we made due with what we had on hand. After plowing through two boxes of wipes I felt as though my little princess was adequately "clean" and could once again go back into her car seat and we could hit the road. WRONG! Oh my word, the car seat was destroyed - covered in it! Wipes were not going to solve this problem.
we love this car seat (via: Walmart)


My poor hubby took the car seat out, pulled out the cushion liner and we shoved it into a plastic bag. Knowing she couldn't sit on the cold hard plastic we spread a few blankets over the bare seat and strapped her safely in. Needless to say we arrived at Grandma's with a bag of dirty laundry and a baby that desperately needed a bath.

This post contains affiliate links which means if you click on a link and make a purchase I may receive a small commission at no additional cost to you. For more information please see my disclaimer page.

Have you ever lived this story before? All I knew is I didn't want to do that again. Fortunately the ride home was uneventful but by now my wheels were spinning as I thought about how to avoid this problem in the future. Little would I know how important this brainstorming session would be for the future when my child was beginning the journey of potty training!

The "light bulb" moment came when I was wiping off our picnic table after a meal with friends. I had a pretty vinyl tablecloth over our picnic table and one of our guests had spilled a little water on it during the meal. I thought to myself "Look how that water just sits on that vinyl without soaking through" - and this is when I ran back into the house, grabbed a pair of scissors and started hacking away at the tablecloth!
via: Walmart


I cut a long rectangular shape piece first then bolted out to the garage to see if my crude hack job fit into the baby's car seat. To my surprise it did! After doing a little more thinking and cutting I was finally satisfied with a piece of vinyl tablecloth that extended up to the shoulder straps of the car seat, just down to the center buckle and up a few inches along the sides.


via: Walmart
Since no one, including babies, likes to sit on sticky vinyl I flipped the piece I had cut out over so the soft fluffy cotton side was against the baby's legs and the vinyl side was against the inside car seat liner. I cut up the rest of the tablecloth so I had spare pads and stored several in the car and a few in the diaper bag. Time to road test this new little invention! Guess what? It worked! And the best part was that these little pieces of table cloth were washable! I could re-use them or toss them (depending on how bad the damage was) and to replace them was pretty cheap, just the price of a vinyl tablecloth.

Over the years as our family grew, this little homemade pad was a lifesaver on many trips. From blowouts to vomit, spills and sticky food, the car seat was kept relatively clean. When the time for potty training came I knew that if my kiddo had a little accident in their cars seat I didn't have to panic, rip out the car seat liner and spend time washing it. Instead I just replaced the tablecloth liner with one from my stash and we weren't stuck at home waiting for the washer to clean the car seat liner and for it to dry.
via: Walmart


Oh, and I didn't stop there! I used these handy tablecloth liners in the stroller as well. It saved the stroller seats just like it did the car seat. No more scrubbing sticky crumbs from the cracks in the stroller seat, just take out the tablecloth liner and replace with a new one.

I hope these helpful tips & tricks will save you some sanity as you walk through the seasons of infant blowouts and potty training toddlers. I know it saved me on many occasions and for that I am very thankful.

Do you have any tips you use to keep your sanity as you journey through the early years of parenting? I'd love to hear from you - please leave your comments below.

Looking for more great parenting tips & tricks? Here are some posts I think you might find interesting:
click to read more


click here to read more


click here to read more


Thursday, October 11, 2018

10 Reasons Why Art Is Essential For Successful Childhood Development And How Parents Can Help

mommysuburbia.blogspot.com
photo credit: Pressfoto

Making time for art and creativity doesn't require hours and hours of time or lots of fancy supplies that cost a fortune.  Start small, ten minutes here and there should give you and your child a little creativity pick me up ! As they get older and become more engaged in these moments allow them more time to explore and really exercise their brains.  

Their little brains need this type of exercise. I recently read a study done by Michigan State University on honors college science and tech grads whose lives included STEM studies as well as some sort of art or creative study. The results were somewhat surprising! The study showed that grads with arts and crafts experiences had a higher likelihood of producing patentable inventions and founding new companies. Many stated that their innovative abilities were inspired and stimulated by their crafty knowledge. In a nutshell the study revealed that continued participation and exposure in arts and crafts yielded the most significant impacts for innovators and entrepreneurs (MSU ArtSmarts Among Innovators, 2011)

Wow! Doesn't that convince you of the importance of art and creativity.

The following post contains affiliate links which means if you make a purchase through any of these links I may receive a small commission at no additional cost to you. For more information please see my Disclaimer Page.


10 Reasons Why Art is Essential for Successful Childhood Development


1. Development of Fine Motor Skills

Holding a paintbrush, scribbling with a crayon or squishing a lump of clay are all essential to the growth of children and the development of their fine motor skills. Letting a child explore the tools used to create art and the cause and effect of those tools when used is all part of the process of honing their fine motor skills. Discovering that more pressure put on a crayon results in a darker or thicker line (OK, scribble) is mind blowing to a child! 


2. Healthy Brain Development 


Think of your child's brain like you do a healthy diet with a variety of different foods. Our brains consist of two "sides", the left side where analytical and logical functions take place and the right side for emotional perception and intuition. To have a healthy brain we must exercise and feed both sides! Seems pretty logical doesn't it? When we expose our children to the rigors of a STEM (science, technology, engineering and math) directed education but neglect the arts (dance, art, music, drama) that portion of their brain doesn't get the same stimulation as the side processing difficult analytical skills. When a brain's left and right sides are "fed & exercised" the two hemispheres start to work together to function at a much more efficient level. The skills for science and math can greatly benefit from the skills we learn pertaining to art, dance and music. 


3. Increase A Child's Ability to Focus


Being creative and artistic requires some focus on the part of the artist or crafter. Obviously in young children their attention spans are short but as they get older their attention spans will increase. A healthy way to guide them along and learn how to focus for longer intervals is by providing them with a creative outlet. Today your youngster may only be able to paint a picture on one sheet of paper but I guarantee that shortly you will have enough "masterpieces" to cover your entire fridge!


4. Outlet for Creativity and Ideas


Providing a variety of ways for your child to express themselves through art and creativity gives them an outlet for all of these ideas. All kids have BIG imaginations so why not give them an opportunity to use that imagination and see what they come up with. I bet they will blow you away with their creations. 


5. Improved Communication 


For some children putting words with their emotions is difficult. Drawing their emotions or picking colors to show what they are feeling expands their abilities to communicate reducing frustration. 


6. Art Is Fun


Who doesn't love having fun? The process of creating something is just plain fun! Watching a blank piece of paper turn into a colorful picture or a lump of clay take shape into an ashtray for Great Uncle Bill is a blast. Art is fun and fun is good!


7. Learn About How the World Works


Allowing a child any amount of time to watch and observe something helps them figure out how it works or what various properties it is composed of.  Children who are engaged in art and creative exploration learn how things work, feel and function. They start learning about how our world works through the exploration of art.


8. Boost Math Skills


Art can be a doorway to introduce your child to simple math concepts like shape, size, making comparisons, counting and spatial reasoning. These are all necessary math skills that can be reinforced with art.


9. Teach Children to Have A Good Work Ethic


"All hard work brings a profit" is a Bible verse that I tell my kids when they are starting a new project. Learning to work hard to make something is an important skill to teach our kids. Learning this through an art project is a fun way to teach work ethic to your child especially since they end up with a finished project they can be proud of. 


10. Self Confidence Boost


My fridge is covered in various projects my kids have created. Each time they look at the picture they drew or the paper weaving project they gave me I can see how proud they are of their work. They put a lot of time and effort into making something and they should feel proud of their hard work and finished project. Doing art or crafting is a great way to boost a child's self confidence!

How to Encourage Your Child Through Art and Creating


Ask Open Ended Questions


Ask your child to tell you about their picture rather than ask "What is it?". Open ended questions allow your child to explain to you what they created. These types of questions show your interest in what they created and most kids are excited to share. 

Instead of trying to figure out what they drew or painted describe the specific things your child is doing by saying things like " I see you are using purple, orange and brown to make those squiggly lines" or "I see many different shapes in your creation like circles, squares and triangles." These types of comments show your interest rather than your judgment in their artwork or creations. 


Provide A Variety Of Supplies


Providing your child with a variety of materials to use like paint, playdoh, clay, oil pastels, crayons, markers, chalk, scissors, stickers, ink and stamps. Show them how to use each media but then back off and let them take the wheel. Throw in some surprising materials like Q-tips, glitter glue, dry pasta, clear glass stones, beads and beans. 

Here are some materials my kids love:
purchase from Dollar Tree
Dollar Tree


Let The Child Lead 


Like I mentioned above, once you show the child how to safely use the materials you as the parent should step out of the way and let them create. Allow the child to explore the materials as well as decide what they want to make. Let your child use their imaginations and come up with their own project instead of having them follow a strict list of instructions. 


Be OK With A Mess


Squash that urge to tell your child not to get messy. Messy is a perfect place for learning to happen so don't stop your child from learning because you are scared of them getting dirty. Grab an old shirt from Dad's drawer to use as an apron and let the creativity begin. When they are all done with their project have the child help clean up their materials. Show them how to properly rinse out a paint brush or how to put oil pastels back in the box. They will learn how to respect the materials they use and how to clean up properly. 


Focus On The Process


The goal here isn't a perfectly shaped vase or a Van Gogh worthy painting. The goal is the process not the product. Praising your child and focusing only on the end result may cause the child to begin creating things just to get your approval instead of doing what they want to do. The unstructured process of art allows your child to express themselves freely. They shouldn't be worried about what others think, so remember to praise their hard work, effort and the process they used to create something amazing.


Don't Sweat The Small Stuff


So you carved out a chunk of time for your kid to do art but all they want to do is sharpen the new box of colored pencils! Don't worry, to them this is part of the fun. Instead of getting frustrated that they aren't "making anything" ask some questions to get them curious. For example "I see you are spending your time sharpening pencils, I wonder what a dull pencil mark looks like compared to the razor sharp edge of the one you just sharpened?"  Or "It looks like fun putting the crayons in the box in that organized order, I wonder what colors look best together when you draw with them on paper?"


Art Project Inspiration


The web (Pinterest) is chocked full of ideas to get you and your child started introducing art into their regular schedule. Please don't feel overwhelmed - remember start small and simple. A great place to get supplies is the Dollar Tree! No need to buy professional grade materials right off the get-go. Don't forget to look in your recycle bin for inspiration too! Empty toilet paper rolls, newspaper and cereal boxes are wonderful art materials. 

Here are some great projects I've done with my kids that should help you get inspired: 


I've also written a great e-book that includes 10 nature inspired craft projects you and your child might enjoy. You can find it here on Amazon:
purchase on Amazon

What types of art materials do your kids love to use? Got an easy art project idea you want to share? I'd love to hear from you - comment and share with everyone. 


Tuesday, October 2, 2018

Little Hoot Owl Craft For Kids


Owls are fascinating creatures! Learning about cool animals plus cool (and simple) craft projects are what we love!

For science this year my oldest son is studying Flying Creatures of the Fifth Day which is part of the Apologia Young Explorers Series science books. The Junior Notebooking Journal is amazing, full of activities, lab reports and lap books for him to complete as he works through each lesson. However in an effort to throw in a little art in our school day I love finding good crafts that tie in with what he is studying. My favorite kinds of kid crafts are simple and quick. Since my son is not a big "crafter" this little owl craft we did was the perfect thing for him.

This craft could be used for any age - my 5 year old and my 12 year old made their own owls too! It doesn't take long, uses simple handy supplies and is easy to make. Here is how we made our owls:

This post contains affiliate links which means if you make a purchase I may receive a small commission at no additional cost to you. For more information please see my Disclaimer page.

Materials For The Little Hoot Owl Craft

Styrofoam or plastic Solo cup 
yarn of various colors
scissors
school glue
white card stock
buttons
orange construction paper
feathers


Instructions for Little Hoot Owl Craft

Cut several lengths of various colors of yarn. We found it easier to use cut lengths rather than use a big ball of yarn.

Spread an even layer of school glue on the outside of the cup covering the entire surface except for the top . Stick a piece of cut yarn on the outside of the cup pressing it down to get it to stick to the glue. Begin wrapping your yarn around the cup, pressing to stick. Continue covering the entire perimeter of the cup with the strings of yarn until the cup's surface is no longer visible. You may need to add more glue as you go to make sure the yarn stays glued to the cup.


Once your cup is completely covered, set it aside to dry. While your yarn wrapped cup is drying cut out two quarter size circles from the white card stock paper. Select two buttons (if you don't have buttons just use black construction paper) and glue them to the white circles. If you want silly looking eyes or crossed eyes you can adjust where you glue the buttons on the white card stock circles. Set the eyes aside to dry.

Now cut a triangle shape from the orange construction paper for your owl's beak.

Since all the owl parts are ready we can begin assembling the owl. It's OK if the glue on your yarn covered cup isn't completely dry yet. Begin by gluing the owl's eyes onto the front of the cup. You may have to hold them on for a bit until the glue starts to dry. The buttons can cause the eyes to slip while the glue is still wet.

After the eyes are on glue the beak just under the eyes tucking one edge of the triangle under the eyes. Next select two large feathers to glue to the sides of your cup to resemble the owl's wings. You are finished! See wasn't that easy?


You could make any type of bird you want by using different colored yarn. Our earth tone browns and beige yarn really made our bird look like a little owl. For a cardinal red yarn would work great and you could use navy or black yarn to make a crow! The possibilities are endless.

 These are the supplies I used and recommend for this project (click on the link to be taken directly to the website where you can purchase the item):

found on Amazon

found at Walmart


found on Amazon

found at; Walmart


from: Walmart

What is your favorite bird? Send me pictures of your "little hoot owls" and share your creations with everyone!

Love simple crafts? Check out the Bird Kites we made. This is super simple and functional! My kids love flying their bird kites and I know yours will too.