Wednesday, January 30, 2019

How To Make A Tissue Paper Stained Glass Star


Do you have the winter blahs? These dark gloomy sunless days can sure take a toll! Why not brighten up your surroundings with these fun and colorful tissue paper stained glass stars? 

Cheerful, colorful and very easy to make, these bright stars will shine a little light into your home on these gloomy days of winter. 

Want to know how we made ours? Of course you do! Here is a tutorial showing how you can make some of these cool stained glass stars too.

This post may contain affiliate links which means if you make a purchase from a link I may receive a small commission at no additional cost to you. For more information please see my Disclaimer page.

Tissue Paper Stained Glass Star


Supplies needed (see where I got my supplies at the end of this post)

- variety of colorful tissue paper (I got mine at the Dollar Tree)
- glue sticks
- coffee stir sticks or thin craft sticks
- scissors
- hot glue gun & glue sticks
- craft place mats

Tutorial - Tissue Paper Stained Glass Stars

1. The first thing we did was play around with the stir sticks to create star shapes. Our stars all came out different which just adds to the beauty of them. You definitely want to work on top of a plastic place mat so that the glue doesn't stick to your work surface.

2. The easiest way to create a star shape is to make two separate triangles using 3 stir sticks for each triangle. Use your hot glue gun and glue to secure the edges of your triangles together. Then all you have to do is arrange the two triangles on top of each other to make a star shape, add a dab of hot glue to hold them together and wa-la you have a star frame!

I recommend making all of your stir stick star frames first before adding the tissue paper. This will help you stay organized as you craft!

3. Next, cut small square shapes from various colors of tissue paper that are large enough to fully cover the open sections on the star.  Place the tissue paper over each of the sections of the stars and arrange the colors to your liking.

4. Once you have the papers arranged the next step is to glue the tissue paper onto the stir stick star frame. At this point there is no need to cut the tissue paper to the exact size we will do this later. With your glue stick spread glue along the wood stir stick section by section and place the tissue paper down on the glue and gently rub along the stick to secure the tissue paper to it. Here is a picture showing what this looks like:


5. Grab a pair of scissors and start trimming off the excess tissue paper. The little bits you can't trim can be folded back onto the stir stick star frame.

6. If you want to hang your tissue paper stained glass stars the easiest way is to use thin baker's twine or any other type of string or twine you have on hand - the thinner the better since these are fairly delicate. You could either tape the string to the frame of the star or poke a small hole at the tip of one of the tissue paper stars points and run the twine through the hole. We chose to string our stars individually but you could easily make your stars into a hanging banner and string it across your mantel or window. The possibilities are endless.


Don't forget to Pin this for later so you can make your own tissue paper stars! 

Wondering where I got my supplies for this craft? Check out the links below!

Hot Glue Gun:
Hobby Lobby

Wood Craft Sticks / Coffee Stir Sticks
Hobby Lobby
Walmart
Place Mat
Walmart


Tuesday, January 22, 2019

12 Kid Friendly Podcasts To Listen To In The Car


Do you find yourself spending more and more time in the car driving your kids from one activity to another? I am certainly living this out! Between basketball practice, games, ballet and Bible study our time in the car seems to be steadily increasing.

Lately, I've been trying to think of some ideas to help pass this time in a little more creative and fun way. Sure, they could do their school work while we drive, and many times they do but I'd really like to find something we can all do together while in the car.

This post contains affiliate links which means if you make a purchase I may receive a small commission at no additional cost to you. For more information please read my Disclaimer page. Thanks!

Awhile back we listened to The Swiss Family Robinson audio book and really enjoyed that. This is a great option for a long road trip since you can spend a lot of time listening to a lengthy story without many interruptions but for those 15 - 20 minute shuttles back and forth in the car it can be hard to stay focused on the story.

Recently a friend recommended finding a podcast that we could all enjoy listening to together while driving. Since I would much rather listen to something like a talk show on the radio than music (sports radio shows are my favorite), I started to take her recommendation more seriously and began to do some searching for a good podcast we would all like.


We interrupt our regularly scheduled program to bring you this short history lesson:

Just in case you aren't familiar with what a podcast is let me give you a short and simple history lesson on podcasts. Previously known as "audioblogging" in the 1980's, audioblogging really took off with the  introduction of broadband Internet and portable digital devices. In 2004 The Guardian columnist and BBC journalist Ben Hammersley coined the term "podcast" by combining "iPod" + "broadcasting". The new word took off!

Today, through the Internet, podcast listeners can enjoy a variety of episodes of a program for free. Great content can be found from around the world on any topic or area of interest. Also, these episodes can be downloaded to your device (phone, tablet or computer) so you can listen to them anywhere, even if there isn't any WiFi. Podcasts aren't exclusive to Apple devices either. Android users can use the Google Play Music app to listen to podcasts easily too.

OK, enough of the history let's get back to our regularly scheduled program...

The challenge I knew for us would be finding something that would work for a large range of ages (from 5 - 14)! What I love about the podcast idea is that many podcasts are 15 - 30 minutes in length which for our quick car rides this seems ideal.

I had been spending quite a lot of time listening to a variety of podcasts geared towards kids and to be honest I was starting to get a bit overwhelmed because there are so many to choose from.

But then....I found this amazing list of podcasts for kids from The Zebra so I started to check them out.


My favorite podcast for kids from the info graphic is definitely The Unexplainable Disappearance of Mars Patel. My kids and I love a good mystery story and this podcast series really seems to be right up our alley. If you find yourself liking this podcast as much as we do please realize there are only two seasons available so you aren't going to want to binge listen to this all in one sitting! Spread it out and make it last a little longer.

I listened to snippets of each podcast from the 12 listed above on the info graphic and I could pretty much tell right off the bat which ones would appeal to my kids and which ones wouldn't.

I highly recommend that you, as the parent, listen to a few episodes of a podcast before your kids do so that you can make sure that the message in the podcast aligns with your family's set of values or beliefs. Since my kids age range is quite large I didn't want my youngest exposed to any topics or discussions that are too mature for him. From what I listened to from the list above the podcast topics and episodes were pretty kid friendly if not a little more geared towards a younger crowd than older.

Overall introducing podcasts into our daily car rides has been a positive experience and one that I think we will continue to keep trying. What about your family? Are there any podcasts your kids love? Please share in the comments!!

Here are some great tools to use for podcasts and traveling in the car: 

Wireless Earbuds 
Walmart
iPod 
Walmart
Neck Pillow for Kids 
Kohl's


Tuesday, January 15, 2019

How To Make Heart Shaped Crayons


mommysuburbia


My youngest tells me "I love you mommy" multiple times throughout the day. I swear I will never tire of hearing him tell me this. I've even started making him promise that when he is a teenager he has to keep telling me he loves me. I'm sure the days ahead, full of teenage angst will come but today I'm going to bathe myself in hearing his sweet little voice tell me he loves me.

This post contains affiliate links which means if you click on a link and make a purchase I may receive a small commission at no additional cost to you. For more information please see my Disclaimer page.

When my husband and I were dating we decided that for our first Valentine's Day together we would make each other something. We were just poor college kids so we needed to be a little creative with our very limited budgets. Honestly this Valentine's Day was and still is my favorite one! You are probably wondering why, but first let me give you a little background to my husband and why his gift to me was so precious and meaningful. 

He can't cook or bake or do anything in the kitchen aside from make himself a bowl of cereal or brew some coffee. His kitchen skills stop there! I'm not even exaggerating - at all. Now that you know him a little better his gift to me will show you how much he was trying to communicate his love or me. 

Back to the homemade gift.


Walmart

He went to the store, bought a heart-shaped cake pan and a boxed cake mix and a tub of frosting along with a bag of cinnamon red hot hearts. This sweet guy made his very first cake EVER, frosted it and put one tiny little red-hot cinnamon candy heart in the middle and gave this to me as a gift. (I'm pretty sure he ate the entire bag of red-hots while the cake was baking!) I was blown away. This small gift spoke volumes to me since he was willing to step out of his comfort zone and into a very strange new world to him - the kitchen, all for me! What a memorable Valentine's Day for sure. 

DIY Heart Shaped Crayons 💗


Fast forward to the present day with 4 kids and the upcoming Valentine's Day holiday around the corner and I'm ready to start crafting some Valentine's Day themed crafts with them.

One of my favorite Valentine's Day crafts is making heart shaped crayons! If your craft cupboard looks like mine I'm sure you have a tub or box of broken crayons you just can't part with. When you have a little one (or many little ones) crayons seem to be breaking right and left but the best part is they still work!


To make these cool heart shaped crayons all you have to do is pull out your tub of crayons pieces, remove any paper labels, put the chunks into molds like a cupcake tin pop them into a 250 degree oven for 15-20 minutes and let the heat of the oven melt the pieces into one solid mixed color mold.

My kids loved making these! My girls liked to make ones that were of the same or complimentary color palette whereas my boys preferred to mix dark colored crayons with light crayons. It didn't really matter what colors they put together because all of the newly shaped crayons turned out awesome.


Walmart


Once the molded crayon is dry and no longer hot just pop them out of the mold and start coloring. The mix of colors is fun to see since they all streak together when you use your new crayon.

We gave our heart shaped crayons away as Valentine's Day gifts to our friends at Bible study and they were a BIG hit! At first the kids couldn't believe it was a crayon but once they started using them they had a blast coloring with them.

Since I had the supplies (broken crayons & heart shaped cupcake tin) on hand this project cost me $0!! Don't you just love projects like this? I certainly do.
Hobby Lobby

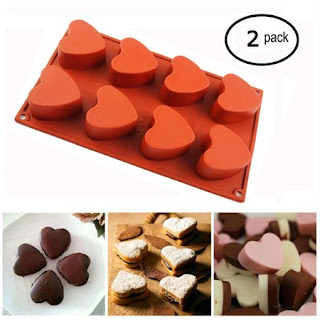
I've really gotten a lot of use out of these heart shaped cupcake pans too. Not only have I made cupcakes and rice krispie treats in them but I also used the mold to make seed bombs! I've put together a great tutorial in this post so you can make some too. They are super easy and also make great gifts for Valentine's Day. 


click HERE to read more

I hope these Valentine's Day craft projects were inspiring! If you enjoyed them please take a quick moment to pin them on Pinterest.

Looking for more inspiring crafts to do? Get a copy of my ebook, Secret Garden Crafts: 10 Nature Inspired Crafts, on Amazon Kindle today. Full tutorials with pictures included in this great book!


Thursday, January 3, 2019

How To Make An Easy Quilted Christmas Tree Ornament


Looking for a great way to use up some of your fabric scraps? I'm always on the hunt for a good fabric scrap buster project. My bin of scrap fabric seems to grow so fast! If you are anything like me it is so hard to toss out any scrap pieces of fabric knowing that there is probably some sort of project you could incorporate it into.

mommysuburbia.blogspot.com

Recently after organizing my scrap bin (I keep my scraps in a plastic tote grouped by color), and assessing my inventory I began scouring Pinterest for a quick quilting project to use up some of my scrap fabrics. Since it was close to Christmas I of course found a lot of great holiday themed projects. I love making holiday themed projects but I was also looking for a pattern that could be used anytime with an assortment of colors and fabric. 

I decided on a simple quilted patchwork tree block that I modified to fit the size fabric scraps I had and I decided that instead of a quilt I was going to turn my patchwork Christmas tree quilt blocks into hanging quilted ornaments to give as gifts to my sisters this year.

Would you like to make these with me? Ok, go get your scrap fabric pieces and start pairing up pieces that contrast yet still look great together. Since these were going to be ornaments for Christmas I stuck with fabrics that had green, gold, red and brown colors in them.


This post may contain affiliate links which means if you make a purchase through the link I may receive a small commission at no additional cost to you. For more information please see my Disclaimer page.


Easy Quilted Christmas Tree Ornament


Supplies - Here is what you will need to make 2 quilted tree ornament blocks
  • 2 contrasting pieces of scrap fabric 4 1/2" x 4 1/2"
  • 2 of the same contrasting pieces of fabric cut into a rectangle 4 1/2" x 1" (border base pieces)
  • 2 squares of brown fabric cut into 1" x 1" 
  • 2 pieces of scrap felt or batting larger than your sewn block (about 4 1/2" square)
  • 2 pieces of backing fabric - could match the front of the block or another contrasting fabric (4 1/2" x 4 1/2" in size)
  • 2 pieces of thin ribbon approximately 6-8" long
  • rotary cutter
  • self healing cutting mat
  • sewing machine & notions
  • iron & ironing board


*looking for the tools I used in this tutorial? scroll to the bottom of the post for a list of tools and where to find them.

Patchwork Quilted Christmas Tree Ornament Tutorial


1. CUTTING THE TREES: Cut a 4 1/2" x 4 1/2" square from each piece of contrasting fabric. The fastest way to do this is to place one fabric on top of the other with right sides facing up and cut them at the same time. Leave the cut fabric squares together. (since my two fabric pieces are stacked on top of each other you only see one of the fabrics in the picture)

Now you will need to make a diagonal cut along the right side of the square fabric. See my example in the picture below.


Next, make a diagonal cut from the left side of the fabric to the top creating your tree shaped triangle. Again see my picture below showing this cut. 


After these two cuts here is what you should have when the two fabrics are separated:


2. MATCHING UP FABRIC: Lay your cut fabric pieces out just like the picture above and then take the two triangle shaped pieces and swap them so that the triangle piece does not match the fabric of the two outside pieces. Make sense? This will allow for your fabric tree to contrast against the border fabric.

3. SEWING THE TREE: Now it is time to start sewing these pieces together to make the tree quilt blocks. When we are all done you will have made two separate quilt blocks. Got it? Good, let's get sewing. 

Let's start with right sides of all pieces of fabric face up. Now flip the triangle shapes onto the left side border piece. Follow the picture below. Then with a 1/4" seam sew down the triangle attaching it to the border piece. Press it open after you are done sewing.


3. SEWING THE SIDES: With the triangle and the left side fabric pieces sewn together it is now time to attach the right side fabric piece. Line up the edges (right sides facing) of the triangle and the right border fabric together. Sew them together with a 1/4" seam then press open. See the picture below for more detail.


After you press open the tree block it is time to square it up! With a straight edge quilting ruler (or regular ruler/straight edge if you don't have one) use your rotary cutter and square up the tree block. 

4. TRUNK & BORDER: The next step is to create the tree trunk and bottom border. Get your 2 pieces of rectangular shaped border fabric (4 1/2"x1") and the two small brown square (1"x 1") pieces. 

Take the two rectangular border pieces you cut for your bases (they should be 4 1/2" x 1") cut both pieces in half. With right sides together place one brown square on top of the border colored fabric sew the 1" side of the tree block fabric to the 1" side of the small brown square of fabric then press open. Repeat this step sewing the brown square to the other half of the cut rectangle and press open. You will do this step for both blocks. This is what you should have when you are done.


5. ATTACHING THE BASE: For this next step we will be attaching the base of the tree to the top. I like to center the brown trunk piece fairly close to the center of the tree. Once I am happy with the placement I flip the base onto the top with right sides facing together and sew a 1/4" line across the base to connect them. Press open after sewing them together and then square up the base of the tree cutting off any extra over hanging edges so it is even with the top of the tree. 


6. BATTING & QUILTING: Place the two finished tree quilt blocks face up on top of the felt batting pieces. The batting should be a little larger than your finished tree block. I free-hand quilted swirls and lines over my tree block since I wanted to give it an "outdoor" feel of swirling snow and wind. Choose whatever quilting pattern you like and quilt both blocks onto the felt batting. Since these blocks will become ornaments and won't need to be washed I used felt for the batting because it is what I had handy. If you use a different kind of batting that is OK, just quilt it like I did with the felt. After you complete your quilting trim the batting so it is square with your tree block. 


7. RIBBON HANGER & BACKING: Since these quilted tree blocks are going to become ornaments they need some ribbon hangers attached. I used some holiday colored ribbon as the hanger. You could use whatever you have on hand like yarn, hemp twine or anything you can sew through. To attach the ribbon hanger you will need to baste the ribbon onto your block along the top edge with a few stitches. Trim off extra ribbon after you baste it to the tree. Here is how to lay out the ribbon along the top: 

After you are done basting the ribbon hanger on it is time to attach the backing fabric to the block. From your supply list you should have two squares of fabric left in your pile each measuring 4 1/2" x 4 1/2". I like to use backing fabric that is a bit larger than my completed block so that I have plenty of wiggle room when sewing it onto the block. 

With the backing fabric laying face up position your block face down in the center of the backing fabric (right sides facing right sides). Make sure your ribbon hanger is not caught along the edges - you may have to tuck the ribbon in a bit so it doesn't get stitched to the edge when you sew the backing fabric to the tree quilt block. I'm not a fan of pinning but if you prefer to this is the time to pin along a few edges so that your block doesn't shift when you sew it to the backing fabric. Normally when I'm working with something larger I will pin but this is a small little piece and easy to handle. 

Using your block as a guide measure down the side of the block so you start sewing about an inch above the bottom corner. Make sure to back stitch so when you turn the block inside out the stitches don't come apart. Sew all the way around the block stopping about 1" away from your starting place. You will need to leave this 1" opening so you can turn the block inside out. Trim away excess fabric around the block and clip the corners to remove extra bulk when you turn the block inside out. 


8. TURN & PRESS: Carefully turn the quilt block inside out pulling it through the 1" opening you left un-sewn. You may have to use a dull pencil or chopstick to push the corners out - just be careful not to push the pencil or chopstick tip through the corner. Press the quilted tree ornament with a hot iron making sure to fold the 1" opening under so that it matches up with the sewn edge of the side. I like to top stitch all the way around my ornament however if you don't want to do this then you can hand stitch the 1" opening closed. This is your preference! 

Guess what? We are all done! You should now have two fully completed quilted tree block ornaments. What a great way to use up some scrap fabrics right!! My sisters were pleasantly surprised with their ornaments and couldn't wait to hang them on their Christmas trees. 

mommysuburbia.blogspot.com


If you wanted to make a door hanger or even a wall hanging using this block all you need to do is increase the size of the fabric squares to meet your needs. I think this tree block would even make a lovely whimsical nature themed nursery quilt. The possibilities are endless. 

I'd love to see your finished projects - please share or leave a comment telling me about your finished quilted tree blocks! Don't forget to Pin this post for later so you can come back to if when you are ready to make more tree blocks. 

Useful Tools & Supplies:


Here are some tools and supplies I recommend using for this project: