Sunday, October 3, 2021

Italian Sausage and Lentil Soup

 Fall is here and we all know what that means - Soup Season! Go ahead and get out your crockpot, instant pot or stockpot and get ready to make an amazing pot of soup for dinner. 

My family loves when I serve soup for dinner and this Italian sausage and lentil soup is one of our favorites. I love it because it is full of healthy veggies and amazing flavors. 


This post contains affiliate links which means if you click on a link and make a purchase I may receive a small commission at no additional cost to you. For more information please see my Disclaimer page. Thanks!

Actually, the first time I made this soup was the first time my family had ever eaten lentils. My husband is not a fan of beans at all!  But I thought since lentils don't actually look like a "regular" bean, like chili beans or cannellini beans I could pull off this soup without disclosing that lentils are actually legumes. Guess what? It worked!! Everyone in our family including my picky 8 year old really likes this soup.

There are four main categories of lentils - brown, green, red/yellow and speciality. Lentils are high in fiber and protein making them an excellent addition to your diet. Unlike most dried legumes (beans) lentils do not require soaking before cooking and the red variety cooks the fastest. You can get buy canned lentils to use in a quick side dish or in salads but dried lentils work best in soup.  Once you open a bag of dried lentils make sure to store them in an air-tight container in a cool dry place. It is best to use up the lentils within one year (which should be no problem after you make this soup!). 

If you have never used lentils before don't worry they are super easy to cook. All you have to do is rinse and sort them picking out any stones then pour them into your stockpot along with the rest of the ingredients and let your stove do the work of softening them in the broth as the soup simmers on your stovetop. 


Check out these other delicious recipes:

Before we get to the delicious fall soup here are a few other recipes I think you are going to love too:

Simply Delicious Italian Sausage & Tortellini 

10 Awesome Recipes For Day Old Jimmy John's Bread

How To Make Cinnamon & Sugar Soft Pretzels


Now for the soup recipe! I love making this soup in a big stockpot but if you want you can definately make it in your crockpot or instant pot too. 

Italian Sausage & Lentil Soup


Ingredients
1lb Italian sausage

1 large onion - chopped

1 stalk celery - chopped

2 large carrots - chopped

2 small zucchini cubed (optional)

6 cups chicken broth

2 (14.5 oz) cans diced tomatoes, undrained 

2 cups lentils

2 tsp minced garlic

1 tsp salt

½ tsp each - pepper, basil, oregano, parsley & thyme

1 pinch red pepper flakes


Directions:

1. Brown the sausage and drain off the fat.

2. Add all of the ingredients to a large stockpot and bring it to a boil. Reduce the heat, cover the stockpot and simmer for 1 ½ hours until the lentils are tender.

3. Sprinkle it with parmesan cheese and serve.


To print out this recipe click HERE for the recipe card.


What are your favorite fall soups? Do you like using your crockpot, instant pot or stock pot to make soup? Leave me a comment and let me know what you are making for dinner tonight!


For more inspiring hearty fall soup recipes check out this post too!

10 Hearty Fall Soup Recipes Your Family Will Love


Saturday, September 25, 2021

10 Hearty Fall Soup Recipes Your Family Will Love

As the weather cools down and it starts feeling more like fall, I start craving those delicious, flavorful fall foods everyone loves - especially a hearty bowl of soup. Soup is the perfect cool (or cold) weather comfort food that is easy to make and fills up a hungry stomach in no time. 


As a busy mom, I love recipes that are filling, full of healthy ingredients, and whip up quickly. There are so many soups that fit these requirements!


Soup is also a great meal to make when you need to use up whatever produce you have on hand in the refrigerator before it goes bad. Soup is very forgiving allowing you to customize the flavor to your family's liking. 


How To Freeze Soup

Did you know that you can freeze (non-cream-based) soup? Next time you make a pot of soup double the recipe so you can freeze half of it for a future meal. Make sure to leave out any noodles or rice before freezing though since they don't freeze well in soups. 

If you are making a cream-based soup leave out the cream or milk and freeze the remaining ingredients. Add the cream or milk after the soup has thawed and you are ready to re-heat it. 

When the soup is cool pour it into a Tupperware container pop on the lid and put it in the freezer. If your recipe calls for noodles or rice just measure out the amount of dry pasta or rice and put it into a zip lock back that you can put in the freezer with the soup so that you are sure to have all the ingredients ready when you go to make it. 

Soup can be stored in the freezer for up to 3 months. Broths will stay good in the freezer for up to 6 months. 


Must-Have Kitchen Tools To Make Soup

The first step in making a good bowl of soup is starting with the right soup pot. I have a large family so I always use my large stockpot to make soup in but you can make many kinds of soups in a crockpot or even an Instant pot. 

Stockpot 

The stockpot that works best for my family is an 8-quart Calphalon stockpot. When I'm making soup I have to make enough to feed four hungry and growing kids, my husband and me so this size stockpot does the trick for us. 

Buying a good stockpot is important for every home because it is such a versatile kitchen tool. I use my stockpot for SOOO many things besides soup like cooking pasta, braising meat, making stocks, and making homemade tomato pasta sauce. When you buy a stockpot make sure it will work for all the different types of cooking you do. If your budget allows it will be worth spending a little extra to get a good quality stockpot that will last for many years to come. 

No matter what pot you end up using for soup make sure the pot has a thick heavy bottom to help prevent burning. Pans that are too thin can cause the soup to stick to the bottom or burn more easily so keep that in mind as you shop for a soup or stockpot


Crockpot 

When I know I'm going to be gone all day I love to use my crockpot to make soup so that when I get home dinner is ready. Crockpots come in lots of different shapes like oval or round and different sizes the standard size being between 5 and 6 quarts perfect for a regular sized family. If you have a big family a large 8 to 10-quart crockpot might fit your needs better than the standard size. Check out this Crock Pot Size Guide from OvenSpot.com to figure out the best option for your family!

If you make soup in a crockpot be sure to add the dried pasta or rice about 30 minutes before you plan to eat to give it time to soften and cook. Adding it to the crockpot and allowing it to cook all day will result in mushy noodles and gummy rice. 

A programmable crockpot is handy when making soup too. Set it and forget it! Set the timer to start cooking then when the food is done let the crockpot switch to warm mode to keep the soup warm until you are ready to eat. 


Instant Pot 

Instant pots are multi-functional pressure cookers that cook food quickly using pressure. The instant pot can be used to make soups when you are in a hurry and want to get dinner on the table lickety-split fast! Because instant pots use pressure to cook food quickly be sure to follow instructions completely since the pressure can cause injury if you are not careful. 

Like crockpots, Instant pots are available in different sizes to meet your needs. Instant pots are also programmable so you can set the cooking time and let it do its job preparing a delicious pot of soup. 


10 Delicious & Hearty Fall Soup Recipes

Today I wanted to share with you my favorite fall soup recipes! Grab your favorite stockpot, crockpot, or Instapot, and let's get cooking!


01. Homemade Chicken Noodle Soup

Shredded rotisserie chicken, thick-cut carrots, celery, and onion in a rich flavorful broth make this one of the best fall soup options. Chicken noodle soup is truly medicine for the body providing comfort, nourishment, and a wonderful meal for your family. Let your crockpot do the cooking in order to make Grandma's Slow Cooker Chicken Noodle Soup recipe from The Cabin Diary. Also, make sure to add the noodles at the end of the cooking time so they don't get mushy. Not only will your house smell amazing but your family will all enjoy an amazing cup of soup!


02. Hearty Basalmic Beef Stew

Let your BFF crockpot do all the work to make this recipe a delicious meal. Whether you consider it a stew or soup there is no question about beef stews' delicious flavor and filling ingredients. Tender chunks of beef, thick-cut veggies in a gravy-like broth make for a classic bowl of beef stew. Go ahead and try adding non-traditional veggies like Brussel sprouts, mushrooms, zucchini, and sweet potato in with the classic carrots, celery, and onion veggies. Find the full Basalmic Beef Step recipe at The Blond Cook


via: The Blond Cook


03. Broccoli Cheddar Soup

 A beautiful blend of cheeses along with fresh or frozen broccoli are the stars of this show. Cheddar cheese is the traditional cheese used in this soup but, feel free to spice it up with some pepper jack or add gouda for a smoky flavor. If you want to get your kids to eat their broccoli try serving them a bowl of this creamy broccoli cheese soup from Little Spoon Farm


via: Little Spoon Farm


04. Beef Barley Soup

A rich, flavorful, and super healthy meal your family will rave about. This soup will keep the winter chills at bay as you enjoy a big bowl of beef barley soup. Don't let the barley scare you - this super grain is packed full of fiber and can help boost your immune system which everyone needs during the cold winter months. Substitute ground beef as a budget-friendly adjustment to the recipe without losing the delicious beef flavor. Try Cooktoria's recipe for the best bowl of beef barley soup around!


via: Cooktoria


05. Creamy Tomato & Tortellini Soup

If your garden yielded an abundance of tomatoes now is the time to use them up in this delicious fall soup recipe. Creamy tomato with cheese tortellini pair well together with a sprinkle of dried basil and slivers of parmesan to top it off. Follow the recipe from Salt & Lavendar and I guarantee you won't be disappointed.  


via: Salt & Lavendar

06. Italian Sausage and Lentil

My family LOVES this soup recipe - even my picky eater! I love it because it is super easy to make and I can freeze it and pull it out for a future meal in the weeks to come. This soup makes a regular appearance during the fall and winter months at our dinner table. To make it for your family follow the full recipe with this handy printable recipe card below.  


07. Pasta Fagioli Soup

This soup recipe is better than the popular chain restaurant's version because of its secret ingredient. Full of the traditional veggies, pasta, and beef broth this soup is a winner any night of the week. To get the recipe and learn what the secret ingredient is head over to Together As A Family!

via: Together As A Family


08. Stuffed Pepper Soup

Turn the classic dish of stuffed peppers into a delicious soup for dinner tonight. This soup is a re-boot with an amazing outcome your family is sure to enjoy. Rice, peppers, ground beef, and plenty of flavors all in a big hearty bowl of soup. Try this recipe from Skinny Taste


via: Skinny Taste

09. Cuban Black Bean Soup

Loaded with veggies, protein, and flavor this soup will warm you up on a cold winter night. Substitute canned black beans to speed up the cooking time without sacrificing flavor. Orange juice or freshly squeezed oranges give this Cuban black bean soup its fresh flavor while cumin and smoked paprika provide a little "kick". To make this soup check out this recipe by Simple-Veganista.


via: Simple-Veganista

10. Creamy Potato Soup

Chunky pieces of potato in a creamy soup base will leave you full and satisfied on a cool fall day. This is my "go-to" potato soup recipe I have used for years so I know you will love it too. I like to add shredded carrot to it when I make this soup but feel free to doctor it up any way you like. Gimme Some Oven's potato soup recipe claims to be the best and I think it is!


via: Gimme Some Oven

Make sure to serve your family a hot bowl of soup in a big soup bowl too. When I got married one of the things I registered for and we received as a wedding gift was a set of ceramic soup bowls. These bowls are deeper and wider than a typical cereal bowl. When I serve soup for dinner I know my family is hungry and will want a big bowl of soup to eat which is why I love these bowls. Everyone knows what I'm serving for dinner when I stack these bowls on the counter - soup! 


More Delicious Recipes

By now your stomach should be growling letting you know that a big hearty bowl of soup is what you need! So go get out that stockpot and get cooking - your family will thank you!

For more delicious recipes make sure to check out these other easy to make recipes:


Easy Homemade Caramel Corn & Kettle Corn

The Best Pancake Recipe

Easy Snickerdoodle Zucchini Bread Recipe

Cinnamon & Sugar Soft Pretzels


What are your family's favorite fall comfort foods? Please share your thoughts in the comments - I'd love to hear from you!


Thursday, September 16, 2021

How To Make Seat Belt Covers For Your Baby's Car Seat

Seat belt covers are a must-have for anyone with a young child who has to be in a car seat or booster seat! They make traveling in the car so much more enjoyable.


This post is brought to you in partnership with Zulily. While I may have been compensated, as always, all opinions are my own.

Do you have young children or a baby? Then you probably have a car seat or two anchored into the back seat of your minivan or car! We all know how much children dislike being strapped into their car seats so they buck like a rodeo bull or arch their back while you are trying to secure the seat belt straps to buckle them in. (ask me how I know this!)

Can you blame them? Not only are they unable to move around freely but most of the time the seat belt straps rub or dig into the sides of their neck causing your child a great deal of agony. 

When my children were young enough to be in car seats I always felt so bad when I would take them out and see a little red line on each side of their neck where the seat belt rubbed. (Please know that I didn't over tighten the straps causing them any pain but when they moved their head back and forth to look around the seat belt would cause a light red indented rub mark that looked irritated) 

I wasn't about to compromise safety by loosening the straps too much - what if we got in an accident and their little body wasn't held into their car seat because of slackened seat belt straps? But I did want to find a way to make the car seat more comfortable for them without compromising safety. 


Seat belt covers changed our whole traveling in the car experience! I sewed each child a pair that fit snugly around their car seat straps and adjusted the seat belt covers so that the soft minky or fleece fabric rested between their neck and the seat belt. No more chaffing marks on their neck, and much happier travelers! Since the seat belt covers are made from fabric they are completely washable which I found out right away to be a huge bonus! I made several spare sets to keep in the car in case of an accident (spit up, drool, spills...) so I could change them right away. 


These seat belt strap covers are super simple to make and only require basic sewing skills. Today I'm going to walk you through how to make your own kid-size (infant & toddler) seat belt strap covers for their car seat straps. If you don't have a little one who is in a car seat anymore you can still use a seat belt cover for a regular seat belt when they transition to a booster seat. Follow along as I make a set of seat belt strap covers. 

This post contains affiliate links. Please see my Disclaimer page for more information.

Seat Belt Covers For Infant & Toddler Car Seats


Materials list (I've included links to products I recommend):


Step-by-Step Instructions:


1. Cut 2 - 6" x 6" squares from the cotton fabric, minky/fleece fabric and cotton batting. You should now have a total of six individual squares. 

2. Place the batting square down on a flat surface first. Next place the minky or fleece square right side up on top of the batting. Lastly, place the cotton fabric right side facing the minky / fleece square (the cotton piece should be upside down so you see the back of it and not the pretty printed side). 

Pin or clip all three layers together in several places so they do not shift around when you start to sew them. 

Tip - I love these handy sewing clips to use instead of pins to hold the fabric in place! No more accidental pokes from a needle or a broken sewing machine needle because you sewed over a pin. 

3. Before you start sewing select one side and insert two pins one inch apart from each other. Starting from the first pin begin sewing around the square with a 1/4" seam allowance. Stop sewing once you get to the second pin. Clip all of the corners to reduce the bulk of fabric. Turn the fabric square right side out through the 1" opening and use a blunt pencil or this cool sewing tool (That Purple Thang) to push out the corners. Make sure your pencil or stick doesn't poke through the corners! 

4. Iron the fabric square to chase out any wrinkles and to press the 1" opening flat with a small amount of fabric turned inside. This helps with the next step - topstitching.

5. Sew around the entire seat belt cover with a 1/4" seam allowance making sure to sew the 1" gap closed with a straight stitch or zig-zag stitch. This is totally up to you but both stitches look nice. 

6. Now it is time to add the Velcro to each seat belt cover. The velcro will be sewn along one side of the seat belt cover. Cut a 5" strip of Velcro then pin the hook side along one edge of the minky side of the square with a 1/2" space above and below the Velcro. Flip the fabric square over then pin the fuzzy Velcro piece to the opposite edge of the cotton fabric. Sew all around the perimeter of both Velcro strips. 

7. Repeat these steps with the second seat belt cover. 

Congratulations, you are all done! 

PIN this post for later!!

Tip - If you want to make an adult size seat belt cover adjust the size of the cut fabrics to measure 6" x 12". The velcro should be attached to the long 12" sides. 


No time to make your own seat belt covers? No problem! I have several sets for children's car seats listed for sale in my Etsy shop Sapucha. I also love custom orders and can accommodate custom orders via Etsy too. 

If you love to sew here are some more fun sewing projects I know you will enjoy making as much as these seat belt covers!


What have you been sewing lately? Make sure to check back often to see what I'm working on! 

Also, check out the 10 Sewing Projects For Beginners I shared on the Zulily blog The Find. I'm sure you will be able to find something to inspire you! 

Saturday, September 4, 2021

Easy Fall Pumpkin Craft Project For Kids

With fall just around the corner, it is time to start thinking about all of the fun fall crafts to make. Fall is such an inspiring season full of colorful leaves, apples, cider, and of course pumpkins! Pumpkins can be used for decoration, carving, and of course to make pumpkin pie (my hubby's favorite).


Fall just isn't fall without pumpkins - everyone loves pumpkins! 

Today's craft project uses pumpkins as the main attraction however you could use any shape or design you like too. This project uses everyday household items and is very budget-friendly. I guarantee kids of all ages will enjoy making their own aluminum foil pumpkin.

This project would also work well in a group setting like a co-op, youth group, Sunday school or school. Because it comes together so quickly and requires minimal supplies or pre-planning you can certainly have your kids make these with friends too. I recommend an adult or older child be in charge of the hot glue gun to prevent any injuries though.


Aluminum foil (a.k.a. tin foil) is the star medium for this project so go raid your pantry and grab that roll of foil. The shiny, smooth texture of tin foil and its ability to be easily bent makes it so much fun to use for craft projects. 

The project we will be making today is a colorful foil embossed pumpkin. Embossing is just a fancy term that means carving, molding, or stamping a design on a surface or object. Don't let this big word scare you away from this easy and fun project. 


Aluminum Foil Embossed Fall Pumpkin Craft


Supplies:


* feel free to use this free pumpkin printable template if you are not comfortable drawing a pumpkin freehand. Coloring book pages work well for this project too!


Download the free pumpkin template here.


Download free pumpkin template (without words) here


Instructions:

Because we are using permanent markers it would be a good idea to cover your work surface (a.k.a the kitchen table) with a placemat or plastic tablecloth before doing this craft project. 

1. Print off the free printable pumpkin template or draw your own on a piece of regular size printer paper making sure to include the vertical lines along the front of the pumpkin, stem, and any leaves. Tape the paper onto the piece of cardboard with the pumpkin picture right side up. 

2. Use your hot glue gun to trace the outline of the pumpkin along the lines from the template or from the pumpkin shape you drew making sure to cover all of the lines completely leaving the inside empty space of the pumpkin free from hot glue. Try to prevent any gaps or blobs of hot glue which will show up when we emboss the design onto the foil. 


3. Tear off a large sheet of aluminum foil taking care not to wrinkle it too much. Place the sheet of foil over the paper with the hot glue outline and smooth it down taping the edges to the back of the cardboard. With your fingers gently press the foil down around the glue molding the foil to the glue outline. Smooth out any wrinkles with your finger being careful not to tear the foil. 

4. Use the Sharpie markers to color in the smooth flat spaces inside the center of the embossed pumpkin shape to make your fall pumpkin. 

5. (Optional Step) Trace around the outside edges of the embossed lines with a black or other dark color Sharpie marker.

You are all done! Pop your finished fall foil art into a frame (minus the glass) and enjoy it all season long. 

My boys were so inspired by this pumpkin project that they ended up raiding our craft cupboard to find great pictures from their favorite coloring books to use next. My youngest found the coolest mini-spider man picture and my other son used a picture of a basketball to emboss in foil and color just like we did with the pumpkins. 


Once you get your kids started the sky is the limit on what they can make! Let their imagination go wild and see what they make.


Sunday, August 22, 2021

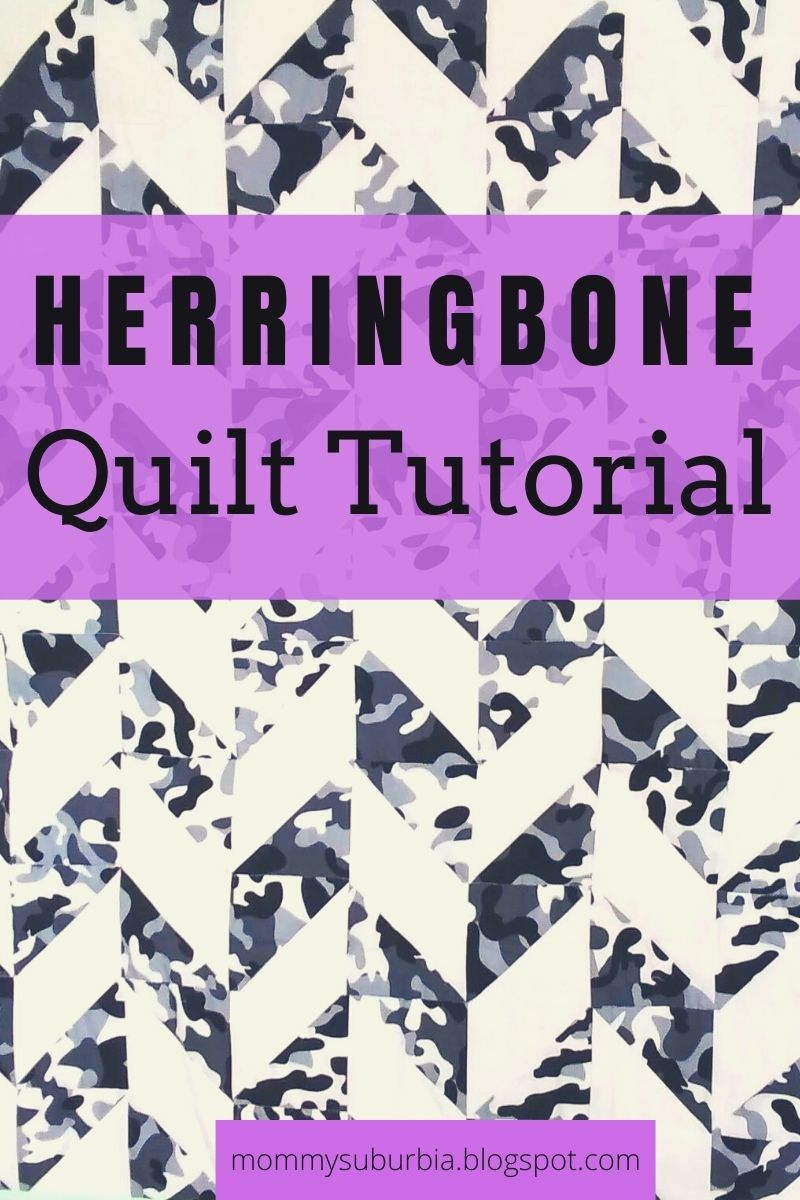
Herringbone Baby Quilt

A friend at church is expecting her first baby this fall and the baby shower is just around the corner. I have had my eye on a herringbone quilt pattern for some time now but I didn't really have any reason to make a quilt...until now! Every new baby needs a cozy baby blanket or quilt to welcome them into this world which gave me a great reason to start making a baby quilt.


When I had my girls a co-worker gifted each of them a hand-quilted baby quilt. It was such a thoughtful and practical gift that I knew then that I wanted to learn how to make baby quilts to give as gifts. Both quilts had been loved by my girls when they were little and are now safely stored away for them when they start a family. 

This post contains affiliate links which means if you click on a link and make a purchase I may receive a commission at no additional cost to you. For more information please see my disclaimer page. Thanks!

Now that I had a great reason to make a herringbone quilt it was time to pick out fabrics! I really wanted to stick to a gender-natural color palette with a simple modern style. I decided to use a black/gray camo print that I got from Fabric Wholsale Direct with white cotton for my half-square triangles and a light mint green cotton for the trim and back. 

Remember to PIN this post for future reference!!


If you are new to quilting or maybe you are interested in making a herringbone quilt this is a great pattern to get started with! It might look a little bit difficult from the finished quilt pictures but don't let that fool you. This quilt is made using half-square triangles (HST) arranged in a repeating pattern. 

Half square triangles are really easy to make and you can find tons of great tutorials on how to make them. Here is the tutorial I found to be very helpful when I first got started quilting: Modernly Morgan - How To Make Half Square Triangles.

For this quilt I made my HST's using 5 1/2" squares of fabric which when sewn and cut end up being 5". Once I sewed the triangles together they end up being about 4 1/2". This quilt is totally customizable to your liking by adjusting the size of the HSTs.  Have fun playing around with different-sized HSTs and see what you like. 

The key to this quilt is to lay out the HSTs in the herringbone pattern on a flat surface (a.k.a the floor) then sew them together one row or column at a time. Also, your iron will become your BFF with this project since getting the points of the HSTs to "nest" properly can only happen if you iron your seams in opposite directions before sewing. 

Here is a graphic to help you get started laying out your HSTs into a herringbone pattern. Add as many rows and columns as to adjust the size of your quilt. 


Right before I made this quilt I also made a small little ironing pad that sits right next to me on my sewing machine table so I can just sew, iron, sew, iron, sew....you get the point right? It has saved me a ton of time and it was super simple to make. I will be posting a tutorial on how to make one for yourself in the near future!!  Make sure to follow me so you get all the latest updates!


Ok, back to the herringbone quilt. I wanted to share some pictures of the process I followed to make the quilt with you that seem to be easier to follow than written instructions. I'm a visual learner so pictures are where it is at for me! 


How To Make A Herringbone Baby Quilt 

  • The first step is to cut out a bunch of 5 1/2" squares from the two main cotton quilt fabrics you chose. I had no idea when I started how big I wanted my baby quilt to be so I made a lot of squares. I had a pile of 5 1/2" white squares and a pile of 5 1/2" black/gray camo squares. Follow the HST tutorial I linked above and make the two different colored fabric squares into HSTs. 


  • Lay the HSTs into the herringbone pattern. I used the floor and part of my cutting mat to lay out the pattern. Once I had them all laid out I started sewing them together in rows. After the rows are finished sew the individual rows together to make the quilt top.  Square up the quilt top to make it square and even all the way around. 
  • Select a fabric for the back of your quilt. For the back of my herringbone quilt, I chose to use a solid light mint green cotton fabric. I purchased a little extra yardage because I knew I was going to make the binding from the same fabric. Make a "quilt sandwich" by laying your backing fabric down (right side down) on a flat surface then your batting then finally the quilt top (right side up). I use safety pins to baste the layers of the quilt sandwich together so they don't move when I start quilting. For this quilt, I stitched in the ditch along the horizontal rows and then added stitching along the camo print triangles on each row creating a zig-zag pattern. Use your imagination and quilt any way you like!
  • Time to add the binding. Since my quilt was going to be gifted to a baby I wanted to make sure it was very durable and could hold up to lots of use and washings so I chose to machine bind the quilt instead of hand-sewing it. To make binding I cut strips of fabric into 2 1/2" by the length of the fabric then ironed the strips in half. If this is your first time binding a quilt I suggest you follow this great tutorial from The Seasoned Homemaker . Go slow and remember you can always pick out stitches if you need to! 

I just love how this herringbone quilt turned out! Of course, I'm not a professional so there are some (OK several) imperfections but honestly, that is what makes this handmade quilt so special - it is one of a kind with lots of personal touches! The finished quilt measured 44 inches by 36 inches - the perfect size for a little baby. 

To add a little extra finishing touch to this quilt I had this sweet little quilt label in my sewing notions stash and I added it to the corner of the quilt (see pic below!). To gift the quilt I folded it twice then rolled it into a log then tied a piece of extra binding around the quilt and tied it up in a bow.


Quilting can be a pretty addictive craft! Once you make one you are going to want to make some more beautiful quilts. I have some more easy quilt patterns and tutorials you will enjoy just as much as this herringbone quilt. Check out these quilts:

Improve Spinners & Hourglass Quilt Tutorial

How To Make A Rag Strip Quilt

Quilting For The Beginner - Rag Quilts

Tips & Tricks To Make A Half Square Triangle Quilt


Sewing and quilting is a fun hobby that anyone can learn! Besides a good quality beginner sewing machine (I love my Singer!) there are some sewing notions (a.k.a. sewing supplies) that you will want to invest in as you get started learning how to sew and quilt. To help you out I put together a post with the 10 Must Have Sewing Supplies For The Beginner  to help you out and get you started. 


Wednesday, August 18, 2021

10 DIY Room Decor Ideas For Your Child's Room

Decorating your child's room can be a daunting task especially if you are working with a limited budget. Finding the right picture or wall hanging in the color and size you want is also a challenge but don't worry I have the perfect solution to help you accomplish your decorating goals. Want to know what it is? Of course, you do - Make Your Own. 


This post is brought to you in partnership with Zulily. While I may have been compensated, as always, all opinions are my own.


This post is brought to you in partnership with Zulily. While I may have been compensated, as always, all opinions are my own.


You know the saying "if you want something done right, do it yourself!" I think it applies perfectly to this situation. Whether you are a seasoned crafter or just a beginner the ideas I am going to share with you offer something for everyone. 

10 DIY Room Decor Ideas For Your Child's Room


01. Fabric Rag Strip Banner - This is a great no-sew, easy to make project, that costs next to nothing to make. It is truly the perfect craft project for a complete beginner. The colors and size of the banner can easily be adjusted to match your room decor and fit your room’s space too. If you want to make one for your child's room fine the complete tutorial I wrote and shared at The Find on Zulily.


02. Painted Circles Art Canvas - You don't need to be a professional artist to paint thiss beautiful piece of decor. With the use of various-shaped stamps and a little bit of paint, you can create a one-of-a-kind piece of art to hang in your child's room. Dabbles and Babbles shares the complete (and easy) tutorial so you can make your own.


via: Dabbles and Babbles

03. Wood Shim Wall Art - This project lets you completely customize the size and color to fit any space you are trying to decorate. Wood shims are arranged in a herringbone pattern, attached to a thin hardboard panel, and stained .If you don't have a miter saw don't worry - you can use a miter box and hand saw to make this too. Find the full tutorial for this project at Amber Oliver.


via: Amber Oliver

04. Rainbow Wall Hanging - This is a modern twist on the popular craft of macrame. Make your rainbow in any colors you want. I love how easy this project is and can be made for any age child's room. Crafting on the Fly provides an easy-to-follow step-by-step tutorial to follow.


via: Crafting On The Fly

05. Custom French Memo Board - You are going to love this easy DIY project because it not only looks great as a wall hanging but keeps your child organized. They can hang pictures, concert tickets, or special cards behind the ribbons rather than keeping them shoved in a drawer or stuffed under their bed. Follow the tutorial at Fabulesslyfrugal.com.


via: Fabulessly Frugal

06. Action Figures Lamp - If you have kids you probably have a bin of small hard plastic action figure toys like plastic toy soldiers, matchbox cars, lego mini-figures, and mini dinosaurs. Grab a handful (but don't tell your kids!) and start gluing the figures to the base of an old lamp base. I recommend using E6000 glue for this project - it has a long setting time but well worth the wait. Use painter's tape to keep figures held together until the glue dries. With the lampshade and bulb removed spray paint the entire base of the lamp including all of the action figure toys. Once dry, put the bulb and shade back on and enjoy the new lamp.

07. Magnetic Chalkboard Wall - Provides hours of entertainment for your younger child or serves as a practical and useful memo board for a teen. A coat of magnetic primer and chalkboard paint directly on the wall and framed in wood makes the best wall art for your kids. Find the complete tutorial and supply list at The Culinary Couple.  

via: The Culinary Couple

08. DIY Reading Canopy - This simple DIY project not only looks fabulous but encourages your child to read while enjoying time in their custom reading canopy. Pick your child's favorite colors to make the canopy, gather the supplies and get busy crafting. Add lights to add an extra special feature to this canopy. The Little Green Bow provides great instructions on how to make a reading canopy and the best way to hang it too.  

via: Little Green Bow

09. DIY Felt Name Pennant - This no-sew project is inspired by old-school felt football pennants but still looks great hanging on the wall in your child's room today! Make one or more in any color felt and pick any wording, like your child's name or even favorite sports team to add to the pennant. Learn how to make your own by following the complete tutorial at Lovely Indeed

via: Lovely Indeed


10. Scrabble Tile Word Art - Everyone loves the game Scrabble which is why this craft is so fun. Bring the classic board game letter pieces in extra large size into your child's room as cool wall decor. Spell any words like their name, favorite color, or encouraging words when making one for your child's room. This not only looks great in a nursery but also in a teen's room too. Find the great instructions to make your own Scrabble wall decor at Whats On My Porch.


I hope you found these child's room decor ideas inspiring! I know your children will love their new decor and be so proud that their mom (or dad) made it just for them. 

Remember to follow me on Pinterest or join my Facebook page to keep up with new posts and ideas.  

Also, find more of my ideas and other great mom's ideas at The Find by Zulily blog