Tuesday, July 31, 2018

10 Best Back to School Supplies From The Dollar Tree

mommysuburbia.blogspot.com
photo credit: freepik.com


The start of another school year is just around the corner and whether you are a homeschooler or send your kids to public/private school your kids will still need to stock up on school supplies. Every year I clean out our craft cupboard and toss out all the stubby, eraser-less leftover pencils, dried up markers, empty bottles of glue and dried glue sticks and used up notebooks. Whew, it's a lot of work!

I love making room for our new supplies as well as making a mental inventory on what we need to purchase. One way homeschooling is similar to public school is that both require students to have the supplies they need in order to do their school work.

With 4 kids it is easy to blow the budget on school supplies but I have found a few tricks to help save a little money that I want to share with you.


mommysuburbia.blogspot.com

This post contains affiliate links which means if you make a purchase I may receive a small commission at no additional cost to you. For more information please read my Disclaimer page.

 Tips For Saving Money On Back To School Supplies


Timing is everything right? Well when it comes to school supplies this is very true! Many large retailers count on the sales of back to school supplies so they offer super discounted prices on some smaller items like crayons, bottles of glue and pencils hoping that you will pick up a few regular priced items like binders, backpacks and lunchboxes. Make sure you shop these deals on the basics when the stores posts them for sale!

Another tip to save some cash is to make a list and stick to it! It can be very tempting to toss a few items not on your list into your cart but by the time you make it to the checkout lane your budget is blown.

Lastly, don't forget your local Dollar Tree! This store is a treasure trove of school supplies that will help you save some big bucks on back to school supplies. Price shop to make sure the items from the Dollar Tree are in fact cheaper than other stores. Speaking of the Dollar Tree, here are my top 10 items to pick up from the Dollar Tree.

Top 10 Back to School Supplies from the Dollar Tree:


pencils

If your kids are like mine they tear through pencils like little beavers! Before I know it we have a pile of stubby pencils with no erasers that no one wants to use. I like to buy several packs from the Dollar Tree so I am ready to replace broken or worn out pencils.


notebooks

I require my kids to have a single subject notebook for most subjects. I have found that this help us stay organized and it is less confusing for me as their teacher to find their finished assignments if the work is done in separate notebooks by subject. They don't need anything fancy just practical and that is why I buy them at the Dollar Tree.


scissors

Crafting scissors quickly get gummed up with glue and other sticky things so buying a bunch of cheap scissors is the way to go in our house. My kids are constantly crafting something so it is nice to have scissors handy.

crayons and colored pencils

With the amount of crafting that takes place in my house I must have replacement crayons, markers and colored pencils available at all times. These are essential tools for the budding artist and student.


folders

I have found that no matter what kind of folders I buy, expensive or cheap, they both take a beating throughout the school year. I used to cringe everytime my kids asked to have a new folder because the (expensive) one they just destroyed needed to be replaced. Now I just stock up on extra ones from Dollar Tree and have found they last just as long as the ones I used to buy that were more expensive.

We use folders as an organizational tool in our 3 ring binders by subject. Loose leaf papers that are still being worked on or other unfinished work goes in these binders. Also, if we are schooling on the road (a.k.a. in the car driving from one activity to another) it is much easier to take the small folder with us rather than the whole 3 ring binder.
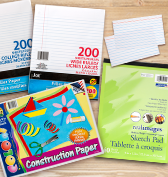

paper

Loose leaf paper, construction paper and sketch pads are expensive if you pay full price at the store. I found that I can get these supplies right at the Dollar Tree for a fraction of the cost. I can even buy one for each of the kids from Dollar Tree and still not come close to the cost I would pay at other stories.


glue

Do your kids make slime? We seem to have a regular ole' slime factory happening over here at my house! I allow the kids to do something quiet while I read aloud to them and one of their favorite things to do during this time is to play with slime. If you miss the back to school sales that most stores have before school starts, don't worry the Dollar Tree always has a great supply of glue, tape and glue sticks all for $1 all year round!

antibacterial wipes

Back to school usually means back to germs even if you are like us and homeschool. Getting sick during the school year is no fun - it's no fun anytime of the year! As a mom I try to battle the germs by wiping down surfaces like doorknobs, railings, tables and toys regularly with antibacterial wipes. Healthy kids are happy kids!

tissue / Kleenex


I keep a box (or 2) of tissues in our car since we are out and about quite a bit during the school year. Even when the kids are healthy we seem to go through quite a few boxes of tissues on a regular basis. This can add up quickly so I try to reduce the amount we spend by shopping smart and that means picking up my tissue boxes at Dollar Tree.
Storage bins of all shapes and sizes are a great tool to keep you and your students organized this year. Instead of loose papers falling out of stacks use a bin to keep them all in one place in a neat pile. You can even have one bin assigned to each child and write their name on the front of the bins! An affordable and helpful solution to staying organized!

I hope your school year gets off to a great start! Hopefully these ideas will help you prepare for the start of your school year. If you found some other great Must Have supplies from the Dollar Tree leave a comment - I'd love to hear from you!

Wednesday, July 25, 2018

The Best Hair Brush You and Your Family Can't Live Without

mommysuburbia.blogspot.com

This post contains affiliate links which means if you make a purchase I may receive a small commission at no additional cost to you. Please read my Disclaimer page for more information. 

Mom: "sweetie please brush your hair, you look like you just woke up."

Daughter: "I did brush it! I just can't get this big tangle out!"

Mom: "Would you like some help?"

Daughter: "NO! I can do it by myself"

......10 minutes later,

Daughter: "MOM!! I need some help brushing my hair, please help me!"

Mom: "Wow, your hair is so tangled!"

Daughter: "Ouch! Mom stop pulling!"

Have you ever had this conversation in your home? This seemed to be a daily conversation in our house every morning, after every shower or bath and after swimming in the pool. It was getting to the point where the girls dreaded combing out their hair because of the pulling and how long it took to brush it.

We have used detangling products, wide tooth combs, paddle brushes, shorter haircuts, combing out sections at a time (takes forever!) which have all caused pain and suffering and a ton of hair pulling!

A friend of mine was over one day with her kids to swim and she shared her secret to keeping her daughter's wet hair tangle free....the Wet Brush. I had never heard of this brush and was skeptical at first since I thought we had tried everything. Boy was I blown away!

via: The Wet Brush.com

My youngest daughter has very long thick hair and my oldest daughter has medium thick long hair. (By long I mean their hair is down to their waist band when they are standing up - so LONG)

The Wet Brush is a game changer for our family! No more tangles, tugging and tears. But what makes this brush unique you ask? The brush has super thin, strong and flexible bristles that glide through ANY hair type. The bristles bounce back to the original form after each stroke so you don't have bent or broken bristles that catch and pull hair like other brushes.

My daughter, with the super long thick hair has no problem brushing out her hair, even the underside of her hair at the nape of her neck in the back where most tangles seem to happen.

Oh, guess what?!! The Wet Brush works on dry hair and extensions & wigs too!

mommysuburbia.blogspot.com


Needless to say this brush is my girls' favorite! Mine too. I highly recommend this brush for yourself and your girl(s). They come in a variety of colors and a few different sizes including a folding handle purse or bag travel Wet Brush. Also, this brush is very affordable with prices ranging from $20- $10. You won't be disappointed with this purchase!!

I've included some links below to make it easy for you to purchase your own Wet Brush from various retailers. Trust me - you will love this brush!

** Please note that this brush is not for use with a hot blow dryer! I tried using it while blowing out my hair to straighten it with a hot blow dryer and I melted a few of the bristles.

Where to Buy the Wet Brush


1. Amazon $12.79 Wet Brush 2 piece Original Detangler Hair Brush

2. Target $8.19

3. Kohl's $9.99

4. Walmart $9.99 free ship to store

Thursday, July 19, 2018

10 Awesome Recipes for Day Old Jimmy John's Bread

mommysuburbia.blogspot.com

This post contains affiliate links which means if you click and make a purchase one of these items I may receive a small commission at no additional cost to you. For more information please see my Disclaimer page.

Let me start by saying how much I love Jimmy John's! My favorites are the #13 Veggie Club and # 9 Big Italian. Yum!

The only problem with my love for Jimmy John's gourmet subs is the price -yikes!! With six people in our family a meal there for all of us could easily run $50 or more!  Clearly not an affordable meal for us to indulge in regularly.

So how can I have a Jimmy John's sub without breaking the bank? Easy - by buying their day old loaves of bread and making them at home!

Did you know a day old loaf of Jimmy John's bread is only $0.49. What a bargain!

Besides making a sub sandwich at home what else can you do with the day old Jimmy John's bread? Let me give you ten great ideas!!

Here is a Freaky Fast list of 10 recipes and ideas you can do with day old Jimmy John's bread.

1. Garlic Bread (add cheese for garlic cheese bread)

Slice a loaf of bread down the center and lay the two pieces cut side up on a baking sheet. Spread a generous layer of softened butter over each piece and gently sprinkle garlic salt over the butter. To kick it up a notch spread grated mozzarella cheese on top of the garlic and butter! Pop it the loaves into a 350 degree over for 15-20 minutes until the cheese is melted and bubbly. 

If your loaf of day old bread is too hard to cut see my tip for softening it up below!

Here are the baking sheets I use (and love!!)

click to buy on Amazon

2. French Bread Pizza

Again cut the loaf of bread in half down the middle so you have two long sections of bread. Set them on a baking sheet, spread your favorite pizza sauce on and start adding your favorite toppings. Bake in a 375F degree oven for about 15 minutes until the cheese is melted and bubbling. 

This makes for a very economical meal for you and your family since the bread was only $0.49 per loaf!

3. French Toast Casserole

My go-to recipe for french bread casserole is this one by Gather For Bread. This is a super simple recipe that can be made ahead of time and is perfect for day old bread. 

via: Gather For Bread

4. Bruschetta

Bruschetta is one of my favorite appetizers and with day old Jimmy John's bread it is even better! If you have never made this before you need to do it today! Here is how I make it:

click here to download

5. Dressing / Stuffing

Dressing (or sometimes called stuffing) is a staple dish at Thanksgiving around here. Homemade is best and really easy to make ahead of time. Find a simple and easy recipe for the Best Dressing from Bon Appetit

6. Homemade Croutons

Are you a salad lover? My favorite is a classic Caesar salad with homemade croutons. Croutons are easy to make and can be stored in an airtight container for a few weeks. Here is how I make croutons:

click here to download

7. Breading for Chicken Parmesan

Using the crouton recipe from above is the best way to start making your own seasoned breadcrumbs! Use leftover croutons, put them in your food processor and pulse until they are fine crumbs. Store the breadcrumbs in an airtight container for several weeks. If you want plain breadcrumbs (unseasoned) make the crouton recipe from above leaving out the seasonings. Easy, right? 

Here is my favorite recipe for chicken Parmesan:

via: Saving You Dinero

8. Bread Pudding

A classic treat passed down from generation to generation. A perfect way to use day old bread! Here is a simple recipe from Cooking with K:

via: Cooking With K
9. Paninni

What is better than a Jimmy John's sub? A Paninni made with their day old bread! If you don't have a Paninni press you can just make yours in a grill pan. Butter the outside of the top and bottom pieces of bread and place the butter side down in the pan. These are so yummy!

10. Cheese Fondue

Appetizer or meal? That is the toughest question you will have to answer when making this amazing dish. I could eat the whole loaf of bread by myself I'm sure! If you don't have a fondue pot you need to get one now! 

Here is a great recipe from My Food Story for cheese fondue that is easy and delicious.

via: My Food Story
Here is the Fondue Pot  I recommend:

click to buy on Amazon

Easy Hack for Reviving a Loaf of Bread That is Hard as a Rock!

Since this is day old bread we are talking about what do you do with it when the loaf becomes harder than a rock? Don't throw it out!! Instead you can revive it to that soft warm bread we all know and love. How? That's easy! Turn on your kitchen sink and Run the entire loaf of bread under the water making sure the surface of the entire loaf is wet. Next wrap the loaf in aluminum foil and pop it into a pre-heated oven for 15 minutes and it will be soft and warm, ready to gobble up or sop up some sauce!

What do you like to do with your loaves of day old bread? Share your tips, tricks and recipes in the comments!

Vintage Cookbook

Also, here are two great vintage cookbooks I love and think you might enjoy! You can find them on Amazon.

find here on Amazon


find here on Amazon


Tuesday, July 17, 2018

A Babysitter Survival Plan for Your Teenager Plus Free Babysitter Information Sheet

mommysuburbia.blogspot.com

This post contains affiliate links which means if you click on and make a purchase I will receive a small commission at no additional cost to you. For more information see my Disclaimer page.

Is your teenager looking for ways to make a little extra money but she isn't quite old enough to get a "real job"? Babysitting is a great option for a responsible, mature young teen to earn some cash and learn some valuable job skills.

If your teen has never done any babysitting on their own I highly recommend that they gain a little experience with kids before they venture out into babysitting on their own.

Here are a few ideas to help your teen gain valuable babysitting skills:

Babysitter Survival Plan For Your Teen

Mentoring Opportunities:

Volunteering in the church nursery or a Sunday school class as a junior helper is a great way to gain some experience. Being paired up with an adult who can guide and instruct them will help your teen gain confidence.

Have you ever heard of a "mommy's helper"? Basically the teen spends time watching the child(ren) 
when the mom is home. The mom gets to do chores or relax while your teen gets to know the kids (and mom). It is like supervised babysitting.

My daughter offers this type of service to the mom for free since the mom is like a babysitting mentor for my teen (win/win for both). Not only does my teen become familiar with the kids, house and family expectations but the mom gets to know my teen who will hopefully become a regular babysitter for them in the near future. My teen daughter has been a mommy's helper to a few neighborhood mom's that resulted in future babysitting jobs.

Babysitter Emergency Info Sheet

The first time your teen babysits for a new family , whether they know the family really well or not, it is important to make sure the teen sitter is prepared in case of any emergencies that might arise. One requirement I have for my teen is to have the family she is babysitting for complete a babysitter information form before they leave.

Information like the house address, parent's cell numbers, neighbors to call, parent's full name (Mr. Smith doesn't help if there is a real emergency - you need the dad/mom's full name!), allergies and other information that your teen might need while watching the kids gets written down on the info sheet.

This handy form is right at my teens fingertips in case she has questions or if a real emergency arises.

First Aid/CPR Training

Having your teen attend a First Aid/CPR class at the local Red Cross is another great babysitting survival tool for your teen. Becoming certified in CPR is a valuable skill that shows parents how serious your teen takes their babysitting job. Being well prepared for anything is important. 

click to buy

Access To A Phone


The last piece of advice I want to impart is to have your teen ask the family they are babysitting for if they have a home phone available to use when the parents are out. Land lines are not as common as they once were and more than likely the parents (mom & dad) have their own cell phone and will be taking it with them when they go out. If your teen doesn't have a cell phone make sure to have your teen communicate this with the parents so they aren't left babysitting without a phone. 

As a parent of a teen you might want to consider purchasing a pre-paid type of phone for your teen to take with them when they are babysitting. They are relatively cheap and can be "re-loaded" with time as it gets used. Always check to make sure the phone has adequate funding before a babysitting job.

click to buy

Activity Bag

When I first started babysitting I used to pack a bag to take with me filled with coloring books, crafts, games and other fun stuff to share with the kids I was babysitting. No matter what I brought the kids loved it because to them these games or crafts were something new to them - it wasn't just stuff from their own house. Kids love to explore new books, crafts and games and by bringing a few things from home I knew they would be engaged and entertained for quite some time while I was watching them.

Bored kids can sometimes equal trouble so help your teen out by suggesting they bring a bag of fun stuff with them on their next babysitting job. A trip to the Dollar Store or just rummaging through your own craft supplies to find fun projects or a board game to do is simple and will pay off in the long run.


click to buy

click to buy
Babysitting can be a fun job for your teen that teaches them so many great lifelong skills so help them start by first being prepared. How about you? Do you have any additional advice you can share to help other parents prepare their teens for babysitting? Share in the comments below!

mommysuburbia.blogspot.com

Tuesday, July 10, 2018

Top 5 Items to Watch For On Amazon Prime Day

mommysuburbia.blogspot.com


The 2018 Amazon Prime Day is just around the corner so what are you doing to get ready for this BIG event, no wait HOLIDAY? The 4th of July firework shows have fizzled out so it is now time for the Grand Finale of Summer - PRIME DAY!

This black Friday of summer starts July 16 at 3pm and ends 30 hours later on July 17. Set a reminder on Alexa so you don't miss out. 

If you are a tech lover or gadget guru this holiday is probably one of your two favorite days of the year, cyber Monday being the other. This year like previous years is expected to be spectacular.

The top two most popular items last year were none other than Amazon's own Amazon Echo and the Amazon Echo Dot. Amazon loves when their customers buy Amazon products so expect deep discounts once again on these types of products. Here are a few to keep your eye on this year:

This post contains affiliate links which means if you make a purchase I will receive a small commission at no additional cost to you. For more information see my Disclaimer page.

Amazon Echo Show
Love Alexa? The show brings her to a new level that includes showing you things like video flash briefings, Amazon Video content, see music lyrics, security cameras, photos, weather forecasts, to-do and shopping lists, browse and listen to Audible audiobooks, and more. All hands-free—just ask.

Fire HD Tablet

Tablets are so useful and make great gifts for any occasion. The reasonable price, especially on Prime Day is a big seller!


Amazon has certainly not forgotten about our kids - here is a kid friendly tablet that comes with a fix it or replace it promise!

Fire 7 Kids Edition $99.99


3. SanDisk 64GB Ultra Class Memory Card

Last year the SanDisk 32GB Ultra Class Memory Card was a surprise as a top seller. Look for another year of stellar Prime Day sales for this baby! As the sales of digital cameras, tablets, video recorders and other devises goes up the need for memory cards is a given. Need more storage on your current devices? Watch for good deals on like this on Prime Day!!

ScanDisk 64GB Ultra $21.81

4. Insta Pot Ultra 10-in-1 Multi Use Programmable Pressure Cooker

Need to get dinner on the table fast? Don't order out, instead use your Insta Pot to make a quick and healthy meal your whole family will love. The popularity of the Insta Pot has not wavered from previous years and due to the kick to eat healthy meals fast I don't imagine the popularity of this cook kitchen gadget will go down anytime soon. Don't have one? Watch for the Prime Day deals as they roll them out starting July 16.

Insta Pot


Instant Pot Ultra 6 Qt 10-in-1 Multi- Use Programmable Pressure Cooker, Slow Cooker, Rice Cooker, Yogurt Maker, Cake Maker, Egg Cooker, Sauté, Steamer, Warmer, and Sterilizer - $99.99 + free shipping.


5. Amazon Music Unlimited

Watch for the deep discount we are hoping for on Prime Day for this awesome service! Last year's deep discount resulted in a top ten of the most popular buys on Prime Day. 

Through this service you can stream and download songs, make and share play lists as well as listen to some of Amazon's pre-made options. 


Save this post to read again later! Don't forget to pin it!!
mommysuburbia.blogspot.com

Amazon Prime Day has something for everyone so don't forget to add a note on your calendar so you don't miss out.

What do you do if you don't have a Prime Account? You can always start a 30 day free trial membership and see if you like it!

Have your eye on something special to look for on Prime Day? I'd love to hear what deal you are looking for - leave a comment and share!

Friday, July 6, 2018

5 Easy Tips and Tricks to Teach Your Child How To Tell Time

mommysuburbia.blogspot.com


Do you know how to read an analog clock? Back in my day (I sound so old saying this don't I), schools, homes, businesses - everywhere - had analog clocks so schools taught students how to tell time on an analog clock. With the birth of digital clocks and now Alexa who needs to know how to read an analog clock anymore? Right!

Digital clocks are everywhere (and so is Alexa!). Analog clocks are like an endangered species slowly decreasing in numbers year after year. So why should you teach your child to read an analog clock? Do they even need to know how?

Some may argue that we are now living in a digital age and kids don't need to be taught outdated skills like reading an analog clock. Or maybe you could argue that this is a skill that they won't ever use once they are taught it therefore it is a waste of time (like algebra). I can see the truth in these arguments however I think there is an underlying value in teaching children how to read an analog clock.

I am a visual learner which means I learn best when I can SEE what is happening. Analog clocks SHOW the user how time is passing just by watching the hands move. Looking at a traditional clock face and figuring out the time requires an application of mathematical skills - skills our kids need to practice. In addition, it gives children a real relation to time that they don't get reading a digital clock. We have analog clocks in our house and as a parent I have on many occasions said to one of my kids "We will eat lunch at noon when the big and little hands are on the 12". The child can watch those clock hands move teaching them the concept of the passage of time - valuable time management skills!

Through watching the clock and feeling time pass your child experiences the "feel" of time passing. They start to know what 10 minutes "feels" like.

Time management is also a skill you can teach a child with an analog clock. Many times I put time limits on electronic devices and TV viewing. By using an analog clock they can SEE exactly how much time has passed and how much they have left by watching the hands of the clock. It is kind of hard to get a good grasp of how time passes with a digital clock since it just shows the exact current time.

As a home school mom I have had the opportunity to teach 3 of my 4 kids how to tell time on an analog clock (the youngest is going to learn this year). I have a few tips and tricks I've picked up along the way I want to share with you as you consider or begin teaching your child how to tell time on an analog clock.

This post contains affiliate links which means if you make a purchase I will receive a small commission at no additional cost to you. For more information see my Disclaimer page.

Tips & Tricks to Teach Telling Time on an Analog Clock

1. Skip counting by 5's is IMPORTANT!

We make this lesson a game that we practice over and over and over!! Sometimes I write numbers by 5's through 60 on sticky notes or small squares of paper and put them on the floor and have the child jump from paper to paper following the trail and saying the numbers out loud (5, 10, 15...). I've also put the numbered papers down our stairway so they could practice skip counting by 5's as they go down (or up) the steps. Hop scotch skip counting by 5's is also super fun too!

2. Teach your child what time FEELS like:

How long is a second, a minute 5 minutes, 10 minutes, 1 hour? Until a child actually experiences (over and over) what these increments of time feel like then they won't be able to grasp what seconds, minutes and hours are. Telling your child what each hand on an analog clock is called then playing some games to help them remember and grasp the concept of time is a great way to reinforce what you just taught.

I start out with seconds. I have my child hold their breath and I count how many seconds they can hold it all while having them watch the second hand on the analog clock tick along. Since I know they can't hold their breath for very long I use a different game to teach minutes. I have them do a fun trick (stand on one foot, hold an ice cube, jump up and down) for one minute. Then we discuss the difference in how time feels comparing seconds and minutes.

Baking cookies together is a super way to teach a child about time. Having them watch the minutes tick by while their favorite cookies bake is very effective (and rewarding) tool.

3. Make your own clocks

Once my child starts to grasp the concept of time and understands the basics I love to pull out the craft supplies and make homemade clocks. Simple supplies like paper plates, brass fasteners and markers/crayons are all you really need. I found this great tutorial at Frugal Fun 4 Boys  I think you might enjoy!

from FrugalFun4Boys.com


4. Practice New Skills All The TIME

When my child seems reasonably comfortable using the analog clock we made or the plastic clock I have as a teaching tool it is time for them to move to the next level. (affiliate link)
Purchase on Amazon HERE


What is the next level you ask? I give my kid their very own analog wrist watch and let them pick out a cool analog wall clock for their room. Below is a big collection of wall clocks I found and wanted to share with you (there are a few fun digital ones in the mix too but mostly analog). (affiliate link)

buy on Amazon
Once they have their own watch I just start asking them all of the time "what time is it". This is great practice and since they are using their own watch to tell time they don't mind me asking over and over again.

5. Introduce Child to Advanced Time Vocabulary like half past, quarter till, quarter after and on the hour...

This is the last skill I teach my children and with an analog clock I think it just makes way more sense in their brains than if I used a digital clock to teach this exercise. I usually whip out the ole' plastic teaching clock and move the minute and hour hands around to show them what each term means. After they see me do it a few times I have them practice using the clock as I say a time like "quarter after 3" or "half past 5". This is a difficult concept to grasp and will take a lot of practice! Hang in there!!

Cool Collection of Clocks for Kids

Here is that cool collection of clocks I mentioned earlier that I wanted to share with you. My favorite is the sock money clock because it reminds me of my niece who loves monkeys! If you see one you love click on it and the link will take you to the site where you can purchase it. (affiliate link)


Connect With Me

What are some tips & tricks you use to teach your child to tell time? Do you still teach them how to read analog clocks? Leave a comment with your ideas and advice.

Tuesday, July 3, 2018

How to Create A Family Journal and Why You Should Start Now

mommysuburbia.blogspot.com

This post contains affiliate links which means if you make a purchase I may receive a small commission at no additional cost to you. See my disclaimer page for more information.

Do you ever find yourself saying "Oh, I should write that down!" after one of your kids says something funny, wacky or inspiring. I know I say this all the time, but regrettably I never end up writing them down. These are memories and I don't want to forget them!

Here are some funny things my kids have said to me or my hubby or done over the years (that I do remember) that I thought you would enjoy reading:

How my son expressed his love to me when he was 5:  "Mom, I love you more than a dump truck"
What my son age 4 says when he is inspired:  "I have a good un-dea..." (idea)
My middle daughter just tells it like it is: "Dad, you have the worst breath ever"
The time my son crawled into our bed just to snuggle one last time with us before he fell asleep. 
The first time I took my son camping and he said all weekend "this is the best time ever" 
My youngest son refused to eat a grilled cheese sandwich because he said "I'm a boy I don't want a "girl cheese" sandwich." 

These are just precious to me and I don't want to forget these great memories and events. So writing them down is exactly what I started doing!

All of them! - In ONE place.

No more sticky notes, napkins, paper plates or scrap pieces of paper, which all end up getting lost somewhere with these little gems written on them.

Instead I started a family journal that any of us can use to write down quirky things or great memories. I can just imagine 20 years from now flipping through these journals with my grown children and possibly grandchildren reminiscing about the good old days what was said by my children at the time. Pure treasure!

I found these wonderful journals to use for our family journal and I wanted to share where I found them with you. This journal is a printable created by Sunny Day Family and it is amazing!

Click To Learn More

My favorite thing about this journal is that I can print as many pages as I want from my own home! The journal contains 16 pages total all undated. The blank daily and weekly pages are a great place to write down those funny things your kids say or an activity you did together. I'm not a traditional journaler so what appeals to me about this journal is that it isn't a traditional style journal. I love just quickly jotting down memories and moving onto the next task on my to-do list!

Here is what I wrote yesterday in our family journal:
7/2 - Taught "J" how to dive off the diving board! He was all smiles.
Simple right! No need to write line after line of text to capture this simple memory!!

In addition to the undated pages I just mentioned, this pack also has a monthly recap pages. On these monthly you can record milestones, holidays and a favorite moment(s) from the month. Isn't that so COOL!!

Can't remember whose side of the family you celebrated Thanksgiving with last year? No problem - check your family journal monthly recap page where you wrote down how special the day was at Papa and Nana's house for Thanksgiving in 2017!

The really nice thing about this journal is that you don't have to wait until January (start of a new year) to begin! Because the daily/weekly pages are blank you can start anytime. You can purchase this printable from Sunny Day Family HERE. (affiliate link).

Pulling It All Together

After you purchase your printable from Sunny Day Family I recommend you print out the pages you want on card stock or some other sturdy paper. If you have a 3 ring binder all you have to do is hole punch the printed journal pages and insert them into the binder. Another option would be to hole punch the journal in 3-5 places down the left side and secure with brass fasteners. If you want to get really fancy you could purchase this sweet little comb punch binding machine and make your journal look professional! (affiliate link) It's a small investment but something you could re-use over and over.

purchase HERE

What are some of your everyday memories? I'd love to hear about them! Leave a comment below and let me know.