Friday, September 28, 2018

How Long Does It Takes Food To Spoil? Get The Answers In This Awesome Food Safety Guide


If you’re a busy mom or have a big family like me you might find yourself buying extra food to store in the fridge, freezer, or pantry to keep your kids tummies full and your family happy. But it’s easy for those half eaten cartons of leftover foods to get pushed to the back of the fridge or pantry and forgotten about. 

Here is something we are all guilty of - leaving food out too long and not refrigerating it in a timely manner! I still get teary eyed when I think of a time I made a pork tenderloin for dinner and left the unplugged crockpot out on the counter cool for a bit before sticking it in the fridge. Well needless to say I got completely distracted, left the poor roast out all night and came down to the kitchen in the morning to find the crock pot just where I left it - roast and all! The budget conscience side of me tried to convince the rational safety conscience side that the roast was fine and I should just pop it in the fridge and pretend nothing happened. Thankfully I listened to the more responsible voice and tossed the whole thing out (while wiping tears). Food poisoning is nothing to mess with especially if my kids were to get sick. I would never forgive myself. 

I know this was an extreme case but don't you ever wonder how long food is safe sitting out? Even food that has been in the fridge for a bit can make you ask yourself the same question - is it still okay to eat? What's even more confusing is that the not all food has the same lifespan  So before you choose to eat it or toss it make sure you know the proper lifespan of your food - both fresh and cooked.


Luckily, this helpful guide by Kitchen Cabinet Kings clears up any confusion with an average lifespan for common household foods. It’s broken down by freezer, refrigerator, and pantry and every typical item you’d take home in your grocery haul is included. The guide can also be downloaded and printed out so you can keep it close by as a reference.

You should consider adding a simple organizational system to your groceries, like food labels or a calendar and chart to keep track of when you purchased something or when it’s set to spoil. Or if this is too much work just grab a Sharpie marker and write the date of purchase on your food as you put it away after a grocery shopping trip.

This simple extra little step can help you reduce throwing away food, save some bucks by not doing so, and most importantly avoid getting you or the little ones sick from eating food that’s gone bad

The visual below is a great reference next time you’re wondering about the shelf life of your favorite food!  To get a free download click HERE.

via: Kitchen Cabinet Kings

This post contains affiliate links which means that if you make a purchase I may receive a small commission at no additional cost to you.

Here are some handy items to help you keep your food safe!

food label stickers (Amazon)


label maker (Target)

food labels


food thermometer (Target)


For awesome kitchen guides and a free kitchen design service please visit my friends at Kitchen Cabinet Kings. Design a kitchen that is functional, beautiful and affordable. A well functioning kitchen helps you store food safely and efficiently!


Tuesday, September 18, 2018

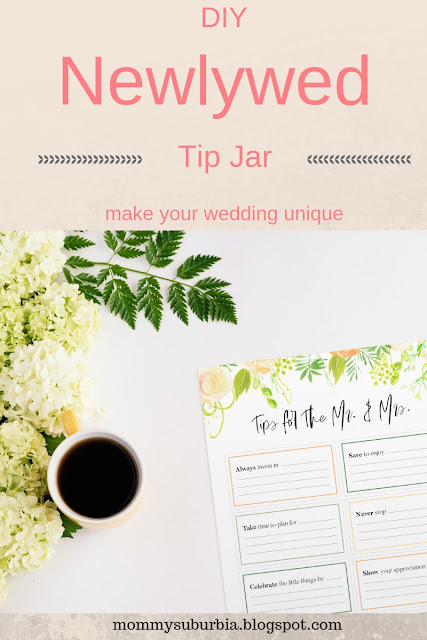
Make Your Wedding Day Unique With DIY Newlywed Tip Jars

mommysuburbia.blogspot.com


DIY Trendy Newlywed Tip Jars


Weddings are a special time to come together and celebrate your love with family and friends. You have planned out this day for a long time, and want to have a special memento from each guest to look back on later. That's why Personal Creations has put together a FREE PRINTABLE titled Newlywed Tips that guests can fill out before or after the ceremony.

If you haven't heard of this tending DIY idea, a newlywed tip jar is a unique way to allow guests the opportunity to offer advice to the newlyweds Simply print out the tip ideas, decorate a mason jar for guests to place the completed printables and set on a table at your wedding. Add a few pens for guests to use, and let their creativity begin! From managing finances to navigating the first year of marriage, getting insight from loved ones who have gone through it themselves can be extremely helpful.

Not only is this alternative guest book budget-friendly, the tips are unique and useful for years to come. Once they have written their insights on the printables, just place them in the jar folded. Then when the two of you are looking for some real-life advice down the road, you'll have a plethora of wisdom from loved ones!

Here is what the free Newlywed Tip Jar Printables look like! Pretty amazing, right? From words of wisdom to date night tips, these printables are the perfect way to leave your favorite couple with a keepsake they can enjoy long after their big day- customize them yourself and add to the wedding tip jar!


Words of Wisdom:


printable HERE

Date Night Tips:


printable HERE

Tips for the Mr. & Mrs

printable HERE

If you haven't heard of Personal Creations you need to check out their website NOW! They have the most amazing gifts for all occasions that can be personalized. Here is my favorite personalized wedding gift:


find it HERE


This post contains affiliate links which means if you make a purchase I may receive a small commission at no additional cost to you. For more information please read my Disclaimer page.


Budget Friendly Bridal Shower Ideas


We all know that weddings are expensive but the cost of throwing a bridal shower can drain your bank account quickly too! Don't worry I have put together some great ideas to help you save money without sacrificing quality when throwing a bridal shower. For more awesome budget friendly wedding and wedding shower ideas read 10 Ways To Throw a Bridal Shower That Won't Break The Bank.

Wednesday, September 12, 2018

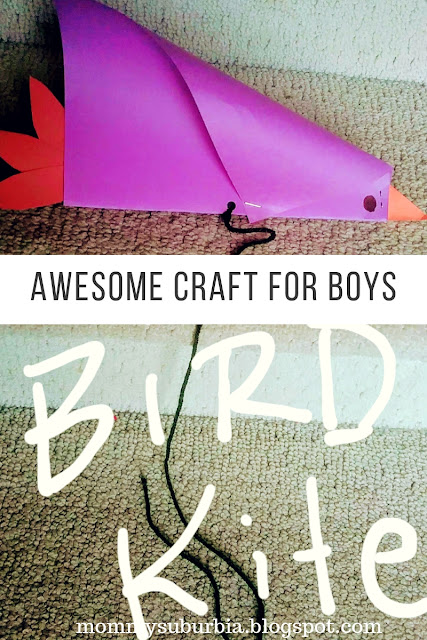
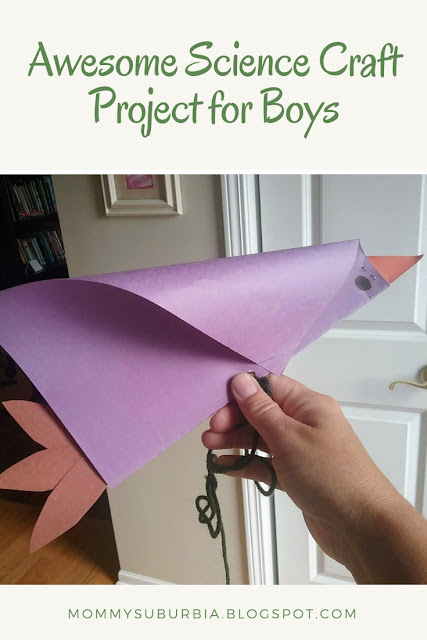
Awesome Science Craft Project For Boys - The Bird Kite

This year my 9 year old son is studying science using the Apologia Young Explorers Series Flying Creatures of the Fifth Day book. We are just getting started and already just after a few pages the creative juices started flowing. The book is full of great experiments, which is my son's favorite part about science but I wanted to throw in a simple arts & craft project to go along with the science theme.

mommysuburbia.blogspot.com


In an effort to kill two birds with one stone (couldn't help myself!) the idea of making kites that look like birds began to form in my head. I wanted to incorporate a craft that used some of the science he had studied. The first chapter explains how the shape of a bird's wings contributes to its ability to fly. We had a lot of great discussion about this and how the study of birds has helped humans learn to fly airplanes.

I found a great tutorial on Krokotak and we went to town making a flock of seagulls....kites (ok, I'm sorry, it just slipped out!). This project required a minimal amount of supplies that you probably already have handy which makes it so easy to pull together last minute.

Now because my youngest, who just started kindergarten wanted to participate in the crafting I used this time to teach shapes, follow directions and measure the length of yarn. Cutting skills, coloring, folding and measuring are great skills for your little one to practice.

Here is what you need to make your own bird kite (a list of where I got my supplies is at the end of the post)

mommysuburbia.blogspot.com

KITE INSTRUCTIONS:

8 1/2 x 11 piece of construction paper (white copy paper works fine too)
1 small scrap of orange paper cut into a triangle for the beak
3-4 small scraps of other colored paper for tail feathers (approximately 2" x 3")
scissors
stapler & staples
glue stick
18"- 24" piece of yarn
black crayon or marker to draw on eyes
hold punch

Fold the 8 1/2  x 11 in half matching the short sides together. The fold becomes the belly of the bird.

Next take the two of the corners at the top of the folded paper and bend them backwards towards the fold. As you fold them back until the tips of the paper meet at the fold. Staple the folded back tips right at the fold (belly of the bird body) to make the wings.

Next make a hole with the hole punch just behind where you stapled the wing down. Thread the yarn through the hole and tie it securely to the belly of the bird.

Now take the triangle shaped piece of orange paper and put a little glue on both sides of one of the triangle bases. Slip the glued edges into the narrow end of the folded paper where the bird's head is. It should now start to look like a bird with a beak.

With the marker draw eyes on both sides of the head just behind where you glued the beak.

Lastly, cute 3-4 long feather shapes from the small scraps of colored paper and glue the ends together one on top of the other. Put a dab of glue along both outsides of the stack of feathers and insert them at the back of the bird inside the fold to give your bird tail feathers.

Take the completed kite outside (or in a big open space inside) and gently pull the kite along with the yarn. The bird kite should fly even if there isn't any wind. Shorten the yarn to make the flying bird kite even easier to handle for younger children.

For the full video from Krokotak click here:

Of course this awesome craft project isn't limited to just boys! Girls are welcome to make these kites too. I just happened to make these fun kites with my two boys and thought it would be fun to write a post specifically for boys.

Supplies Found Here:


This post contains affiliate links which means if you make a purchase I may receive a small commission at no additional cost to you. For more information please read my Disclaimer page.

Here are some of the supplies we used to make our kites:

Walmart


hole puncher from Walmart

yarn from Amazon

via: Amazon


Thursday, September 6, 2018

Easy Homemade Caramel Corn & Kettle Corn Recipes


Popcorn two easy ways! Caramel corn & Kettle corn recipes you can make right in the comfort of your own home. Gluten-free and full of great flavor make these two recipes so good!


I have always loved popcorn. I think my love for it is genetic. My dad has consumed mass quantities of popcorn on a regular basis over his lifetime! He loves to eat air-popped, lightly salted popcorn while watching a sports game. 

This post contains affiliate links which means if you click on a link and make a purchase I may receive a small commission at no additional cost to you. For more information please see my Disclaimer page. Thanks!

When it isn't doused in butter, popcorn can really be a healthy and satisfying snack.

When I need something sweet to snack on I love to make a batch of homemade kettle corn or homemade caramel corn. It is a sweet treat that I like to indulge in for special occasions...or anytime really. 

If you are intimidated about making homemade kettle corn or caramel corn you don't have to be any longer! My caramel corn and kettle corn recipes are super simple, quick, and DELICIOUS!  


Ingredients for Caramel:

1/4 tsp. Salt
1/8 tsp. Baking soda
1/8 tsp. Vanilla extract


How To Make The Best Caramel Corn:
  • Preheat your oven to 315 degrees Fahrenheit. 
  • Pop your popcorn either in an air popper or in a traditional popcorn popper. Make 6-8 cups of popped popcorn then pour the popped popcorn in a large roasting pan and set aside. 
  • In a medium size saucepan mix the following ingredients (below) - except for the baking soda and vanilla extract over medium high heat, stirring constantly.
  • Let boil for five minutes continuing to stir. Turn off heat and add the vanilla and baking soda stirring to combine. 
  • Pour the caramel mixture over the popcorn in the roasting pan and stir to coat evenly. Put the roasting pan with the caramel covered popcorn into the oven and bake for 10 minutes.
  • Stir the caramel corn and bake an additional five minutes. 
  • After it is done baking scoop the caramel corn into a large bowl (or two) and stir occasionally to break up the chunks as it cools.
  • Let the caramel corn cool for about 10 minutes and then enjoy!

Pour the cooled caramel corn into your favorite bowl and prepare to dig in! Be careful - it is very easy to eat it all in one sitting, I may or may not be speaking from experience!

Here is the printable recipe card for this amazing recipe!!


Let's try my homemade kettle corn recipe. This recipe requires the popcorn to be made in a traditional oil popcorn machine. If you don't have one (you should get one) you can use a large pot with a lid to make the popcorn in instead. 

* My all-time favorite popcorn popper is the Whirley Popper!! Trust me when I tell you this is the best because I have tried tons of different kinds of popcorn poppers and this is by far the best. 


Homemade Kettle Corn Recipe

  • Pour 2-3 tablespoons of vegetable oil in the popcorn popper or pot along with 2/3 cup of popcorn kernels. ( I prefer yellow popcorn versus white but use whatever you like best. ) 

  • Next, sprinkle  2-3 tablespoons of granulated sugar (white sugar) over the un-popped kernels. 

  • Over medium-high heat using a Whirley popper popcorn machine begin to pop your popcorn or if you are making it in a pot on the stove, put the lid on and turn the heat to medium-high. Shake the pot every few seconds to keep the kernels moving.

  • Once the popping stops remove the pot from the stove or turn off your popcorn machine and pour the popcorn into a large bowl. Lightly salt the kettle corn if you desire. 


Here is a printable for the Kettle Corn Recipe:


Since this post is all about popcorn I thought I'd share with you the tools I use to make the best popcorn. 

My favorite traditional popcorn maker is the Whirley Popper Popcorn Machine. It is the most amazing popcorn popper. This popper can make 6 quarts of popped popcorn in 3 minutes! (I timed it and sure enough it only takes 3 minutes). You can make the kettle corn recipe (above) right in this popper too!


Amazon


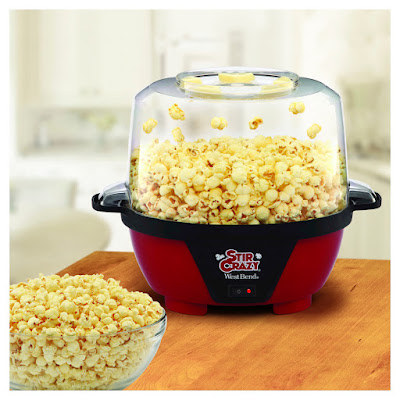
Since I am a popcorn junkie it would be a big tragedy if my popper broke and I was left popcorn-less! To make sure this never happens I keep a backup popcorn popper.  My backup popper is this cute air popper machine from West Bend called the Stir Crazy Popcorn Maker.


click HERE


If you are really in a bind and don't have access to a popcorn machine you can just use what you have on hand like a large stockpot with a lid. This method too can make a pretty tasty batch of popcorn. I got my large stock pot on Amazon.


I'm not overly picky about popcorn kernels however I do prefer yellow popcorn over white. I think yellow popcorn is bigger and has that fluffy appearance whereas white looks small and crumbles easier. White popcorn is the perfect kind to use when making popcorn balls though because of its size.

Did you know that there are blue popcorn kernels? The blue (or purple) corn tastes similar to standard popcorn and is fluffy with very little crunch. Some would say it has a sweeter taste with a milder popcorn flavor. I recommend this Amish Country popcorn that comes in a 3lbs bag. If you have never had it you should give it a try!


On a side note - did you know Home Depot sells popcorn? Weird (but totally awesome) right? I discovered this the other day when my husband and I were there shopping for some plumbing parts. I love wandering around the store just looking at things! That is when I discovered popcorn! Here is one of my favorites - a 4 lb. Yellow Popcorn in a plastic container with a screw-on lid! Keeps it fresh and 4 lbs should last a little while.


Other Popcorn Toppings

Since I am a huge fan of popcorn it won't surprise you that I've tried a variety of different toppings as well.  Right now my favorite flavors are white cheddar, cheddar and ranch. I've lost count as to the number of times I've ordered these flavors on Amazon but I haven't tired of them yet. 

What is your favorite popcorn topping? The fact that you can put just about anything on popcorn as a topping makes this treat so much fun! 

Enjoy your popcorn, I know I will.