Wednesday, June 24, 2020

10 Must Have Sewing Supplies For The Beginner

Having the right sewing tools is essential for anyone who loves to sew or quilt. For the beginner, having some basic sewing tools not only helps you learn faster but it can be the key to help keep this hobby fun and not frustrating. 


Today, I want to introduce you to my top 10 favorite sewing tools and supplies that I use almost every time I sew. Of course there are tons of additional sewing tools available, but this list focuses just on the basic tools a beginner would need when just starting out. As your skills grow and you gain confidence you can begin to add new sewing tools and notions to your inventory. 

Oh, by the way I am going to assume that you already have a sewing machine so I won't include that on my list of tools.

10 Must Have Sewing Supplies For The Beginner


#1 Sewing Scissors

A good quality, sharp pair of scissors is a must have for anyone who sews. Having a basic pair helps you cut through fabric and other notions easily. My personal favorite are these Gingher dressmaker's shears that I got from my in-laws for Christmas. I love the weight of them in my hand and how they don't rub or slip when I cut fabric.

Amazon.com

Another type of scissors that are handy to have when you are just starting out are pinking shears. Pinking shears cut small peaked triangles into the edge of the fabric as you cut so that it doesn't fray as easily. 


#2 Pins & Pin Cushion


When I first started out on my sewing adventure I found it frustrating when the fabric I was sewing would shift a little bit causing seams to get crooked and look wonky. I quickly realized how useful pins were in helping to hold the fabric in place while sewing. Pins were a sewing game changer for me! Now, I have a variety of pins in different lengths since certain projects may require a longer pin or a shorter pin.  Pins are an inexpensive sewing tool that are a must have for any level sewing enthusiast. 

If you are using pins, you are going to need a pin cushion to stick your pins into so they don't end up on the floor where they can be stepped on! (I may or may not be speaking from experience, OUCH!). There are so many different options, but I find the best pin cushion is the one you will actually use! This might sound strange but if you have a pin cushion that gets in the way while you are sewing you will be less likely to use it increasing the risk for pins on the floor. 


Whether you are sewing with a machine or by hand it is very important to have good quality sewing needles. 

Did you know that sewing needles are not all the same? Most needles for sewing machines have a color coding or a number coding on the needles to help you determine the best needle to use based on the fabric you are sewing. Sewing a thick fabric like duckcloth or denim is not the same as sewing cotton jersey! If you want your project to turn out and look great make sure you use the proper needle

#4 Rotary Cutter & Self Healing Cutting Mat

If you are new to the whole sewing thing you may have read this one and have no idea what I'm talking about! That's OK, I will tell you all about these amazing tools! Technically these are two separate tools but since they are used together I've combined them into one tool must have category. 

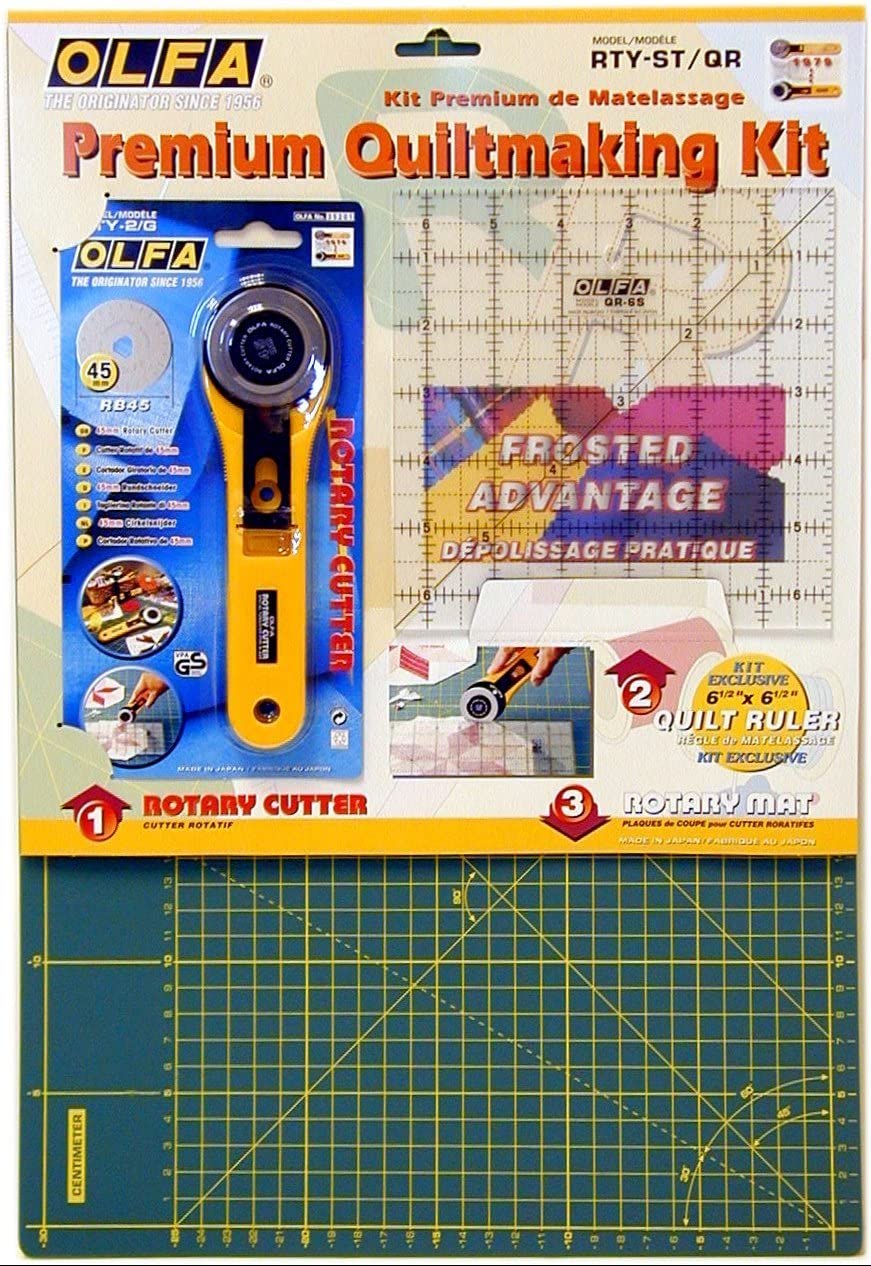
A rotary cutter is used to cut very precise straight cuts through fabric. Unlike scissors, a rotary cutter gives straight smooth cut lines that are very difficult to do with scissors. A rotary cutter has a circular blade that fits onto a straight handle. The blade rotates as you roll it over the fabric to make a cut. The blades are super sharp so be careful when using one! 

To keep the blade on your rotary cutter in top cutting condition it is important to make sure you use a self healing mat under the fabric you are cutting. The self healing mat does not dull or warp your blade as you cut making it the perfect surface to cut on. Most self healing mats have measurement lines printed on them so cutting an exact 5" square, or any other length is easy and fast. Self healing cutting mats come in a variety of sizes too!  

The reason why the mat is called self healing is because cut lines from the rotary cutter are not permanent. Self healing mats are made from tiny separate pieces that are pressed together to create the solid mat's cutting surface. When you cut on the mat the blade of your rotary cutter actually goes between the tiny independent pieces, separating them and not cutting into the surface like a traditional cutting board. 


Depending on the type of project you are working on the type of ruler you will need might vary. Because of this I'm going to highlight two separate ruler tools here.


The first, a flexible fabric ruler is very useful when sewing clothing. I use mine all the time when measuring waistlines, bustlines and hemlines. Since the ruler is flexible I can easily wrap it around my model's body to get a more precise measurement. 

The other ruler that I love to use when I need a straight edge to guide my rotary cutter when cutting out fabric for a quilt is an acrylic ruler. Acrylic rulers come in a variety of sizes and like a self healing mat, have markings to help you measure accurately. Acrylic rulers also make a great guide to run your rotary cutter along the edge to ensure a straight cut. These types of rulers are also called a quilter's ruler and are made from transparent acrylic. 


Whether you are new to sewing or a seasoned pro using a seam ripper to tear out or fix mistakes is a handy tool. This sharp tool makes cutting through those small sewn seams easy and quick. Forget scissors and the risk of cutting the fabric, a seam ripper is all you need.

#7 Thread

Like needles, sewing thread comes in a variety of options. Using the right thread can make or break your sewing project. For example, using thick upholstery fabric on a sheer fabric is a recipe for disaster. Depending on the type of fabric you are sewing you will want to make sure you use the right thread. 

Thread is ranked by a number system. A high number indicates a light/fine thread. Medium weight thread has a measurement of 50 weight. It is important to match the thread weight to the fabric weight for each project you sew. 


Also, try to match the thread fiber to the fabric fiber. If you are sewing with cotton use cotton thread but if you are sewing with polyester or man made fiber use polyester thread. You may not notice a difference at first if you use polyester thread on cotton fabric but over time the stronger polyester thread may cause the weaker cotton fabric's fibers to break or tear. For any quilting projects it is important to use thread labeled "machine quilting / hand quilting" since this type of thread is made especially for quilting projects. 

#8 Iron

This one might sound strange but when I first started out sewing I realized how amazing ironing my seams made my project look. Even today I use my iron to press down seams before I topstitch so that there is less chance of me messing it up! 

An iron with multiple settings for various fabrics like cotton, polyester, linen and more delicate fabrics is helpful. I also love using the steam function on my iron to quickly press out any wrinkles before I cut the fabric to size. 

#9 Sewing Machine Oil and Cleaning Tools


I learned my lesson the hard way by not regularly cleaning and oiling my machine. Fortunately a local sewing shop fixed the mess, but I was without a machine halfway through a project. There are lots of great YouTube videos out there to teach and show you how to clean and oil your machine. Don't be scared or intimidated, you can do this and save your machine! 

It is amazing how much lint collects inside of a sewing machine or under the feed dogs. Investing in the right cleaning tools will help ensure your machine stays in top working order. 

#10 Extra Bobbins

I guarantee after you really get into the swing of sewing there will come a time when right in the middle of a project you run out of bobbin thread. Of course you don't want to lose your sewing rhythm so having some extra bobbins filled with the thread you are using for your project is very helpful. Bobbins are pretty inexpensive and usually come several to a  pack. It is worth the little bit of money to buy some extra bobbins and have the thread wound on them ready to go. 

When you have the right tools sewing can be a very relaxing and gratifying hobby. Make sure when you are ready to give it a try that you have all of the essential tools for success. It is worth the investment!

What are you currently sewing? Share you favorite tools, current projects and other ideas with me in the comments.


Make Your First Rag Strip Quilt


Not sure what to sew as your first project? Let me help you out with a super simple, easy to follow sewing project that is perfect for a beginner like yourself. A rag quilt is very forgiving and always turns out looking amazing! I put together a tutorial for a rag strip quilt that I made as a baby gift that you can check out HERE. The tutorial has pictures and instructions to follow along with as you make your first rag strip quilt. 

Tuesday, June 16, 2020

How To Make A DIY Tabletop Hook & Ring Bimini Game

Looking for a fun and simple woodworking project to do with your kids? A tabletop hook and ring game is an easy project you can make in just about an hour with just a few handyman woodworking supplies. 


This post contains affiliate links which means if you click on a link and make a purchase I may receive a small commission at no additional cost to you. For more information please see my Disclaimer page. Thanks!

A few years ago while on vacation we were at a seafood restaurant waiting to be seated for dinner. The restaurant had a great outdoor lounge area which included a bunch of fun yard games to keep you busy as you waited for your table. We had played most of the other games before but the hook and ring toss, a.k.a. The Bimini game was new to us. We were "hooked" right away. 

It is a simple game that is really challenging! At the restaurant one of the wooden lamp posts on the perimeter of the lounge area had the hook attached to it at about 4 feet off the ground. A 3"to 4" piece of skinny lumber was attached to the lamp post so that it stuck out perpendicular to the lamp post at about 7 feet off the ground. We will call this the "arm". A few inches from the end of the "arm" was an eye screw attached to the underside of the arm with a long piece of string tied to it and then a thin metal ring tied to the end of the string. The point of the game was to swing the metal ring and get it to catch on the hook. 

Simple, right? But so frustrating and FUN!

Of course I wanted to get this game for our house but I really didn't want a full size (outdoor only) Bimini hook & ring game. What I needed was a tabletop one that was portable and could be played inside or outside and didn't take up a lot of space. That's when I knew I had to make one for our home! 

This is a great project to do with kids so of course I had my boys help build our tabletop hook & ring games. Yes, I said GAMES because there is no way we could just make one of these fun games! We made two and are currently making our third to give away as a birthday present to a family member. 

If you aren't a handy-mom or maybe you're a little scared to tackle a woodworking project don't be - this one is easy and doesn't require any previous building skills. You can do this, seriously - you CAN.

Let's get building shall we? Here is the supply and tool list. If you don't have all of the tools in your own tool box consider borrowing from a friend or neighbor or buy your own now since you are going to want to make more than one anyway.

Also, many hardware stores like Lowe's or Home Depot will cut the wood in the store down to the size you need! The wood furring strips and pine boards are located in the lumber area of the hardware store. 


Tabletop Hook & Ring Bimini Game Tutorial


Supplies 

1" x 4" x 8" - pine board  (the base)
1" x 2" x 8" - wood furring strip 
3" nails (I used 4 total) or screws
metal ring (1" diameter)
sandpaper (80-120 grit)
cordless drill & 3/8" drill bit (optional) for drilling pilot holes

Tutorial

#1 CUT & SAND

BASE: Measure and cut a 13" long piece from the pine board base wood. 

ARM & POST: Measure and cut from the furring strip one piece that is 9" long for the "arm" and a second piece cut 12" long to form the "post"

In total you will have three pieces of wood cut down to size when you are done sawing. If your hardware store cut the wood to size, start by sanding all pieces thoroughly to ensure no rough spots. If you need to cut the wood yourself, measure to the proper length and then use a hand saw to cut the pieces to the right length. Sand all the cut pieces.


Tip - Place the board you are cutting on top of another piece of lumber so that the mark you drew to measure the piece slightly hangs over the board on the bottom. This will ensure that when you are sawing the wood you don't accidentally run the saw blade into your floor while cutting. I'm right handed so I like to press my knee on the left section of the wood I"m cutting and then saw with my right hand. 

#2 ATTACH POST TO BASE

Take your 13"x 4" base piece and make a light mark with pencil 1" in lengthwise. This is where you will attach the post piece to the base. Place the post piece up vertically on the base board and then draw a light pencil mark around the arm onto the base. Next use your pencil to place two small dots in the approximately 1/2" from each edge lengthwise on center of the traced markings. This is where you will be drilling your pilot holes. (see picture above)

To drill your pilot holes use a 3/8" bit in your drill, stack your baseboard on top of a second piece of wood with the dot marks slightly hanging over and then drill through each hole. Insert nails through each pilot hole and then line up the wood post and press the nail ends into the wood to create indent marks. Drill two pilot holes into the bottom end of the post. 

Apply wood glue to the end of the post piece, line it up with the base and nail it in place. The wood glue will bond tightly to ensure the post is firmly attached to the base. If you choose to use screws, attach the post to the base in the same way but use your power drill to carefully screw the post to the base. 

Tip - The pilot holes will help prevent the wood from splitting when you are nailing or screwing into it. 

#3 ATTACH ARM TO POST

Now we are going to attach the arm piece to the post piece. Place the arm piece on top of the post piece making sure the arm end is flush with the post. Use your pencil on the underside of the arm to mark a line across the arm to measure the width of the post. Basically you should have a line on the arm board that reflects the width of the post board. With your pencil place two small dot marks approximately 1/2" from each edge lengthwise on center within the traced area. Again we are going to drill two pilot holes.

After you drill the pilot holes, put nails in each hole and position the arm over the top of the base and firmly press the ends of the nails into the top of the post board to create two indent marks. Drill pilot holes into each of the indented marks with your drill.  Place more wood glue on the top of the post and then attach the arm by nailing the nails into the pilot holes from the top of the arm into the top of the post. 


Tip - Wood glue takes 30 minutes to an hour to dry if you apply it to an unstressed joint. 

#4 FINISHING TOUCHES

Once the wood glue is dry it is time to attach the eye screw, hook, string and ring to finish the project. To position the eye screw properly flip the game upside down so the arm piece is lying flush against the floor. From the end of the arm piece measure 1" and make a small mark in the center of the board at this measurement. Begin screwing the eye screw into the underside of the arm.

Flip the game right side up and then measure 3" up from the point on the inside of the post where the base and post intersect. In the center of the post at this 3" mark begin screwing in the hook. Once the hook is attached make sure the hook is facing up towards the arm. 

Cut a piece of string 12" long and tie one end to the ring trimming any excess string. Next insert the opposite side of the string through the eye screw opening. Before securely tying the string onto the eye hook, attach the ring to the hook making sure there is a slight amount of slack in the string. Once you have adjusted the string to the proper length so the ring reaches the hook, finish tying the string onto the eye screw and trim off any extra string. 


Since this game is going to be used on your tabletop it might be a good idea to add a few felt furniture pads to the bottom of the base so that the game doesn't scratch the surface of your table. This step is optional however if you value a nice unscratched table top you might not want to skip this step. 

My boys wanted to paint their Bimini games to really personalize them. They just used acrylic paint and went to town customizing the color of their games. 

That's it! You are done and now you have your very own hook & ring game. Wasn't this so much fun? These games would make a great gift for Christmas, birthdays or even Father's Day/Mother's Day. 


HOW TO PLAY THE HOOK & RING GAME

This game can be played with an unlimited number of players. Just make sure everyone gets the same number of ring swings.

Game Rules

Version 1: First player gets 10 ring swings. Player scores 1 point if the ring touches the hook, 2 points if a double touch, 5 points for getting the ring onto the hook. After 10 ring swings the next player gets a turn. Play up to 50 points. 

Version 2: First player gets 10 ring swings. 1 point is awarded each time a player gets the ring to stick onto the hook. After the first player takes 10 ring swings the next player gets a turn. First player up to 11 or 21 points wins.