Showing posts with label school. Show all posts

Thursday, May 11, 2023

Amazing & Fun Science Experiments For Kids To Do This Summer

Are you looking for ways to get your kids excited about science? Sometimes all you need is a little extra help and a few amazing and fun experiments. 


One of the easiest, low-prep ways to accomplish this is by implementing your science lessons with a monthly science kit. These monthly kits contain ALL of the supplies and instructions so you don't have to do any special shopping or prepping beforehand. 

Disclosure: I am an affiliate for the Generation Genius science subscription kit and recently they sent me a kit to try out in our homeschool. Today I'm going to share with you what my 10-year-old 4th grader learned, what experiments he did, and his overall like/dislike of this kit. I did not receive any compensation, besides a free kit, and all opinions are mine.


MONTHLY SUBSCRIPTION BOXES WE HAVE TRIED IN THE PAST:

We have tried many different subscription kits over the years in our homeschool. In many cases, the kits have been a great addition to our school days by adding a little excitement or newness to our daily routine. There have been some monthly kits we really loved and some that were just OK. Here is a list of the kits we have used so far:

  • Kiwi Co - Kiwi Crate
  • Kiwi Co - Doodle Crate
  • Kiwi Co - Tinker Crate
  • Kiwi Co - Maker Crate
  • Kiwi Co - Eureka Crate
  • Let's Make Art - Watercolor Painting
  • Let's Make Art - Mixed Media
  • Annie's Kit Club - Young Woodworkers Kit
  • Raddish Kids Cooking Kit
Whew, that's a lot of kits! 

When the Generation Genius kit arrived I let my 10-year-old 4th grade son take a crack at it! I have to admit that at first, he was not very excited about a science kit because he thought it would be "baby-ish" and boring. Even though these were his initial feelings he still decided to open up the box and try it. 

Keep Nature Wild
After opening the box we found three separate and sealed individual experiments inside. Each experiment comes nicely labeled and ready to be used with all the supplies you need (except for tap water). 

Since my son is only 10 years old and still needs some help and adult supervision I fully expected to work on the kit alongside him. We pulled out experiment #1, cut open the bag, and got started. 


GETTING STARTED WITH THE GENERATION GENIUS SCIENCE KIT


I expected to find an instruction sheet inside the first bag like other kits we've done but there wasn't anything like that in the kit. After searching the rest of the box and its contents and not finding any instruction sheets I decided to check out the kit website to look for instructions. After a few minutes of searching, I discovered that instead of printed-out instructions Generation Genius uses video instructions taught by Dr. Jeff. 

After getting the video ready to play for experiment #1 my son was well on his way with the first experiment. 

Here are my thoughts on the Generation Genius Science Kit instruction video:
  • The video is a professional production that thoroughly explains the kit contents in detail and at an age-appropriate level. 
  • Dr. Jeff has a great teaching personality and does not "talk down" to his audience. He presents the scientific objectives of the experiment using real scientific terms and explains how the experiment student will see this lesson happen when they use the kit.
  • The video has automatic pauses built in so that students can stay on track and follow along with the instructions at a reasonable pace. The experiments are meant to be done while the student watches the video 


Get your kit today!

GENERATION GENIUS SCIENCE KIT EXPERIMENTS


As I mentioned before, each box comes with three full experiments! The three experiments in our kit were:

1 - Liquid Worms
2 - Light Painting
3 - The Countdown Reaction

Without explaining all the scientific details each experiment taught - I'll leave that to Dr. Jeff, I think telling you what my son and I thought about each one would be more helpful if you are looking for an educational science kit. I will just highlight a few things for each experiment as well as give you my son's rating of the experiment on a scale of 1 to 5 with 5 stars being the best.


LIQUID WORMS EXPERIMENT


This kit comes with this large, amazing, almost indestructible "splat" mat to keep any spills and messes contained and to protect the surface, a.k.a the kitchen table, from any potential harm. As a mom, this little detail within the kit was so very much appreciated! Honestly, none of the other types of kits we have tried had one of these protective mats included (bonus points for Generation Genius!!)

Little and Lively


At this point, my son was still very skeptical at this point but willing to do the first experiment. This first experiment includes two different activities to try. In the first activity, the student created liquid art and in the second activity, the student made liquid worms.

The science lessons from this experiment were to see how a chemical reaction between two natural resources can form new synthetic materials as well as learn what viscosity is. One of the chemicals used in this kit was sodium alginate. This is a thick liquid chemical that actually comes from seaweed, a fact my son thought was so cool! The second chemical is calcium lactate gluconate which is found in calcium vitamins.

My skeptical student tried both activities and to our surprise, this experiment blew our minds! As the saying goes, "A picture is worth a thousand words", and I think from this picture you can see how amazed and excited my little guy was with the liquid worms. 


Pros of this experiment:
  • unique - introduced something new!
  • comes with all supplies you need
  • has plenty of supplies to repeat this experiment over and over
  • allows the child to use their imagination 
  • splat mat keeps everything clean
  • rubber gloves & safety goggles that are kid size
  • included 2 activities
  • the video explains real-world uses for the chemicals used
Cons:
  • fairly messy (again, the splat mat is awesome)
  • the liquid worms get discarded when you are all done (this is my son's only disappointment)


LIGHT PAINTING EXPERIMENT


On to the second experiment which was light painting. This experiment allowed my son to learn about light and how ultraviolet light differs from other light like red and green light. Inside the experiment bag, there were three different colored lights, two sheets of special paper, and a spinning wheel covered in a special paper. 

This experiment requires your student to be in a dark room which for us is our pantry. After watching the video and then testing which of the three lights, red, green, or ultraviolet worked best on the special paper my son was ready to create his own designs with the UV light in our dark pantry. 

We taped both pieces of special paper to a wall in our pantry where he spent the next hour (yes, a full hour!) experimenting! He even cut out different shapes from a piece of paper, taped it to the special paper, and then used the UV light around the shape to create different prints. This experiment really encouraged him to use his imagination!


The second activity included a spinning disk covered in the special paper that when spun created amazing spiral patterns when the ultraviolet light tip was touched to the paper. 


Pros of this experiment:
  • student can do this experiment over and over!
  • good quality equipment is provided in the kit
  • an engaging video that explained the differences in light in an easy-to-understand way
  • allowed for imaginative discovery
  • no mess at all
Cons:
  • the special paper provided in the kit was small (8.5" x 11") - it would have been nice to have a larger size piece of paper to use
  • once the student "drew" on the paper it took quite a while for the light image to fade


CHEMICAL CLOCK REACTIONS


The last experiment from this kit was the iodine chemical reaction countdown. 

The chemicals used:
  • puffed starch 
  • sodium iodide
  • hydrogen peroxide
  • vitamin c pellet
  • destain

By the time my son got to this third experiment, he was a total fan of the Generation Genius science kit! Because this kit included chemicals (like the worm kit) he knew it was going to be cool before he even started it. There is just something cool about using chemicals so he opened up the bag, cued up the video, and got started. 

The main science lesson from this kit was about chemical clock reactions which is a process where a periodic change in color will be observed with the progress of a reaction. 

This kit really required the student to follow the directions exactly as Dr. Jeff explained to them so that it would work properly. As a parent, I appreciated the "following directions carefully" portion of this experiment since this seems to be a constant struggle with my ten-year-old. Because he was so into this science kit and he knew beforehand that he struggles with listening and following directions he suggested that we replay the video a few times so he could get everything right and not mess up the last experiment. (proud mom moment!!) 

There is plenty of chemicals supplied in this kit for the student to try this experiment over and over as well as allowing the student to try mixing the chemicals in different proportions and observe what happens. 

Oh, and did you see from the supply list that it included DESTAIN! Yep, Dr. Jeff thought of everything so dear ole mom doesn't need to scour the internet or even call Generation Genius to ask how to get the blue chemical stain out of your dear little one's favorite shirt! Thank you so much Generation Genius for covering all of the bases for us moms. And if you are wondering, yes, I did have to use a little destain on some of my son's clothing and yes, it did work!


Pros of this experiment:
  • plenty of chemicals were supplied to allow for lots of experimentation 
  • destain - need I say more!
  • an interesting and engaging experiment that is age appropriate
Cons:
  • a little messy but, again there is destain!

To say we are thrilled with Generation Genius is an understatement! My son absolutely loved this kit and is now begging for more. 

If you find teaching science in your homeschool a little lackluster consider adding the monthly Generation Genius science kit to help add some interest to your lessons! 

Generation Genius science kits can be used by individual students, in co-ops, public and private schools as well as a summer school option. Shipping is free with a 3-month subscription and the monthly price is very affordable too. To start your subscription or to just try out one month click here now! 

Wednesday, January 5, 2022

How To Write Course Descriptions For Your Homeschool High School Student

Writing detailed course descriptions for all of the high school-level classes your homeschooler took can be a bit overwhelming. Keeping track of grades and creating a high school transcript are big jobs but an even bigger job is writing course descriptions! It can make a homeschool mom's head spin!  


This post may contain affiliate links which means if you click on a link and make a purchase I may receive a small commission at no additional cost to you. For more information please see my Disclaimer page. Thanks!

A course description is a way to explain what your student covered in each course they took in high school and how they were evaluated. As more and more families choose to homeschool, college admission departments are becoming a lot more familiar with homeschooled student transcripts. Providing colleges with course descriptions will help them understand your student's level of academic achievement, course difficulty, and how they earned their grades. 

I have a confession to tell you about course descriptions. I admit I was one of those homeschool moms who waited until my child was in 11th grade before I got serious about writing course descriptions for all of the high school level classes she had taken! I really regret not starting them earlier because it would have saved me a lot of time and wouldn't have been so overwhelming. I ended up setting a goal to have them all written by the end of the summer so that when she started applying to colleges that fall they were done and ready to be submitted with her transcript. 

I'm telling you all this not to scare you but to encourage you to get started pulling together these vital course descriptions today. 


How To Write High School Course Descriptions For Your Homeschooler


In this post we are going to cover the following 3 things you need to know about course descriptions:

1. What is a student portfolio.

2. How to write a course description and what to include in a good course description

3. How to submit a course description to a college. 


Student Portfolio

Speaking of college - I'm proud to say that my daughter was accepted into every college she has submitted an application! I'm not sharing this to brag (ok, maybe a little) but to tell you that your homeschooled child can and will get into college because homeschooling does works!

Even though college admission staff are beginning to become more familiar with homeschoolers I still wanted to make sure there was no confusion when they got her application. Instead of just sending each college her official transcripts (grades only) I put together and submitted to each college what I called a "student portfolio". Her student portfolio included the following:

  • Official transcripts - make sure the words"Official Transcript" appear somewhere on the transcript you submit and that it is signed and dated)
  • Course descriptions for all classes taken 9th grade through 11th grade - updated class descriptions for her 12th-grade year will be sent once her classes have been selected.
  • Complete reading list of the books she was required to read in high school
  • List of activities, achievements, and volunteer opportunities she participated in or received in high school

 Maybe I went a little overboard, but not a single college admissions department has asked for additional information or clarification of her transcript. The portfolio speaks for itself and I consider this a success!

I came up with the idea to call this bundle of information a "student portfolio" so if you call and ask an admissions counselor if you should submit a student portfolio they might react a bit confused about this concept. This is a term I use in our homeschool so my kids (and husband) know what I'm talking about. 


How To Write A Course Description 

Don't let writing course descriptions scare you! Once you learn how to find course information you will be well on your way to getting the task done. This is a task you don't want to put off until your homeschooler's senior year. Instead, begin writing the course descriptions for each class your child takes starting their freshman year.

Today I wanted to share with you how I wrote course descriptions for my daughter's high school classes and what they actually look like. My hope is that this example will be a springboard to get you started writing course descriptions for your student today. What I included in the course descriptions are what I determined to be the "must-have information" which I am going to try to break down into small easy to follow sections:

#1. Course Title

The course title should match the title from your student's official transcript. I listed all of the courses in bold so that the college admissions department could easily find each course within the course descriptions. If the class had a lab component include the words "with lab" in the course title. I chose to group my course descriptions by subject rather than by school year. You choose what works best for you!

#2. Credits Earned and Academic Level of The Class

Again, the credits earned should be consistent between the official transcript and course description. It is also helpful to state if this was a high school or college-level course especially if your student took the course as a dual-enrolled student. Here is an example:

This is a 1.0 credit high school level course.
 
or

This is a 1.0 credit dual enrollment course taken at Grand Rapids Community College.

#3. Written description of the course.

 This part should include skills acquired, material covered as well as details describing lab work if applicable. In addition, you should include how the student was evaluated - tests, quizzes, oral discussion, and essays. Lastly, a list of the course textbook(s), supplemental materials, and if this was an online class or lecture.


Here are some examples of the course descriptions I wrote:


Remember, I am not a professional course description writer so I'm sure there are bound to be a few inconsistencies but I tried my best and I think it does the job! If anything this is a good springboard for you as you prepare your high schooler's student portfolio and write course descriptions. 


How To Submit Course Descriptions To Colleges

As a homeschool mom, a.k.a. high school guidance counselor, I took a proactive approach when submitting my daughter's transcripts to each college. I saw myself as a kind of translator who was responsible for translating my student's homeschooling career into an easy-to-understand language the admissions counselor would understand. What worked well for me was to email the full student portfolio as one pdf document directly to her assigned admissions counselor.  

Plan on the course description document alone to range anywhere from 10-15 pages in length. This combined with the transcript, reading list, and activities/volunteer record can make for a lengthy document. Don't panic! Most colleges would rather get more information than too little and it is up to their discretion if they need to dig through every page. Most colleges do read every page! Not only will your child's complete student portfolio be helpful but it will show how seriously your homeschool student took their education. 


BONUS - Free Course Description Download!!

Now that you are all ready to start on this course description writing journey I thought I would lend a hand and give you access to a free Google doc with the course descriptions I wrote for my homeschooled high school student! 

Hopefully with this in hand all you have to do is tweak a few things here and there, add classes your student completed and add it to your student portfolio. 

Click this link to Free Course Descriptions


I wish you the best of luck as you and your homeschooled high schooler begin to navigate the "next step" on their educational path! 

What has been the most challenging part of the college application process for you and your student? Leave a comment to share!


Tuesday, July 31, 2018

10 Best Back to School Supplies From The Dollar Tree

mommysuburbia.blogspot.com
photo credit: freepik.com


The start of another school year is just around the corner and whether you are a homeschooler or send your kids to public/private school your kids will still need to stock up on school supplies. Every year I clean out our craft cupboard and toss out all the stubby, eraser-less leftover pencils, dried up markers, empty bottles of glue and dried glue sticks and used up notebooks. Whew, it's a lot of work!

I love making room for our new supplies as well as making a mental inventory on what we need to purchase. One way homeschooling is similar to public school is that both require students to have the supplies they need in order to do their school work.

With 4 kids it is easy to blow the budget on school supplies but I have found a few tricks to help save a little money that I want to share with you.


mommysuburbia.blogspot.com

This post contains affiliate links which means if you make a purchase I may receive a small commission at no additional cost to you. For more information please read my Disclaimer page.

 Tips For Saving Money On Back To School Supplies


Timing is everything right? Well when it comes to school supplies this is very true! Many large retailers count on the sales of back to school supplies so they offer super discounted prices on some smaller items like crayons, bottles of glue and pencils hoping that you will pick up a few regular priced items like binders, backpacks and lunchboxes. Make sure you shop these deals on the basics when the stores posts them for sale!

Another tip to save some cash is to make a list and stick to it! It can be very tempting to toss a few items not on your list into your cart but by the time you make it to the checkout lane your budget is blown.

Lastly, don't forget your local Dollar Tree! This store is a treasure trove of school supplies that will help you save some big bucks on back to school supplies. Price shop to make sure the items from the Dollar Tree are in fact cheaper than other stores. Speaking of the Dollar Tree, here are my top 10 items to pick up from the Dollar Tree.

Top 10 Back to School Supplies from the Dollar Tree:


pencils

If your kids are like mine they tear through pencils like little beavers! Before I know it we have a pile of stubby pencils with no erasers that no one wants to use. I like to buy several packs from the Dollar Tree so I am ready to replace broken or worn out pencils.


notebooks

I require my kids to have a single subject notebook for most subjects. I have found that this help us stay organized and it is less confusing for me as their teacher to find their finished assignments if the work is done in separate notebooks by subject. They don't need anything fancy just practical and that is why I buy them at the Dollar Tree.


scissors

Crafting scissors quickly get gummed up with glue and other sticky things so buying a bunch of cheap scissors is the way to go in our house. My kids are constantly crafting something so it is nice to have scissors handy.

crayons and colored pencils

With the amount of crafting that takes place in my house I must have replacement crayons, markers and colored pencils available at all times. These are essential tools for the budding artist and student.


folders

I have found that no matter what kind of folders I buy, expensive or cheap, they both take a beating throughout the school year. I used to cringe everytime my kids asked to have a new folder because the (expensive) one they just destroyed needed to be replaced. Now I just stock up on extra ones from Dollar Tree and have found they last just as long as the ones I used to buy that were more expensive.

We use folders as an organizational tool in our 3 ring binders by subject. Loose leaf papers that are still being worked on or other unfinished work goes in these binders. Also, if we are schooling on the road (a.k.a. in the car driving from one activity to another) it is much easier to take the small folder with us rather than the whole 3 ring binder.


paper

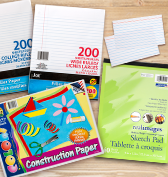
Loose leaf paper, construction paper and sketch pads are expensive if you pay full price at the store. I found that I can get these supplies right at the Dollar Tree for a fraction of the cost. I can even buy one for each of the kids from Dollar Tree and still not come close to the cost I would pay at other stories.


glue

Do your kids make slime? We seem to have a regular ole' slime factory happening over here at my house! I allow the kids to do something quiet while I read aloud to them and one of their favorite things to do during this time is to play with slime. If you miss the back to school sales that most stores have before school starts, don't worry the Dollar Tree always has a great supply of glue, tape and glue sticks all for $1 all year round!

antibacterial wipes

Back to school usually means back to germs even if you are like us and homeschool. Getting sick during the school year is no fun - it's no fun anytime of the year! As a mom I try to battle the germs by wiping down surfaces like doorknobs, railings, tables and toys regularly with antibacterial wipes. Healthy kids are happy kids!

tissue / Kleenex


I keep a box (or 2) of tissues in our car since we are out and about quite a bit during the school year. Even when the kids are healthy we seem to go through quite a few boxes of tissues on a regular basis. This can add up quickly so I try to reduce the amount we spend by shopping smart and that means picking up my tissue boxes at Dollar Tree.
Storage bins of all shapes and sizes are a great tool to keep you and your students organized this year. Instead of loose papers falling out of stacks use a bin to keep them all in one place in a neat pile. You can even have one bin assigned to each child and write their name on the front of the bins! An affordable and helpful solution to staying organized!

I hope your school year gets off to a great start! Hopefully these ideas will help you prepare for the start of your school year. If you found some other great Must Have supplies from the Dollar Tree leave a comment - I'd love to hear from you!

Thursday, June 22, 2017

Tips to Keep Your Kid's Brain In Top Shape During The Summer

School has been out for a few weeks (or even a month) now and kids have slipped into their new summer routine - sleeping in, playing outside, staying up late and just relaxing. School is a past memory they would rather not think about but how do you as a parent keep them from becoming victim to the SUMMER SLIDE?

mommysuburbia.blogspot.com


What is the summer slide you ask? It is the loss of learning/remembering what they had learned during their previous year of school. For example, let's say your 3rd grader worked super hard all school year memorizing their multiplication facts and by the last day of school was able to rattle them off without any prompting or help from you or their teacher. Fast forward 6 to 8 weeks into the summer and you happen to ask little Sally what 4 x 6 is and all you get in return is a blank stare - that is the summer slide.

So how do you keep your kid's mind just as active during the summer break as their little bodies seem to be? Reading! Reading and more Reading. Exercising those brain cells all year round is so important to their continued educational development. Like a muscle that has atrophied due to lack of use their little brains need the year round stimulation to keep it strong and sharp.

But how do you keep them interested or motivated to read during the summer? Most kids love a challenge so how about joining a summer reading book club! A lot of summer book clubs encourage kids to track their reading each day and if they attain the set goal the child gets a prize or an award. Kids love this kind of motivation!


This summer my kids are participating in 4 separate reading club challenges. Even my 4 year old is able to participate! During the summer I allow them to choose their own books rather than follow the school year curriculum book choices. They love to explore new genres - some of which they find they like and others they find aren't their "thing".

So where do you look to find these summer reading club challenges you ask? The first place we go is to our local library. Most libraries host a summer reading challenge for kids and some even have a fun kick-off event like a carnival or craft to get the summer reading program started.

Local book stores or even the big box bookstores host summer reading programs. The most challenging summer reading club my kids are participating in this summer is with a local bookstore that challenges kids to read a certain number of hours in order to earn their reward. The top reward after a child reads 150 hours during the summer is a $40 gift card to use in the bookstore. It is a tiered challenge so if you reach the minimum 20 hours of reading the child still gets a $5 gift card.

Barnes & Noble offers a summer reading program encouraging kids to read this summer too! The reward is a choice of books to choose from (by age/grade) when they complete the challenge.

Our last book club is through our local homeschool building bookstore. Kids can earn a $5 gift card to spend in the bookstore and PARENTS get a 5% discount card to use too.

Now you might be asking about those lost math facts and how does reading help your child retain those memorized facts. Reading will help your child keep their brain in tip top shape making it easier for them to remember their math facts or reduce the time they need for a refresher at the beginning of the new school year.

Can't find a reading club challenge for your child in your area? Don't worry! How about creating your own family reading club summer challenge. Here is a bunch of ideas (and links) you can use to help keep your kids reading this summer

#1 - Summer Reading Challenge Bookmarks
via: thirty handmade days


#2 - Color Your Own Reading Logs

via: 123 Homeschool 4 me
#3 - Reading & Reward Chart
via: pretty providence

#4 Summer Reading Chart Bingo Game

via: simply kierste

#5 - Summer Reading Challenge Chart

via: a teachable teacher


Looking for a great list of age appropriate books for your child to read? Check out my post -   Top Ten Books for Children Ages 8 - 13

Here are some other great summer reads for your kids:


Just remember - make it FUN for your children to read this summer! Exercise those brain cells and enjoy a good book. 

Tuesday, February 7, 2017

10 of The Best Books for Children ages 8 - 13

Books are one of the most important tools you can provide for your children as they are growing and learning. Making sure you are reading to them or they are reading good books is essential to their success throughout their school age years. 

Sometimes though as a parent it is hard to know what the best books to let your children read are so I've put together a list of the top 10 Children's books for ages 8-13 to get you started!


Designed by Freepik

Maybe you noticed (or maybe not) that I/we are a homeschooling family. One of the many "perks" of this job are the wonderful stories and books I get to read to/with my children.

I have to confess there have been books that I had to take a quick break from because I got choked up and needed to go dry some tears - but isn't that one great reason to share books with your kids? So you can experience the story's emotional ups and downs with your children.

For the last seven years we have been using Sonlight for our main curriculum. If you know anything about Sonlight you know that the program has a rich selection of great quality literature. We just love it!

This book list includes some of the books Sonlight offers in their curriculums as well as many other stories that are good quality books.

Top Ten Books for Children Ages 8-13


1.  The Secret Garden - by Frances Hodgson Burnett
2.  Heidi - by Johanna Spyri

3. Red Sand, Blue Sky - by Cathy Applegate

4. The Chronicles of Narnia (series) - by C.S. Lewis

via: Amazon

5.  Anne of Green Gables the Ultimate Collection - by L.M. Montgomery
via Amazon
6. Johnny Tremain - by Esther Forbes, Lynd Ward

7. Five Little Peppers and How They Grew - by Margaret Sidney

8. Red Sails to Capri - by Ann Weil
via: Amazon

via: Barnes & Noble


10. Little House on the Prarie (collection) - by Laura Ingalls Wilder
via; Amazon

There are so many more to include here but these are some of our all time favorites.

Tips to Encourage Reluctant Readers


Maybe your kids don't love books quite as much as mine. Do you have any reluctant readers? There have been times that in order to really get my kids into the story I've had to be pretty creative and let them get their "hands dirty" digging into the story. What did I do you might ask? Well let me give you a few examples that might help you with any reluctant readers in your home.

1. Bake a Treat or Meal Found in a Book: 

When we read Heidi I had the kids help me make bread from scratch. After it baked I served them a lunch similar to what Heidi would have eaten up on the mountain - fresh baked bread, chunk of cheese and cold glass of milk. I spread a picnic blanket out on the livingroom floor where we shared our lunch while watching the Heidi movie staring Shirley Temple!

2. Visit a Local Museum or Farm to Learn More About the Setting in a Story

If you have read the Little House on the Prairie series you might recall how Laura and her siblings loved the early spring season when trees were tapped for collecting maple sugar which they turned into maple syrup. Laura and her siblings would drip the fresh maple syrup onto the snow and eat it as a treat. 

After reading this story, which I tried to time with our sugar season here in Michigan, I took the kids to a local non-profit organization that hosts and annual maple sugar festival. We learned about tapping trees with a spile, how to make maple syrup and sample some of the sweet syrup and maple candy. We brought home a spile and tapped one of our maple trees. The kids collected the sugary liquid and cooked it OUTSIDE in an electric frying pan and make a little syrup of their own. (please do  not try to cook the liquid maple sugar inside - it will coat everything with a sticky sugary mess as the water evaporates)

3. Prepare a Craft Along With The Story

I read The Secret Garden to the kids during late winter one year. I had them make seed bombs which we then planted in outdoor containers in the spring. They were excited to discover the different flowers that grew and bloomed and could relate to the joy Mary felt while working in the secret garden with Dicken and Colin in this wonderful story.

Read Post Here: Make Your Own Seed Bombs

I would just love to hear what you have done to get your children inspired to read or crafts/projects you've done to make the story come alive! Also, if you have any books you think should be added to the top ten above let me know. It is fun sharing books and recommendations with fellow book worms.