Tuesday, October 29, 2019

How To Make Homemade Cinnamon & Sugar Soft Pretzels

Homemade soft pretzels are such a delicious and easy treat to make at home. As the weather turns colder do you find yourself craving all those wonderful comfort foods like pot pie, hot chocolate, apple pie and warm soft pretzels? At our house we are in full comfort food mode. The crock pot is churning out meals while tag teaming with the oven! 


Our latest comfort food recipe is homemade soft pretzels. At first this seemed so intimidating since pretzel making is a three step process, but once I made my first batch I realized there is nothing to be intimated about homemade pretzel making! They are quite simple and easy to make at home thank goodness, otherwise I was considering buying stock in Auntie Anne's due to our frequent stops there for warm soft pretzels. 

I am a participant in the Amazon affiliate program which means if you click on an affiliate link within this post and make a purchase I may receive a small commission at no additional cost to you. For more information please see my Disclaimer page. Thanks

If you have never made anything with dough before, making soft pretzels is a great one to start with. As I mentioned before making soft pretzels is a three step process broken down as follows:

  • Make the dough and let it rise, 
  • Shape the dough and give it a quick water/baking soda bath
  • Bake the pretzels
Let's make a batch together shall we? Here is the recipe I used to make mine that I think you will love:


Easy Homemade Cinnamon & Sugar Soft Pretzels


Ingredients
  • 1 cup warm water
  • 1 pkg dry active yeast
  • 1 Tbsp sugar
  • 1 Tbsp melted butter
  • 1/2 tsp salt
  • 2 1/2 cups all purpose flour
  • 2 Tbsp vegetable oil
  • 1 egg white

Baking Soda Bath

  • 6 cups water
  • 1/4 cup baking soda

Cinnamon & Sugar Topping

  • 1/4 cup melted butter
  • 1/4 cup sugar + 1/4 tsp cinnamon mixed together


Step #1 Make the Dough

In a metal mixing bowl pour in the warm (see Tip below) water, yeast and the tablespoon of sugar. Let the yeast activate or proof (technical term) for 10 minutes. The yeast will feed off of the sugar and begin to foam and get frothy. 


Tip: If it bubbles up and gets frothy you know your yeast is active and well. Causes of "dead" yeast can be too hot water, too cold water, old yeast or too much sugar. The water should feel warm to the touch on the inside of your wrist - not hot. 


After the yeast is proofed add the melted butter, salt, flour and cinnamon and mix for about 10 minutes. I find it easiest to mix everything in my Kitchen Aid mixer starting with the mixing paddle then switching to the dough hook once the ingredients come together. Using the dough hook is how you are going to kneed the dough. 

If you don't have a stand mixer you can do all of the mixing by hand using a solid wooden spoon and then once the ingredients come together dump it out onto a lightly floured surface and kneed it by hand. (if you need a quick lesson in how to kneed dough here is a great video). The dough should not stick to the bowl at all and feel smooth and elastic. 


The dough needs to rest and have time to double in size. We don't want the dough to stick to the bowl so you should pull the dough out of the metal mixing bowl, pour in the vegetable oil and spread it around the inside of the bowl with a kitchen brush and then place the dough back in the bowl. 

Completely cover the top of the bowl with a piece of saran wrap or a towel. It is best to put the bowl in a warm location to help the dough rise. The dough should be doubled in size after 60 minutes.


Tip: Since it is super cold where I live I like to turn my oven on low for about 15 minutes then turn it off and set the bowl with the dough on it to rise.  

Once the dough is double it's size pour it out onto a lightly floured surface and divide it into 8 to 10 equal size pieces. If you want huge pretzels go with 8 pieces otherwise for medium size pretzels divide the dough into 10 pieces. 


Step #2 Baking Soda Bath

Pour the six cups of water into a large pot, mix in the baking soda and turn the stove top on medium high temperature. You want the water to come to a full boil. 


While you are waiting for the water to reach the boiling point you can use this time to shape your 8 or 10 pieces of dough into pretzel shapes. 
  • Shape your dough by rolling each piece into a long rope about 24 inches long. 
  • On your work surface lay the dough rope into a "U" shape.
  • cross the ends of the U two times to make the center twist
  • fold the top of each U shape down towards the bottom of the U and pinch the ends down. 
The dough should now resemble the shape of a pretzel. You can easily adjust to dough into the proper shape of your liking. 


Tip - If you don't want to make the traditional pretzel shape you can cut the long rolled rope of dough into small 1" pieces to make pretzel nuggets instead. 


Once the baking soda water bath is boiling carefully drop one pretzel at a time into the water. You do not want to crowd the pot so you may only be able to bathe one pretzel at a time. Remove the pretzels from the water after 30 seconds and place them on a parchment lined baking sheet. 


Mix the egg white with 1-2 tablespoons of water and brush each pretzel top with this mixture. Since we are making Cinnamon pretzels I don't recommend sprinkling salt on the unbaked pretzels. 


Tip - if you want to make traditional pretzels, skip adding cinnamon to the dough in the first step. After the pretzels are brushed with the egg wash sprinkle salt on each pretzel to your liking. 


Step # - Bake The Pretzels & Add Toppings
Bake the pretzels in a 425F oven for 10-12 minutes. Allow the pretzels to cool on a wire rack for 5 minutes before serving. Melt the 1/4 cup of butter in a small dish. Brush the baked pretzels with melted butter then sprinkle the sugar & cinnamon mixture over the pretzels. 

Enjoy!


Tip - if you aren't going to eat the pretzels right away (or within an hour after baking) I recommend flash freezing the pretzels then storing them in a Ziploc freezer bag to keep them fresh. When you are ready to eat place the pretzels on parchment paper on a baking sheet and put them in a 425F oven for 10-12 minutes until thawed and warm.
Wasn't that easy? There are so many different toppings you could put on your homemade soft pretzels like - poppy seeds, drizzled chocolate with chopped nuts and Parmesan cheese.
What's your favorite pretzel toppings? Share your favorites in the comments or follow me so you don't miss out on future recipes, crafts and useful parenting tips.
While you're in the kitchen in full comfort food snack mode why not whip up a batch of this amazing carmel corn? I have the perfect recipe for you that is fast, easy and YUMMY! 

Thursday, October 24, 2019

How To Make A Rag Strip Quilt - Full Tutorial

Rag Strip Quilts are the perfect starter quilt for beginners. Rag quilts are very forgiving and actually look best when made with a few crooked stitches. They whip up fast and look fabulous when done!


My husband's boss is having a baby in a few months and he asked me to make a baby gift for her. After pouring over various baby blankets and quilt ideas on Pinterest I decided to make a soft and cuddly rag strip quilt. Rag strip quilts are easy to make and always turn out beautiful. Rage quilts are a perfect project to do if you are a quilting or sewing beginner. 

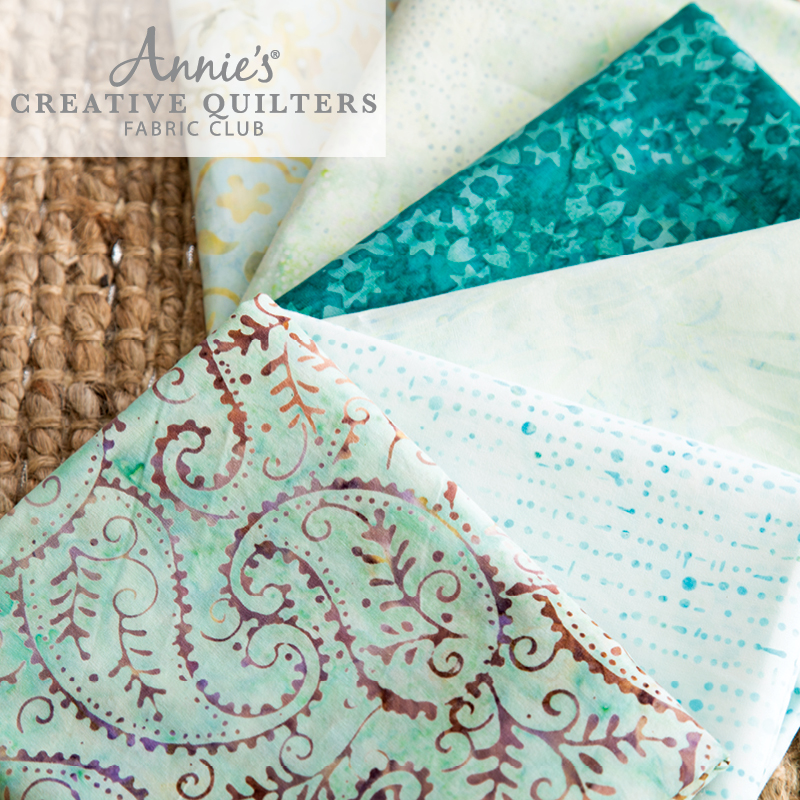
Since I don't know the baby's gender I stuck to gender neutral fabric colors for the quilt. My favorite part is picking out the fabric! Here are my choices:

There was one more additional print fabric that I also included in my rag strip quilt that isn't pictured here. It was a last minute addition! The missing fabric has mini mint green stars on a white background. You can look for it in the completed pics of my quilt! 

Not sure where to get color coordinated quilting fabric? I suggest giving Annie's Creative Quilters Club a try. Annie's offers color coordinated fat quarter kits! They also offer a monthly subscription club option that includes 6 fat quarters (18" x 22" inches) of 100% cotton coordinating quilting fabric from top American fabric companies. Also included is a bonus pattern that includes a step by step instructions.


To see where I found my inspiration check out my Pinterest board HERE and follow me so you can see what else inspires me. I loved the rag strip quilts that had varying size strips so I decided to do that with this quilt.

Want to make your own rag strip quilt? Don't worry if you have never made a quilt before - you can do this! This is a great quilt for beginners because it is such a forgiving kind of quilt. Follow along with me as I take you step by step through the process of making a strip rag quilt.

Supplies needed:
It is debatable as to whether you should or shouldn't pre-wash your fabric. You will hear pros and cons for both. I prefer not to pre-wash my fabric especially for this kind of a quilt partly because I just don't have the time and don't want to press it out after washing. This is your choice as to whether you want to pre-wash the fabric or not.

1. Cut Your Fabric Strips

To begin we will be cutting the fabric into long strips. I chose to make my rag strip quilt with two different fabric strip widths. If you choose to make your quilt with fabric strips that are the same width then you will want to cut your printed fabrics all the same width. Otherwise if you choose to make the strips vary in sizes then you can mix up the widths of the fabric strips. Make sense?


Tip - the wider your strips the faster the quilt will be finished since there will be less sewing and cutting

Here is a chart to show the sizes I cut each of my fabrics. I only used two different widths, 5" and 7".
I had a total of 15 strips so that the total width, once they were all sewn together with enough seam allowance to trim the edges to get that lovely fray was 44". My finished quilt measured 44" x 40" (standard crib quilt size is 40" x 42").


When cutting strips of fabric it is easiest to fold the fabric with the longest sides matched up and then measure your desired width and cut a straight line with your rotary cutter down the fabric using either a quilters ruler or a durable straight edge as a guide. You may have to fold the fabric twice to get it to fit on your self healing mat or table. Just make sure there are no wrinkles in the fabric when it is folded or you will have uneven strips.

2. Cut The Backing Strips

Now that you are finished cutting strips from the printed fabrics it is time to cut strips from the solid fabric that will become the backing to your quilt. You will need the same quantity of strips in the same sizes you cut from your printed fabrics. For example my quilt has 7 strips that are 5" wide and 8 strips that are 7" long therefore I cut a matching number of strips for each width for a total of 15 strips.

3. Cut The Batting/Fleece Strips (optional)

This next step is optional. Since I live in a state that gets super cold in the winter I wanted to add extra warmth to the blanket which means it needed an extra layer. I used white fleece fabric sandwiched between the printed top layer fabric and the bottom solid layer fabric. You could use a thin layer of batting (I recommend this one by Warm & Co.) instead of fleece but I just like the feel of the fleece so that is what I used. If you choose to add this extra layer you will need to cut the fleece or batting into the same number of strips as you have for the the top layer of the quilt - for my quilt I needed 15 strips of batting. The batting should be cut 1 inch narrower than the printed fabric so if you follow the same widths as I used you will need 7 pieces cut into 4" x 48" and 8 pieces cut into 6" x 48".

4. Time To Sew - Quilt Your Strips

Place one 7" strip of solid backing fabric face down then spread the correct size batting/fleece (6") on top of it in the center and finally take a 7" print strip and lay it face up on top of the batting matching the edges of the bottom layer to the edges of the top layer. Pin the layers together in several places down the center of the strip to make sure the layers don't shift when you bring it over to your sewing machine or while you are sewing. Sew straight down the middle of the strip long ways. I love the look of more quilting so I sewed two more lines down every strip about 1" apart from the center  stitched line. This stitching will keep your layers all together and give the the quilt that quilted look. Do this for all of the strips.

5.  Sew The Strips Together

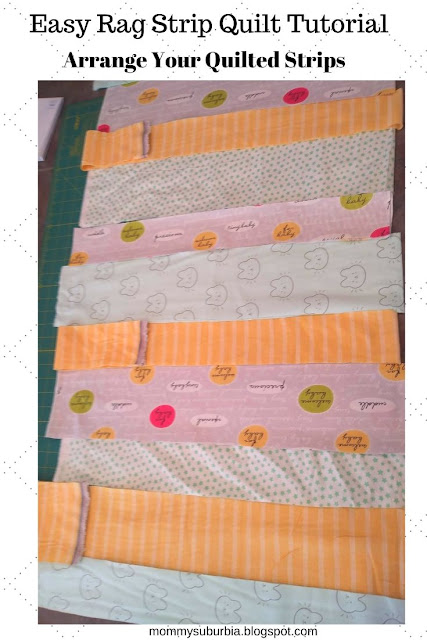
I like to lay our my quilt strips into the pattern that I plan on sewing them together. It helps me stay organized as the quilt starts to take shape.


Grab the first two strips from one end of your quilt. Place the strips with the solid bottom sides facing each other. Pin the two strips together matching the outside edges together. Sew the strips together with a 1"  or 1/2" seam allowance (or however much you want to leave and snip for the rag effect). I used a 1" seam allowance for the blanket I made because I wanted a lot of soft rows of texture. Repeat this step sewing the third strip to the second strip and continue sewing the strips together until all of the strips are sewn together.


6. To Bind Or Not To Bind

No Binding Method:
Remember how I said this quilt was super easy for a beginner? To keep it simple you can choose not to add binding to the quilt and instead allow the edges of the quilt to have that same great rag quilt look that the strips will have. The quilt will still look great if you choose to leave it binding-less. 

If you choose not to bind your rag strip quilt you still will need to sew around the perimeter of the quilt with a 1/2" to 1" seam allowance (again your preference). This adds a little more stability to all of the sewn together strips and gives you a guide line to use when cutting the little slits. 

After sewing around the perimeter it is time to cut the slits into all the seam allowances and outside edges of the quilt. I recommend using these wonderful spring action rag quilter scissors to save your poor hand from all the squeezing it will have to do to snip all the slits. If you don't have these scissors make sure whatever pair you use are super sharp! Cut small slits about 1/2" apart on all edges and all seam allowances between each strip. Make sure you do NOT cut through the stitches!! 

Binding Method:
I chose to bind the perimeter of my quilt and to do so I made my own quilt binding from the same yellow fabric I used in the quilt strips. If you have never made your own binding before I recommend following this tutorial HERE from Simple Simon & Company. After your binding is finished it is time to sew it onto your quilt. Again, if you have never sewn binding onto a quilt don't worry I found this great tutorial HERE from Love Patchwork and Quilting that will walk you through it step by step. 

Once your binding is attached you will need to start cutting the slits into all seam allowances between the quilt strips. See above (in the not binding section) for instructions on how to do this. 

7. Wash, Dry, Repeat

Yeah, you made it to the last step! It is time to let your washer and dryer do their magic and start to turn your quilt into an actual rag quilt. This step will create A LOT of lint and small bits of fabric thread - be warned! I recommend washing and drying your quilt in cold water on the normal cycle at least twice so that all the stray threads come off and the slits you cut in the seam allowances begin to take on the classic soft rag quilt qualities that make this quilt a real rag quilt. The rag effect will continue improving every time the quilt is washed and dried. 

**Make sure to clean your lint trap out after you dry the quilt since it will probably be full and you don't want the extra lint to become a fire hazard. 

Congratulations! You did it - you made a Rag Strip Quilt. 

I'd love to hear how your quilt turned out! Please leave your comments below and a picture of your final quilt would be great too. These quilts make great baby gifts, Christmas presents and birthday gifts. 

More Rag Quilts + Tutorial

If you liked this tutorial, head on over to this popular post I wrote about a different type of rag quilt. Now that you have conquered the rag strip quilt it is time to try the traditional rag quilt with squares. 

click to read entire post

Tuesday, October 22, 2019

How To Help Your Daughter Plan The Best Sleepover Ever


The Best Sleepover Guide For Girls

Plan the sleepover of your dreams! The only thing more exciting than a sleepover is planning one! Filled with awesome slumber party ideas for girls, this book guides party hosts from planning to clean up. Inside, you'll find tons of ideas for crafts, activities, yummy foods and snacks to help you with your totally unique and super fun sleepover. This book includes examples of themed sleepover invitations, 3 detailed DIY craft projects and a big list of games and how to play them. You’ll even find the most amazing pancake recipe to make for breakfast the next day!

This post contains affiliate links which means if you make a purchase through the link I may make a small commission at no additional cost to you.  Please see my disclosure here.


Whether you want to have a simple pajama party or go all-out with a theme party, this guide has all you need to plan the epic sleepover party you and your friends will never forget!

* * *


As a mother of 4 kids (2 being pre-teen girls) sleepovers have become a big deal in our house! My girls spend countless hours thinking up sleepover ideas like crafts, activities and games or movies to do with their friends.

We have hosted many sleepovers at our house with their friends and the girls have attended many sleepovers at their friends' houses. These sleepovers were the inspiration for me to write this ebook so that you and your kids can come up with some great ideas to do at your own sleepover parties.

When my girls first started hosting their own and attending sleepovers I enjoyed telling them about the sleepovers I had when I was a kid. They love to hear stories like this! Now it is their turn and they love planning and throwing a good party! I'm sure these fun parties with their friends are going to make great memories for them!

The Best Sleepover Guide For Girls is chocked full of ideas from activities and games, crafts and even food/snacks for a sleepover. Also included are three detailed craft projects that your daughter can do with their friends. 

Oh! Don't forget about breakfast the next day - this ebook even has the Ultimate Pancake Recipe included at the end. I guarantee these pancakes will be a hit for breakfast!

Whether this is your daughter's first sleepover or 100th, this book will help inspire her next sleepover so it is an epic party and event!

Guess what? You can easily access this ebook on your Kindle through Amazon. Get your copy of The Best Sleepover Guide for Girls and start planning with your daughter. 

If you don't mind please leave a review for the ebook so others can find it on Amazon too!


Monday, October 21, 2019

20 Of The Most Useful Items I Bought On Amazon And Would Buy Again

Do you like shopping on Amazon as much as I do? As a busy homeschooling mom, Amazon has made shopping and life so much easier. 


Don't forget to PIN for later 


The smile on my face matches the smiley-faced box that arrives on my doorstep because I know I saved myself a little time and frustration not having to drive all over town shopping for whatever it was I needed.

I participate in the Amazon affiliate program. If you click on a link below and make a purchase I may receive a small commission at no additional cost to you. For more information please see my disclaimer page. Thanks.

Amazon has made the price of convenience so incredibly reasonable! I have found some great products over the years that I love and some that I continue to buy over and over again.

I thought I'd share with you some of the best purchases I have ever made on Amazon in the hopes that you might find something you will like too. Here are my recommendations:


The 20 Most Useful Items I Purchased on Amazon. 


Shall we get started? I hope you find these products as helpful as I do. 


Aegend Swim Goggles: 


We have an in ground pool and spend most summer days swimming for hours on end. Because of this, we have to have good quality, affordable swim goggles that fit a variety of sizes from adult to child. I've tried tons of different swim goggle brands from super cheap to super expensive. These Aegend swim goggles are my kids favorite! The lenses are anti-fog, UV protection, and do not leak. They also come in a variety of colors and lens options (tinted, mirror or clear). As a bonus each pair comes in a protective hard case that you can use to store your goggles in when you aren't swimming.

If you were to ask my kids what they love about these goggles they would say the strap because they don't have to pull the strap over their heads (which always pulls their hair). Instead they put them on by unhooking the clip at the back of the strap, pressing the goggles to their face over their eyes then connecting the strap behind their head.

Flybar My First Foam Pogo Jumper for Kids 


I love toys that promote active kids and this one doesn't disappoint. This fun and safe pogo stick can be used indoors, is made from durable foam and a bungee jumper and can support up to 250lbs (just in case daddy wants to give it a little try!!). Winter's in our state can be rough so finding an active toy the kids can use inside is perfect for us! 


I recently sent this to my 4 year old niece for her birthday and she LOVED it! Guess who is her favorite aunt now!!


Shotbow 10 Assorted Color Premium Metallic Marker Pens


My oldest daughter loves to journal and has recently started her own bullet journal. Not only does she love organization, planning and doodling but when she can add color she will. These metallic paint pens add such a cool pop of color to her bullet journal pages! They are perfect for journaling, crafting and can be used on a variety of different surfaces too. 


Fire HD 10 Tablet 


Since we are in the car a lot driving from activity to activity it has been so convenient for my oldest children to use their Fire HD 10 to access and read books online, work on homework and listen to their favorite music (with headphones!). We love this case too that is super functional and keeps their tablets protected.


Batiste Dry Shampoo


If you are like me you probably don't have time every day to wash, dry and style your hair that is why I rely on a good quality dry shampoo to give my hair an extra day or two between shampooing. I have tried many different dry shampoo brands, none of which "wowed" me...until I tried Batiste. my hair wasn't oily but instead it felt clean and was super easy to style and manage throughout the day. The hint of color was a game changer as well since it helped cover up my grays a little while helping my brown locks shine!


Neoprene Dumbbell Pairs and Sets with Stand


We have a small area in our basement we use as a workout area. Since space is at a premium this little compact weight set fits into the space easily and provides us with a the right weights for toning muscles. I love to use these right after completing a programmed session on my Bowflex Max Trainer because my muscles are warmed up and ready to feel more burn! 


Speaking of the Bowflex Max Trainer, if you are looking for a compact full body exercise machine that anyone can use, no matter your current physical state this is it!! My six year old can use it just as easily as I can. It is smaller than a treadmill or elliptical and doesn't require a lot of impact to you knees. 


10X Magnifying Makeup Vanity Mirror With Lights


Since I'm at the age of needing reading glasses on a regular basis I found putting on my makeup was beginning to be a struggle. I just couldn't see! This mirror saved my face, literally. The light along with the magnification are super helpful as I try to apply my makeup. It has also made eyebrow maintenance so much easier too!


I have two daughters, both who have super thick, long hair. There isn't enough detangling spray or conditioner that will help them comb out their hair without a lot of pain after swimming or even after a shower. The Wet Brush has become their number one favorite hair tool! Not only can they easily comb out big tangles but it doesn't pull or tear their hair. We love this brush so much that I even wrote a complete product review of the Wet Brush - check it out here.

Inflatable Air Mattress


I bought several of these a year ago when our family was about to take our first tent camping trip together. They were so comfortable! I never even felt bumps, rocks or sticks that may have been poking through the bottom of our tent. I made sure to buy an air mattress that came with a battery operated air pump too so I knew I could inflate it even if there wasn't any electrical hook up or power. My kids love using the air mattress when they have friends over for sleepovers because they are easy to inflate and comfortable to sleep on. We've even taken one or two with us if we are traveling and staying in a hotel since we know they are comfortable and pretty much a good night sleep for anyone who sleeps on it.


Spiral Hair Ties 


We go through hair accessories so quickly with three of us using hair ties regularly. These corded hair ties are our favorite because they stretch easily, hold hair in desired style well and work well in different thicknesses of hair. The best part is they don't leave your hair with a pony tail bump when you take your hair down. They make great gifts -  I always put a pack or two in my girls' Christmas stockings each year.


My youngest son LOVES to wear socks! Many times he is so busy playing he will run outside to grab a toy or talk to a friend and forget to put shoes on which wears out his socks so quickly! I find myself ordering new socks for him often. I love that Amazon has my history saved so all I have to do is re-order the pairs he knows and loves (without the holes!). I actually buy socks and undershirts for my boys and my husband on Amazon regularly and I don't even have to make a special trip to the store for these basics. 


If I don't write everything down in my planner I know I will forget something, usually something important! I love this planner and the flexibility it offers me so I can keep life and all of our busy events, appointments and celebrations all in one place. I don't like using electronic planners, call me old fashioned, that's OK! I use what works and for me that is a good ole' paper bound planner. 


KIPOZI 1875W Hair Dryer 


This was the first time I purchased an ionic blow dryer and let me tell you I absolutely love it. I notice a huge difference every time I use this awesome blow dryer. My hair is silkier and not dried out anymore. It comes with a concentrator and a diffuser and offers 2 speeds and 3 different heat settings. Also, it is not noisy which is a big must have for me since I don't want to wake up my kids because I am blow drying my hair. 


Wireless Headphones 


I purchased these Bose SoundLink Around Ear Wireless Headphones last year for my husband. I never thought he would be so excited over a pair of headphones but boy was I wrong! He loves these wireless headphones and uses them all of the time. His favorite way to relax and chill out after work is to sit in his favorite chair, headphones on listening to music or a sermon. These headphones cancel out any noise (which our house has plenty of!) so he can listen without distractions. 


My oldest daughter loves to exercise and workout and does so on a regular basis. We got this for her so she could track her workouts as well as her nutrition. The Versa special edition also offers additional features such as 300+ song play list and Fitbit pay which we opted not to get for our teen since she uses her phone for music all the time. She loves the functionality of this smartwatch and we love that she has become more accountable for her nutrition. 


Wall Mounted Acrylic Fish Bowl


This is just the coolest fish tank ever! We actually have two, one for each of our kids' rooms. I was always afraid that if the kids had a fish tank sitting on top of their dresser or night stand it would get knocked over. This tank solved that problem since it hangs on the wall. Not only is it a fish tank it is like having a living piece of art on the wall too. It is simple to take care of and our goldfish have done quite well in this tank. 


So we actually don't have a dog but one of our neighbors just got a new puppy and has hired my oldest to come over three times a week during the lunch hour to walk their puppy. We got these waste bags and dispenser so that her job of walking the puppy would be easy and hassle free. The little dispenser just clips to the leash so my daughter can easily access the waste bag quickly as they make a pit stop along the walk. All responsible pet owners should carry their own waste bags so that unwanted yard bombs aren't left in your neighbor's yards for them to clean up. 


Kaasage Eyelash Curler with Advanced Silicone Pressure Pad


This little eyelash curling tool is wonderful! It fits all eye shapes and creates the perfect curl. My daughters and I have all used it and I can truly say that it works on all different eye shapes. The silicone pads are gentle and don't pull or rip out lashes. Cleans up quickly too!


StankStix Deodorizer for Shoes and Smelly Sports Equipment


There are days when I open up our shoe closet and can feel the hair melting off of my face! Have you ever experienced this? The smell from the shoes is overpowering and stinky! These Stank Stix have been a lifesaver (or shoe saver!), eliminating the odors and keeping the closet much more scent friendly. 


If you don't have an Amazon Prime account yet Amazon offers a free 30 day trial so you can give it a test drive before committing to paying the annual membership fee. This is what we did before committing and we found that there were tons of items we could get through Amazon shipped free to our house that saved us time and money. I hope you will give it a try! 


There you have it, my top 20 most useful items I bought on Amazon. I hope that by reading this you have a better idea of some of the unique and useful items you can find on Amazon. Amazon is so big that sometimes it can be a little overwhelming trying to find the things you want without getting sidetracked! 

Don't forget to PIN this post for later so you can refer back to it when you are shopping on Amazon.