

This post contains affiliate links which means if you click on a link and make a purchase I may receive a small commission at no additional cost to you. For more information please see my Disclaimer page. Thanks!


A few years ago while on vacation we were at a seafood restaurant waiting to be seated for dinner. The restaurant had a great outdoor lounge area which included a bunch of fun yard games to keep you busy as you waited for your table. We had played most of the other games before but the hook and ring toss, a.k.a. The Bimini game was new to us. We were "hooked" right away.
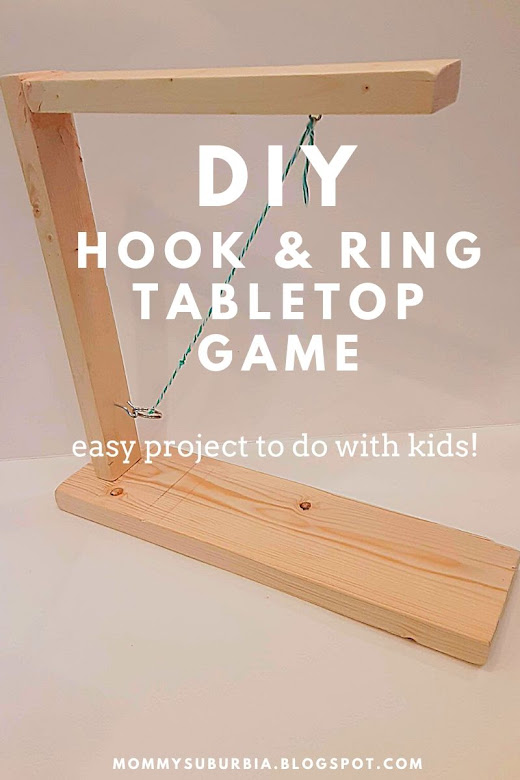
It is a simple game that is really challenging! At the restaurant one of the wooden lamp posts on the perimeter of the lounge area had the hook attached to it at about 4 feet off the ground. A 3"to 4" piece of skinny lumber was attached to the lamp post so that it stuck out perpendicular to the lamp post at about 7 feet off the ground. We will call this the "arm". A few inches from the end of the "arm" was an eye screw attached to the underside of the arm with a long piece of string tied to it and then a thin metal ring tied to the end of the string. The point of the game was to swing the metal ring and get it to catch on the hook.
Simple, right? But so frustrating and FUN!
Of course I wanted to get this game for our house but I really didn't want a full size (outdoor only) Bimini hook & ring game. What I needed was a tabletop one that was portable and could be played inside or outside and didn't take up a lot of space. That's when I knew I had to make one for our home!
This is a great project to do with kids so of course I had my boys help build our tabletop hook & ring games. Yes, I said GAMES because there is no way we could just make one of these fun games! We made two and are currently making our third to give away as a birthday present to a family member.
If you aren't a handy-mom or maybe you're a little scared to tackle a woodworking project don't be - this one is easy and doesn't require any previous building skills. You can do this, seriously - you CAN.
Let's get building shall we? Here is the supply and tool list. If you don't have all of the tools in your own tool box consider borrowing from a friend or neighbor or buy your own now since you are going to want to make more than one anyway.
Also, many hardware stores like Lowe's or Home Depot will cut the wood in the store down to the size you need! The wood furring strips and pine boards are located in the lumber area of the hardware store.

Tabletop Hook & Ring Bimini Game Tutorial
Supplies
1" x 4" x 8" - pine board (the base)
1" x 2" x 8" - wood furring strip
3" nails (I used 4 total) or screws
small eye screw (5/8")
small metal screw in hook (1 5/16")
metal ring (1" diameter)
sandpaper (80-120 grit)
cordless drill & 3/8" drill bit (optional) for drilling pilot holes
felt furniture pads (optional)
Tutorial
#1 CUT & SAND
BASE: Measure and cut a 13" long piece from the pine board base wood.
ARM & POST: Measure and cut from the furring strip one piece that is 9" long for the "arm" and a second piece cut 12" long to form the "post"
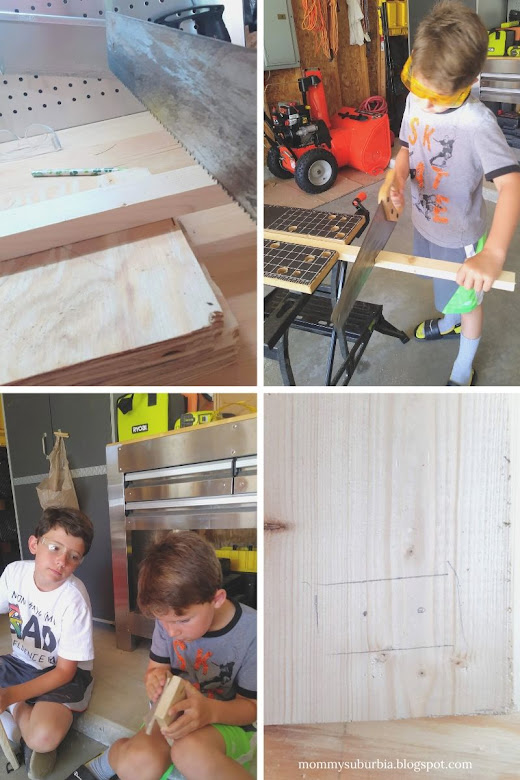
In total you will have three pieces of wood cut down to size when you are done sawing. If your hardware store cut the wood to size, start by sanding all pieces thoroughly to ensure no rough spots. If you need to cut the wood yourself, measure to the proper length and then use a hand saw to cut the pieces to the right length. Sand all the cut pieces.

Tip - Place the board you are cutting on top of another piece of lumber so that the mark you drew to measure the piece slightly hangs over the board on the bottom. This will ensure that when you are sawing the wood you don't accidentally run the saw blade into your floor while cutting. I'm right handed so I like to press my knee on the left section of the wood I"m cutting and then saw with my right hand.
#2 ATTACH POST TO BASE
Take your 13"x 4" base piece and make a light mark with pencil 1" in lengthwise. This is where you will attach the post piece to the base. Place the post piece up vertically on the base board and then draw a light pencil mark around the arm onto the base. Next use your pencil to place two small dots in the approximately 1/2" from each edge lengthwise on center of the traced markings. This is where you will be drilling your pilot holes. (see picture above)
To drill your pilot holes use a 3/8" bit in your drill, stack your baseboard on top of a second piece of wood with the dot marks slightly hanging over and then drill through each hole. Insert nails through each pilot hole and then line up the wood post and press the nail ends into the wood to create indent marks. Drill two pilot holes into the bottom end of the post.
Apply wood glue to the end of the post piece, line it up with the base and nail it in place. The wood glue will bond tightly to ensure the post is firmly attached to the base. If you choose to use screws, attach the post to the base in the same way but use your power drill to carefully screw the post to the base.
Tip - The pilot holes will help prevent the wood from splitting when you are nailing or screwing into it.
#3 ATTACH ARM TO POST
Now we are going to attach the arm piece to the post piece. Place the arm piece on top of the post piece making sure the arm end is flush with the post. Use your pencil on the underside of the arm to mark a line across the arm to measure the width of the post. Basically you should have a line on the arm board that reflects the width of the post board. With your pencil place two small dot marks approximately 1/2" from each edge lengthwise on center within the traced area. Again we are going to drill two pilot holes.
After you drill the pilot holes, put nails in each hole and position the arm over the top of the base and firmly press the ends of the nails into the top of the post board to create two indent marks. Drill pilot holes into each of the indented marks with your drill. Place more wood glue on the top of the post and then attach the arm by nailing the nails into the pilot holes from the top of the arm into the top of the post.

Tip - Wood glue takes 30 minutes to an hour to dry if you apply it to an unstressed joint.
#4 FINISHING TOUCHES
Once the wood glue is dry it is time to attach the eye screw, hook, string and ring to finish the project. To position the eye screw properly flip the game upside down so the arm piece is lying flush against the floor. From the end of the arm piece measure 1" and make a small mark in the center of the board at this measurement. Begin screwing the eye screw into the underside of the arm.
Flip the game right side up and then measure 3" up from the point on the inside of the post where the base and post intersect. In the center of the post at this 3" mark begin screwing in the hook. Once the hook is attached make sure the hook is facing up towards the arm.
Cut a piece of string 12" long and tie one end to the ring trimming any excess string. Next insert the opposite side of the string through the eye screw opening. Before securely tying the string onto the eye hook, attach the ring to the hook making sure there is a slight amount of slack in the string. Once you have adjusted the string to the proper length so the ring reaches the hook, finish tying the string onto the eye screw and trim off any extra string.

Since this game is going to be used on your tabletop it might be a good idea to add a few felt furniture pads to the bottom of the base so that the game doesn't scratch the surface of your table. This step is optional however if you value a nice unscratched table top you might not want to skip this step.
My boys wanted to paint their Bimini games to really personalize them. They just used acrylic paint and went to town customizing the color of their games.
That's it! You are done and now you have your very own hook & ring game. Wasn't this so much fun? These games would make a great gift for Christmas, birthdays or even Father's Day/Mother's Day.

HOW TO PLAY THE HOOK & RING GAME
This game can be played with an unlimited number of players. Just make sure everyone gets the same number of ring swings.
Game Rules
Version 1: First player gets 10 ring swings. Player scores 1 point if the ring touches the hook, 2 points if a double touch, 5 points for getting the ring onto the hook. After 10 ring swings the next player gets a turn. Play up to 50 points.
Version 2: First player gets 10 ring swings. 1 point is awarded each time a player gets the ring to stick onto the hook. After the first player takes 10 ring swings the next player gets a turn. First player up to 11 or 21 points wins.
Hey there! I know this is kinda off topic but I'd figured I'd ask. Would you be interested in trading links or maybe guest writing a blog post or vice-versa? My site goes over a lot of the same subjects as yours and I think we could greatly benefit from each other. If you might be interested feel free to send me an email. I look forward to hearing from you! Terrific blog by the way!
ReplyDeletebathing suit tops uk
Thanks for reaching out to me! I'd love to take a look at your blog and see if it would be a fit for me. Please send me your blog address and I will take a look at it. Thanks!
Delete