
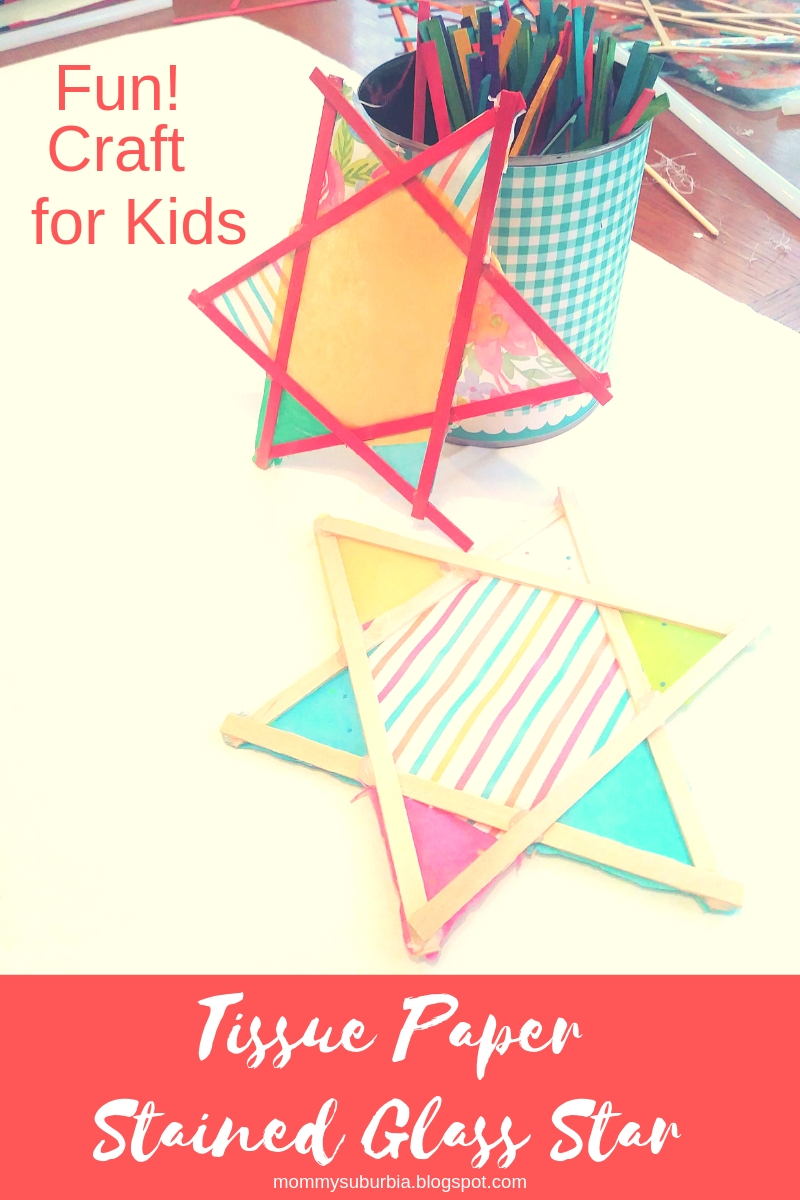
Do you have the winter blahs? These dark gloomy sunless days can sure take a toll! Why not brighten up your surroundings with these fun and colorful tissue paper stained glass stars?
Cheerful, colorful and very easy to make, these bright stars will shine a little light into your home on these gloomy days of winter.
Want to know how we made ours? Of course you do! Here is a tutorial showing how you can make some of these cool stained glass stars too.
This post may contain affiliate links which means if you make a purchase from a link I may receive a small commission at no additional cost to you. For more information please see my Disclaimer page.
Tissue Paper Stained Glass Star
Supplies needed (see where I got my supplies at the end of this post)
- variety of colorful tissue paper (I got mine at the Dollar Tree)
- glue sticks
- coffee stir sticks or thin craft sticks
- scissors
- hot glue gun & glue sticks
- craft place mats
Tutorial - Tissue Paper Stained Glass Stars
1. The first thing we did was play around with the stir sticks to create star shapes. Our stars all came out different which just adds to the beauty of them. You definitely want to work on top of a plastic place mat so that the glue doesn't stick to your work surface.
2. The easiest way to create a star shape is to make two separate triangles using 3 stir sticks for each triangle. Use your hot glue gun and glue to secure the edges of your triangles together. Then all you have to do is arrange the two triangles on top of each other to make a star shape, add a dab of hot glue to hold them together and wa-la you have a star frame!
I recommend making all of your stir stick star frames first before adding the tissue paper. This will help you stay organized as you craft!
3. Next, cut small square shapes from various colors of tissue paper that are large enough to fully cover the open sections on the star. Place the tissue paper over each of the sections of the stars and arrange the colors to your liking.
4. Once you have the papers arranged the next step is to glue the tissue paper onto the stir stick star frame. At this point there is no need to cut the tissue paper to the exact size we will do this later. With your glue stick spread glue along the wood stir stick section by section and place the tissue paper down on the glue and gently rub along the stick to secure the tissue paper to it. Here is a picture showing what this looks like:

5. Grab a pair of scissors and start trimming off the excess tissue paper. The little bits you can't trim can be folded back onto the stir stick star frame.
6. If you want to hang your tissue paper stained glass stars the easiest way is to use thin baker's twine or any other type of string or twine you have on hand - the thinner the better since these are fairly delicate. You could either tape the string to the frame of the star or poke a small hole at the tip of one of the tissue paper stars points and run the twine through the hole. We chose to string our stars individually but you could easily make your stars into a hanging banner and string it across your mantel or window. The possibilities are endless.

Don't forget to Pin this for later so you can make your own tissue paper stars!
Wondering where I got my supplies for this craft? Check out the links below!
Hot Glue Gun:
 |
| Hobby Lobby |
Wood Craft Sticks / Coffee Stir Sticks
 |
| Hobby Lobby |
 |
| Walmart |
 |
| Walmart |
No comments:
Post a Comment
Your comments are appreciated! Thanks for your suggestions, questions and feedback.