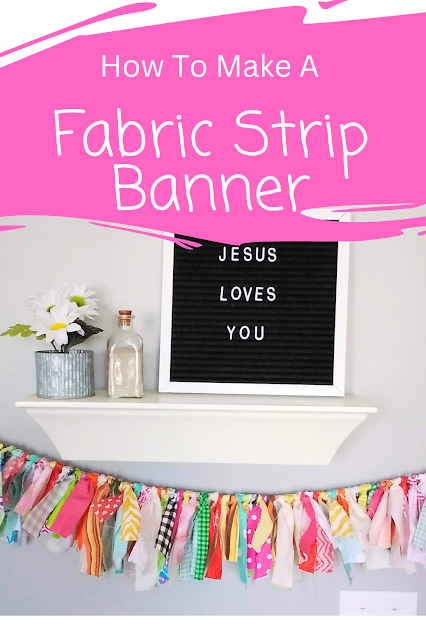
Decorating on a budget can be challenging no matter what room in your house you are looking to update. Instead of a complete room overhaul sometimes a few small, simple changes or additions can have a big impact. Little pops of color, patterns, and texture can really change the feel of a room without breaking your budget.
A little imagination and a few supplies are usually all you need to make a room feel updated. This no-sew Fabric Rag Strip Banner is a perfect way to add color and texture to a room that just needs a little boost. Not only is this banner inexpensive to make but it is really fun and whips up fast. The colors and size of the banner can easily be adjusted to match your room decor and fit your room’s space.
Customizable Banner Ideas
Because this rag strip bunting is so versatile you could make one in pastels for a nursery and another in bold geometric shape printed fabric for your teen’s room!
Here are some more ideas for color selection for your rag strip banner:
Favorite sports team colors
Holiday colors: red/green for Christmas, black/orange for Halloween, red/pink/white for Valentine’s Day, red/white/blue for the 4th of July
Ombre
No matter what pattern or color you choose I guarantee it will turn out amazing!
How to Display Your Fabric Strip Banner
These banners can be displayed across the top of a curtain rod like a valance or draped across curtains for a pop of color. If you are looking to spruce up your living room decor you could attach the bunding across a fireplace mantel. Draping around a bedroom mirror in your teen’s room is also a great way to display a rag strip banner.
A little imagination can really go a long way with this simple project. I promise once you make one you are not going to want to stop!
How To Make A No-Sew Fabric Rag Strip Banner
Gather up the following supplies and follow this step-by-step tutorial.
Supplies:
Scissors or rotary cutter & self-healing mat (optional)
Various strips of colored cotton fabric cut into 1 ½” x 8” long strips
Twine or thin macrame cord rope cut to the length needed + 8” for hanging
Tutorial:
1. Cut your fabric into strips 1 ½” wide by 8” long. Any cotton fabric will work including old sheets or even men’s dress shirts - just use what you have on hand!
2. Measure 4” in from one end of the twine and begin looping the fabric onto the twine. I find it best to fold the strip of fabric in half matching the cut ends together then take the loop part of the fabric and lay it on top of the twine. Tuck the fabric strip cut ends under the twine then put them through the loop and pull to tighten the fabric strip to the twine. Continue to loop the fabric strips onto the twine leaving 4” of twine at the other end.
3. Once all of the fabric strips have been tied to the rope or twine hold up the banner and trim the ends of the strips to the same length if you want a more uniform-shaped banner. If you want some variety in the length of the strips you can skip this step.
I just love these types of useful DIY projects that can be customized to fit your colors and decor. These fabric strip banners make a great gift for a baby shower, birthday, or a special holiday.
More DIY Projects To Check Out
If you liked this project I know you will like these other DIY projects too -
DIY Rock & Wire Picture Holder


No comments:
Post a Comment
Your comments are appreciated! Thanks for your suggestions, questions and feedback.