

Christmas crafting is in full swing around here! Glitter, glue, cardboard, beads and many other kinds of craft supplies are strewn across our table this time of year. Christmas is just so inspiring and it is so much fun making holiday themed crafts with your kids at Christmas. Today I am going to share with you a craft my kids and I are currently working on together. We are making 3D Christmas trees!
This craft requires minimal supplies and turns out looking amazing. I got the inspiration for this craft while my kids were helping their grandparents (my parents) decorate their Christmas tree. My mom pulled out a set of wooden 3D Christmas trees my sister and I had made way back in our childhood as a gift to her one year. My dad, a retired shop teacher, had cut out these Christmas tree shapes from wood had my sister and I paint and decorate them and we wrapped the up and gave them to my mom for Christmas. She still has them! I was just so inspired by those trees and the memories of making them I wanted to do something similar with my kids this year.
In an effort to simplify the craft from the original wood tree I wanted to make our 3D Christmas trees out of corrugated cardboard. This type of cardboard is sturdy and seems to be in abundance this time of year due to all the boxes being delivered to my house (thanks Amazon) - and it is FREE!!

After creating a template to use for our 3D tree we got to cutting, painting, gluing and full on decorating to create the cutest 3D Christmas tree ever. If you are looking for a great craft project to do with your kids this one is perfect! These would also make great gifts to give to grandparents or aunts & uncles.
To make this project super easy for you I created a tree template for you to use. I really like the rounded edges of the tree boughs but if you prefer a more triangular shape you can adjust the pattern to fit your taste. Also, if you want to make your tree taller or bigger simply enlarge the pattern or trace a wider line around the shape I created to make the three size you want.
Shall we get started?
OK, go print off the pattern below on 8 1/2" x 11" printer paper, grab a cardboard box, scissors or whatever you like to use to cut cardboard and let's get started.
On a side note - do you do a lot of crafting with cardboard? We do! After many, many projects that required scissors or an exacto knife to cut cardboard my hand was getting tired! I was really getting tired of this but didn't want to stop crafting. The solution I found was a cardboard cutter! This handy tool is specially designed to cut cardboard effortlessly! Yes - effortlessly! And no need to worry about a super sharp exacto blade or box cutter blade injuring you or your child, this special tool is much safer and doesn't have a pointy sharp tip. This tool is awesome and I highly recommend you get one to use for this project and future cardboard cutting projects.
This post contains affiliate links which means if you click on a link and make a purchase I may receive a small commission at no additional cost to you. For more information please read my Disclaimer page. Thanks!

3D Christmas Tree Tutorial
Supplies: (a list of what I used and links where I got them at at the end of this post)
Tree template - printed out and cut out of regular printer paper
Cardboard - 2 pieces at least 9" x 8" (if using the template provided)
Canary cardboard cutting tool (if you don't have this use Scissors or an Xacto knife)
Ruler or straight edge tool
Craft paint
Paint brushes
Glue (hot glue or Elmer's will work)
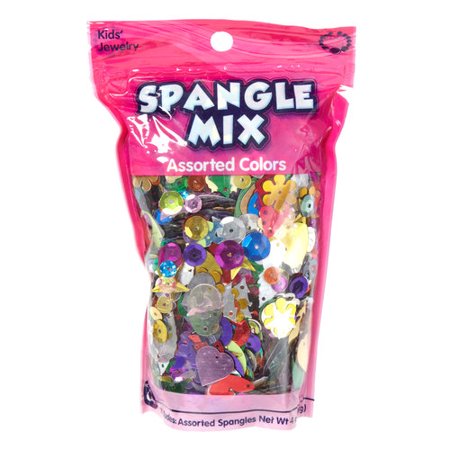
Decorations to decorate your painted tree with (sequins, buttons, pom-poms, string - the sky is the limit!)
Instructions:
After printing out the Christmas tree template onto a printer paper, trace the pattern onto two pieces of corrugated cardboard and cut out the two tree shapes from the cardboard. This is a step that an adult should do since it requires sharp tools - please use caution and be careful!
In order to make our tree 3D we are going to have to cut slits in the center of each cardboard tree piece so we can slide each piece together to make a tree that stands up on its own. So now that you have the cardboard trees cut out it is time to measure for the slits that need to be cut out.
 |
| See the slits I cut out of each piece above. |
The slits only need to be as wide as the thickness of your cardboard. For each cardboard tree make a light pencil mark at the center of the tip of the tree and at the center point at the bottom of the tree. Take one of the tree cutouts and from the bottom center mark you just made in pencil measure up the middle of the tree 5 inches and make a pencil mark connecting these two points. Now with the second cardboard tree start from the top of the tree and measure down the middle of the tree 4 inches again connecting the two points with a pencil mark. Using a straight edge or ruler measure and mark in pencil a line just 1/16" over on each side of the center line you have marked on both cardboard tree pieces. Because the cardboard is probably 1/8" or less thick you are going to want to be careful not to cut the slits too wide otherwise the trees will be wobbly.
With your cutting tool of choice cut the cardboard where you just marked creating one slit in each tree like I did in the picture below. Fit the two cardboard tree shapes together and make adjustments if necessary. If there is a small gap when the trees are connected don't worry! When the trees are sitting up right on a flat surface the bottom of each tree will make it flush.
At this point you can choose to glue the assembled tree together but I recommend if you are going to glue it to set the tree up on a flat surface and glue it then so that the tree isn't wobbly and the bottom of the tree is flush against a flat surface.
The tree is now ready to be painted and decorated! You could paint it whatever color you choose or maybe even use chalkboard paint so that you can write a message on your tree. The options are endless and so much fun for anyone making one of these 3D Christmas trees.
I'd love to see your finished 3D Christmas trees! Please share in the comments section. Also, if you have any questions please ask!
Merry Christmas!
Looking for more fun holiday craft projects? Check out this tutorial for a mini sock snowman craft project! It is super fun and makes such a cute snowman!
 |
| for the full tutorial click HERE |
Where I Got My Supplies:
If you don't happen to have the same supplies I used handy here is where you can find them at a reasonable price:
 |
| find HERE on Amazon |
Acrylic Paint:
 |
| find HERE at Walmart |

Great project for larger groups!
ReplyDeleteHey would you mind sharing which blog platform you're working with? I'm looking to start my own blog soon but I'm having a tough time deciding between BlogEngine/Wordpress/B2evolution and Drupal. The reason I ask is because your layout seems different then most blogs and I'm looking for something unique. P.S My apologies for getting off-topic but I had to ask!
ReplyDeletediscount womens swimsuits uk
Thanks for your question! I use Google Blogger (blogspot) for my blog. My blog is a "learn as I go" adventure for me and I'm having a blast learning all about blogging. I like the simple format of Blogger and it has been easy for me to learn so far. Best of luck with your blog!!
Delete