Showing posts with label holiday. Show all posts

Wednesday, April 16, 2025

Top 5 Easter Basket Ideas For A Memorable Celebration

Easter is just around the corner, and if you’re looking for creative and fun ways to fill your Easter baskets, you’re in the right place!


This post contains affiliate links which means if you click on a link and make a purchase I may receive a small commission at no additional cost to you. For more information see my Disclaimer page. Thanks!

5 Amazing Easter Basket Ideas  

Whether you’re crafting a basket for kids, adults, or even pets, there’s no shortage of ideas to make this holiday extra special. To help you get started, we’ve rounded up five Easter basket ideas that will delight your loved ones and add a little extra fun.

1. Classic Candy Craze Basket

You can never go wrong with the classics! An Easter basket filled with an assortment of candies is always a crowd-pleaser. Think chocolate bunnies, jelly beans, pastel-colored M&Ms, and individually wrapped caramel eggs. You can even add in some novelty candy shaped like Easter symbols, such as crosses, chicks, or flowers. For a twist, include a mix of milk, dark, and white chocolate to cater to every sweet tooth.

Tip: Add a few Easter-themed treats like chocolate-covered pretzels or bunny-shaped cookies for extra flair.


2. Crafty and Creative Basket for Kids

If you’re putting together a basket for a child, you can combine fun activities with festive treats! Look for small craft kits, coloring books, crayons, or Easter-themed puzzles. Add some playdough or even a set of DIY Easter egg decorating supplies for hours of fun. You could also include a plush bunny or chick to make the basket even more cuddly.

Tip: Consider a “build your own bunny” craft to make your own stuffed animal bunny. Here is an EASY NO-SEW SOCK BUNNY TUTORIAL your kids will love making so they can enjoy their new furry friend! 


3. Gourmet Easter Basket for Adults

Easter isn’t just for kids—adults can enjoy their own basket too! A gourmet Easter basket filled with artisanal chocolates, premium coffee beans, flavored teas, or even small bottles of craft liquor can bring a sophisticated touch to the celebration. You could also add in some high-quality snacks like nuts, dried fruits, or gourmet popcorn for a little treat to savor. If the person you're gifting enjoys cooking, consider including a set of unique spices or an herb garden starter kit.

Tip: Add a personalized touch by choosing items that match the recipient’s favorite flavors, such as dark chocolate for a chocolate lover or a bottle of rosé for wine enthusiasts.


4. Easter Basket for Pet Lovers

Don’t forget about the fur babies! Many people love to spoil their pets on Easter too. For dogs, you can create a basket with dog-friendly treats like gourmet biscuits, chew toys, or even a personalized collar. For cats, consider including catnip-infused toys, treats, and even a cozy pet bed. You can even throw in a cute Easter-themed bandana for that extra festive touch.

Tip: Include a small Easter basket just for the pet owner, with something like a pet photo frame or personalized pet keychain to show off their love for their furry friend.


5. Outdoor Adventure Basket for Active Folks

For those who love the outdoors, consider creating an Easter basket with items geared toward adventure and exploration. Think along the lines of a new water bottle, hiking socks, portable snacks, or a multi-tool for their next camping trip. You could also add in a pair of sunglasses, sunscreen, or a cozy beanie for a thoughtful, practical gift. If they’re into gardening, include some small potted plants or garden seeds to start their own little outdoor haven.

Tip: For an extra surprise, include an Easter-themed scavenger hunt or an activity book that challenges them to get out and explore!


Easter baskets are a wonderful way to celebrate the season, and with a little creativity, you can craft something truly special for anyone in your life. Whether you're opting for traditional sweets, fun activities, or thoughtful gifts, the possibilities are endless. With these five ideas in mind, you're sure to create an Easter basket that will leave everyone smiling!


Happy Easter and happy basket-making!

Saturday, September 4, 2021

Easy Fall Pumpkin Craft Project For Kids

With fall just around the corner, it is time to start thinking about all of the fun fall crafts to make. Fall is such an inspiring season full of colorful leaves, apples, cider, and of course pumpkins! Pumpkins can be used for decoration, carving, and of course to make pumpkin pie (my hubby's favorite).


Fall just isn't fall without pumpkins - everyone loves pumpkins! 

Today's craft project uses pumpkins as the main attraction however you could use any shape or design you like too. This project uses everyday household items and is very budget-friendly. I guarantee kids of all ages will enjoy making their own aluminum foil pumpkin.

This project would also work well in a group setting like a co-op, youth group, Sunday school or school. Because it comes together so quickly and requires minimal supplies or pre-planning you can certainly have your kids make these with friends too. I recommend an adult or older child be in charge of the hot glue gun to prevent any injuries though.


Aluminum foil (a.k.a. tin foil) is the star medium for this project so go raid your pantry and grab that roll of foil. The shiny, smooth texture of tin foil and its ability to be easily bent makes it so much fun to use for craft projects. 

The project we will be making today is a colorful foil embossed pumpkin. Embossing is just a fancy term that means carving, molding, or stamping a design on a surface or object. Don't let this big word scare you away from this easy and fun project. 


Aluminum Foil Embossed Fall Pumpkin Craft


Supplies:


* feel free to use this free pumpkin printable template if you are not comfortable drawing a pumpkin freehand. Coloring book pages work well for this project too!


Download the free pumpkin template here.


Download free pumpkin template (without words) here


Instructions:

Because we are using permanent markers it would be a good idea to cover your work surface (a.k.a the kitchen table) with a placemat or plastic tablecloth before doing this craft project. 

1. Print off the free printable pumpkin template or draw your own on a piece of regular size printer paper making sure to include the vertical lines along the front of the pumpkin, stem, and any leaves. Tape the paper onto the piece of cardboard with the pumpkin picture right side up. 

2. Use your hot glue gun to trace the outline of the pumpkin along the lines from the template or from the pumpkin shape you drew making sure to cover all of the lines completely leaving the inside empty space of the pumpkin free from hot glue. Try to prevent any gaps or blobs of hot glue which will show up when we emboss the design onto the foil. 


3. Tear off a large sheet of aluminum foil taking care not to wrinkle it too much. Place the sheet of foil over the paper with the hot glue outline and smooth it down taping the edges to the back of the cardboard. With your fingers gently press the foil down around the glue molding the foil to the glue outline. Smooth out any wrinkles with your finger being careful not to tear the foil. 

4. Use the Sharpie markers to color in the smooth flat spaces inside the center of the embossed pumpkin shape to make your fall pumpkin. 

5. (Optional Step) Trace around the outside edges of the embossed lines with a black or other dark color Sharpie marker.

You are all done! Pop your finished fall foil art into a frame (minus the glass) and enjoy it all season long. 

My boys were so inspired by this pumpkin project that they ended up raiding our craft cupboard to find great pictures from their favorite coloring books to use next. My youngest found the coolest mini-spider man picture and my other son used a picture of a basketball to emboss in foil and color just like we did with the pumpkins. 


Once you get your kids started the sky is the limit on what they can make! Let their imagination go wild and see what they make.


Friday, December 20, 2019

Easy DIY Bath Bombs With Custom Flavor Recipes

DIY bath bombs are a ton of fun to make and are a fabulous homemade gift idea! Because they are quite simple to make, are fairly forgiving when it comes to measuring the ingredients and can be shaped into almost any form you have available they are a great project to do with your kids.


Did you know that you can make custom scented bath bombs too? There are endless scent combinations you can use to truly make your bath bombs one of a kind. Customize your bath bomb scents and give them as gifts for celebrations like Christmas, Easter, birthdays, Valentine's Day and many more special occasions. They truly make the perfect gift for those you and your kids care about! Keep the simple ingredients handy so you are ready at a moment's notice to whip up a batch for gifting to a last minute party or just to surprise your child with at bath time!

This post contains affiliate links which means if you click on a link and make a purchase I may receive a small commission at no additional cost to you. For more information please see my Disclaimer page. Thanks!

I remember the first time my kids got their own bath bomb. A small box from an out of state aunt and uncle arrived a few days post Christmas and they were so excited to open this belated gift. They tore it open and stood looking confused at the big colorful set of 4 bath bombs. At the time they didn't know what they were so I had to explain that they made your bath all fizzy and scented as they dissolved in the water.

Of course the kids insisted that they needed baths at that exact moment so we ran up to the bathroom and filled the tub! They were pretty little at the time and we often called the bath our pool so they all threw on their swim suits and jumped into the tub together. Needless to say the bath bombs were a BIG hit! The kids loved holding the bath bombs just under the water to feel them bubble and dissolve. The bathroom smelled AMAZING too! The biggest surprise for all of us was the little toy hidden inside each bath bomb! Since then my children have all loved bath bombs and love getting and giving them as gifts!

Ready to make your own bath bombs to give as gifts this year? Gather the following ingredients and follow the step by step instructions below!


Easy DIY Bath Bomb Tutorial


Supplies Needed:


Dry Ingredients


Mix The Dry Ingredients
In a large stainless steel or glass bowl, mix all of the dry ingredients together. If you are going to make multi colored bath bombs, divide the dry mix into two or three separate bowls and add different color pigment to each bowl (this step is optional).

Mix The Wet Ingredients
Melt the coconut oil in a small microwavable bowl or over a double boiler. In another stainless steel or glass bowl mix the wet ingredients together including the melted coconut oil, water and essential oils. (For custom flavor scents see the recipe options below)

Combine Wet & Dry Ingredients
Start by SLOWLY adding the wet ingredients to the dry ingredients. Mix all the ingredients together until they are the consistency of wet sand and won't crumble. Depending on the climate where you live you may want to use the spray bottle to spray the water over the mixture evenly. The amount of water may vary slightly depending on the humidity of your area.

Shape & Mold The Bath Bombs
Lightly spray the non-stick spray on the inside of whatever molds you are using to ensure the bath bombs don't stick to the mold. Fill each mold completely packing the mixture in until the mold you are using is slightly overflowing. 

If you are making a multi colored bath bomb you will want to fill the mold with the desired colors and continue packing the ingredients into the mold until it is completely full. If using the ball shaped molds fill each half them press the halves together firmly. 

Allow the mold to sit for 2 minutes then gently tap the mold and slowly pull the halves apart to remove the bath bomb. The bombs will be fragile so be careful when separating the halves! 

Set your bath bombs somewhere where they will be left alone to dry for 24-48 hours. 

Packaging Your Bath Bombs
Are you giving your bath bombs as gifts? In this case you will want to wrap them in clear cello sheets and tie them closed with string or ribbon. Don't forget to add these FREE printable Christmas gift tags from Fragrancex.com! All you have to do is print these cute gift tags onto card stock, punch a hole at the top and tie them to your gifts. 


Click HERE to find the free gift tag printable.
DIY Holiday Scented Bath Bomb Recipes Image Map
click HERE to get free printable Gift Tags

*Fragrancex.com has all sorts of great fragrances for both men and women! Make sure to check out this site when you are looking for perfumes, fragrances and many other great scented products.


8 Holiday Essential Oil Flavor Scent Recipes 

Here are 8 great custom holiday flavor scent recipes you can mix and use in your bath bombs this winter or holiday season.

* remember these are NOT edible! They may smell yummy but they will not be good for your tummy! Please supervise children when using bath bombs to make sure they don't eat them.


Make sure to PIN this post so you can refer back to it when you are ready to make your own bath bombs! Let me know how your bath bombs turned out in the comment section!

Friday, October 4, 2019

The Best Halloween Games, Crafts & Candy Free Treats For Kids

Don't let the scary Halloween ghouls and ghosts scare you away from having some fun with your kids this year.  A "fright free" Halloween can be enjoyed by kids of all ages.


If you are looking for some fun Halloween activities for your youngster you have come to the right place! You won't find any scary monsters here but you will find fun Halloween themed crafts, a challenging scavenger hunt, some tasty treats and many more ideas for your family to enjoy together.

This post contains affiliate links which means if you click on a link and make a purchase I may receive a small commission at no additional cost to you. For more information please see my disclaimer page. Thanks!

Fun But Not Scary Halloween Activities & Treats For Kids


HALLOWEEN GAMES

Halloween Scavenger Hunt


Everyone loves a fun (and not spooky) Halloween scavenger hunt! The best part about this cool Halloween Scavenger Hunt from Sunny Day Family is that all the work is done for you  - all you have to do is print, cut and play! The Halloween Scavenger Hunt set comes with 4 total pages - there are 12 pre-printed clues plus instructions. There is also a page of blank cards for you to create your own custom adventure if you'd like. (click HERE to purchase your own pre-made Halloween Scavenger Hunt)


Mummy challenge


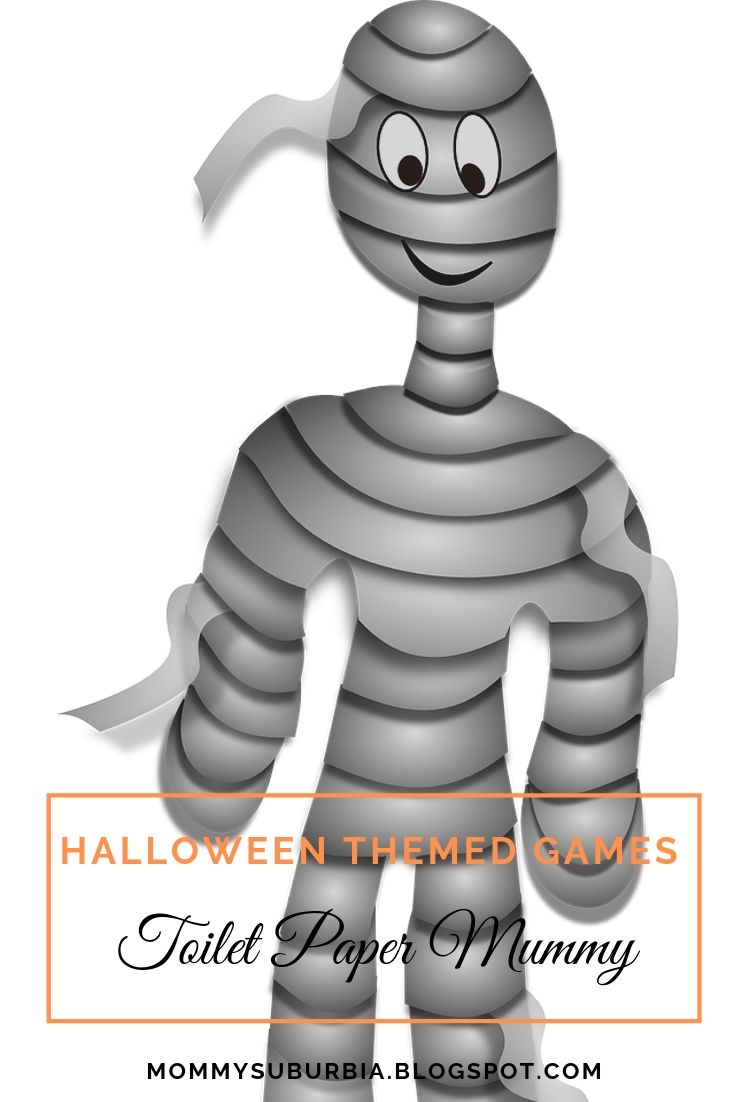
Divide your family or group into teams (3-4 people per team). Give each team a roll of toilet paper. Select one person per team to be the mummy. The rest of the teammates take turns wrapping the mummy up with toilet paper. The team with the beat mummy after 2 minutes wins the challenge.


Pumpkin Ring Toss


Toss rings onto the stems of several pumpkins. The person who gets the most rings on the pumpkin stems within 2 minutes wins. Check out the full tutorial here. (for plastic ring toss rings click HERE)

Pumpkin Memory Game
You will need 12 orange paper plates or if you can't find orange plates either paint or color plain paper plates orange. Using black paint or black construction paper create 6 matching sets of pumpkin faces. Glue on the faces or paint on the faces to the orange plates. Mix up the plates and lay them face down in a random order. Take turns trying to find matching faces. When a match is found remove it from the game. 

The winner is the person with the most matching plates. The complete tutorial can be found at Simple Play Ideas. 

Lollipop Ghost Hunt


Supplies needed: package of lollipop suckers, white tissue paper or white Kleenex, clear tape, black marker.

Hold a lollipop sucker, candy side down in the middle of a tissue. Gather the tissue around the sucker so that the round part is completely covered. Wrap a piece of tape securely around the tissue just under the sucker so that the sucker doesn't fall out. Draw eyes and a mouth on each ghost. 

Secretly hide the ghosts around your house and let the kids find them. Finders keepers!


HALLOWEEN CRAFTS

Mini Marshmallow Ghost Poppers


For this craft you will need white paper cups, large balloons, sharper markers, white cardstock (optional), hot glue and hot glue gun and mini marshmallows. 

Find the full tutorial and video instructions at The Craft Train. Either pom-poms or mini marshmallows can be used in these fun poppers! Pull down on the balloon and let the fun fly!!

Paint A Pumpkin


Supplies needed: mini pumpkins, tempra or acrylic craft paint, plastic place mats, paintbrushes, small cups or bowls of water, paper towels.

Gather enough mini pumpkins (small orange gourds) for each person to have their own. Using tempra or acrylic paint let your children paint anything they want on their mini pumpkin. You might want to suggest the drip painting method and see how colors mix as the colors run together down the pumpkin. Make sure you put the pumpkins on top of a plastic place mats so you don't get paint on any surfaces that shouldn't be painted.

For a step by step tutorial visit Glued to My Crafts blog! 

Spooky Spider Web
Supplies needed: Popsicle sticks, white or silver acrylic craft paint, paint brush, hot glue and glue gun, 6-8' of orange, black or white yarn, mini plastic spiders.

For a complete tutorial on how to make these amazing Popsicle stick spider webs go to Consumer Crafts Blog


HALLOWEEN TREATS


Candy Corn Krispie Treats


via: Pint Sized Treasures

Everyone loves Krispie treats! They whip up super fast and look amazing especially when dipped in chocolate. Cut the treats into triangle shapes to resemble the shape of candy corn then dip the tips of the triangle into melted white chocolate and the bottom into melted milk chocolate to make these party favorites. 

Vampire Donuts


via: Sisterhood Of The Sensible Moms

Here is another Halloween treat that is perfect when you are short on time and need a treat for the kiddos. These little monsters can be put together in less than 10 minutes and turn out super cute and taste great! The bonus is that each child can have their own set of vampire teeth to take home with them. You can find a great pack of vampire teeth HERE.

Fruit Kabobs


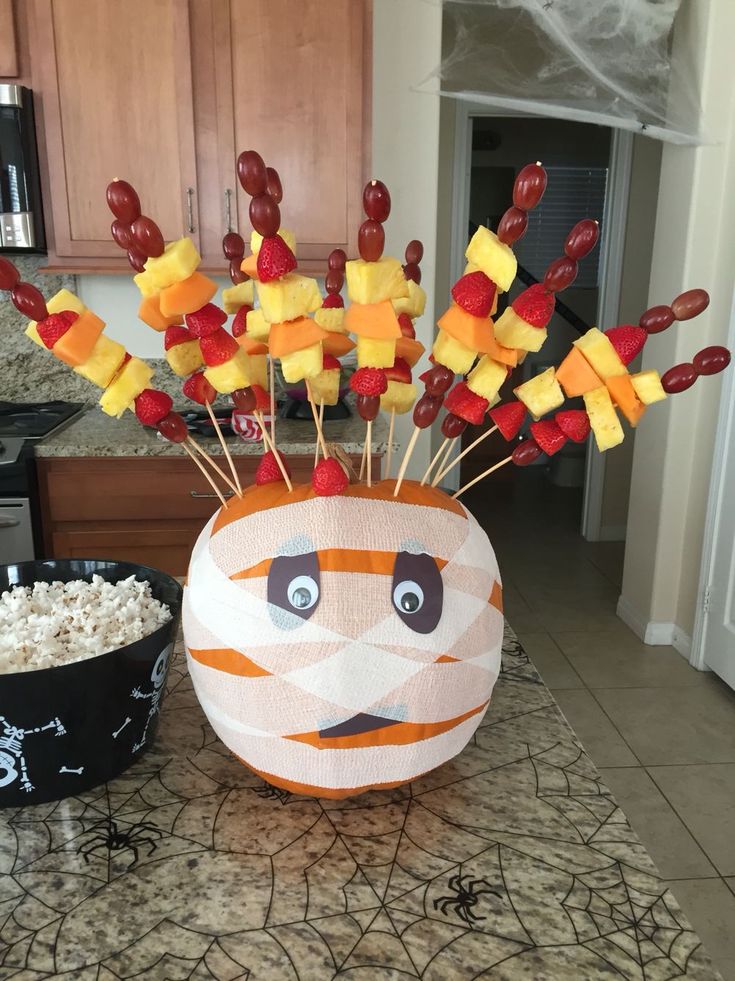
Halloween is always packed with sweets and candy and it can be hard to sneak a healthy treat in but I think these fruit kabobs are sure to get kids eating at least one healthy snack!

Decorate a medium to small size pumpkin by wrapping crepe paper around it to look like a mummy. Draw eyes and a mouth on the crepe paper or cut out eye shapes from black and white construction paper and attach to the pumpkin's front face area and you are all done decorating it.

Next grab 20-30 wooden skewers (find some here) and begin sliding red and green grapes in an alternating pattern onto the wood skewer. Top the end with a strawberry. Push the sharp point of the skewer into the top of the pumpkin and continue filling in the top with more fruit kabob skewers. 

click HERE for the Halloween Planner

Before you go I wanted to show you this great Halloween Party Planner and Halloween Coupon Book. If you struggle with keeping holiday activities, snacks, costumes and all the other busyness that comes with holiday celebrations this printable planner is a must-have! Don't be that mom who is rushing to the grocery store at 5pm on October 31 to buy Halloween candy or costumes - plan ahead to keep your sanity. 


The Halloween coupon book is a terrific bonus that comes with the planner. The coupons can be customized so you can make them specific for each child. Use them as special rewards for your child for a special treat like date with mom or dad! This is a great sweet free treat that won't disappoint. 


Happy Fun (and not scary) Halloween!


Saturday, April 13, 2019

How to Host An Awesome Easter Egg Hunt - Free Easter Printable

Host an awesome Easter egg hunt for your kids! Check out the free kids Easter egg coupon printable (adult coupons too) in this blog post.


Easter is just around the corner! Every year we host a big party at our house inviting several families over to celebrate with us. 

There are always lots of kids at this party ranging in ages from toddler to teen. No matter their ages, all of the kids still love participating in a traditional Easter egg hunt. 


This post contains affiliate links which means if you click on a link and make a purchase I may receive a small commission at no additional cost to you. For more information please see my Disclaimer page.


Free Easter Egg Coupon Printable 


I love mixing up what goes into the eggs and this year I've got a special addition to add to the eggs this year. My friends at Gifts.com have provided a free Easter Egg Coupon printable that I get to share with you! 

The printable coupons include both silly and meaningful activities that all ages will appreciate. What teen wouldn't want the coupon to "skip out on a chore" that they can turn in anytime and I'm sure my boys will want the coupon for "a water balloon fight". 

The great thing about these coupons is that there is no expiration date and you can print as many as you need! They are also a great alternative to Easter candy if you are looking for a non-candy Easter basket idea. The free Easter egg coupons also include blank templates so you can add your own ideas to personalize some of the coupons. 


via: Gifts.com

Here are a few examples of what is included in the free Easter egg coupon printable:

  • Indoor camping
  • Breakfast for dinner
  • Ice cream/frozen yogurt date
  • Family bike ride
  • Get out of one chore
  • Extend bedtime by one hour
  • Download a new app/game
  • Music DJ for one car ride
  • Water balloon fight
  • PJs all day
  • Lunch with mom and dad
  • Sleepover with three friends
  • Start a garden
  • Zoo trip
  • Fly a kite
  • Paint birdhouses
  • Family nature walk
  • Sprinkler party

Download the kids Easter coupons here:


Looking for a way to get the adults involved or having an adult only Easter party? Check out the Easter egg coupons printable for adults at Gifts.com


click here for printable from Gifts.com

Click the picture below to download the adult Easter egg printable:


Our Easter egg hunt also includes a "Golden Egg". Whoever finds the Golden Egg receives the top prize. In the past the top prize from the Golden Egg has consisted of things like a giant candy bar, stuffed animal, money, pool toy or a gift card. 

The older kids love the challenge of finding the Golden Egg! I have to hide it really well since they are good finders. 

Our annual Easter party is a lot of fun but what is most important is that we get to celebrate the true meaning of Easter, the resurrection of Jesus, with friends and family. 


Do you have any fun Easter traditions? Or a favorite Easter candy (jelly beans anyone??)? 

Tuesday, January 15, 2019

How To Make Heart Shaped Crayons


mommysuburbia


My youngest tells me "I love you mommy" multiple times throughout the day. I swear I will never tire of hearing him tell me this. I've even started making him promise that when he is a teenager he has to keep telling me he loves me. I'm sure the days ahead, full of teenage angst will come but today I'm going to bathe myself in hearing his sweet little voice tell me he loves me.

This post contains affiliate links which means if you click on a link and make a purchase I may receive a small commission at no additional cost to you. For more information please see my Disclaimer page.

When my husband and I were dating we decided that for our first Valentine's Day together we would make each other something. We were just poor college kids so we needed to be a little creative with our very limited budgets. Honestly this Valentine's Day was and still is my favorite one! You are probably wondering why, but first let me give you a little background to my husband and why his gift to me was so precious and meaningful. 

He can't cook or bake or do anything in the kitchen aside from make himself a bowl of cereal or brew some coffee. His kitchen skills stop there! I'm not even exaggerating - at all. Now that you know him a little better his gift to me will show you how much he was trying to communicate his love or me. 

Back to the homemade gift.


Walmart

He went to the store, bought a heart-shaped cake pan and a boxed cake mix and a tub of frosting along with a bag of cinnamon red hot hearts. This sweet guy made his very first cake EVER, frosted it and put one tiny little red-hot cinnamon candy heart in the middle and gave this to me as a gift. (I'm pretty sure he ate the entire bag of red-hots while the cake was baking!) I was blown away. This small gift spoke volumes to me since he was willing to step out of his comfort zone and into a very strange new world to him - the kitchen, all for me! What a memorable Valentine's Day for sure. 

DIY Heart Shaped Crayons 💗


Fast forward to the present day with 4 kids and the upcoming Valentine's Day holiday around the corner and I'm ready to start crafting some Valentine's Day themed crafts with them.

One of my favorite Valentine's Day crafts is making heart shaped crayons! If your craft cupboard looks like mine I'm sure you have a tub or box of broken crayons you just can't part with. When you have a little one (or many little ones) crayons seem to be breaking right and left but the best part is they still work!


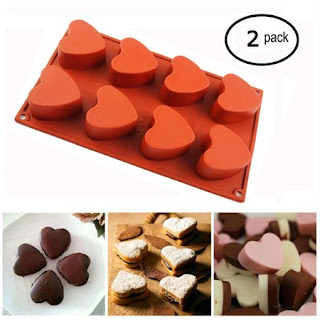
To make these cool heart shaped crayons all you have to do is pull out your tub of crayons pieces, remove any paper labels, put the chunks into molds like a cupcake tin pop them into a 250 degree oven for 15-20 minutes and let the heat of the oven melt the pieces into one solid mixed color mold.

My kids loved making these! My girls liked to make ones that were of the same or complimentary color palette whereas my boys preferred to mix dark colored crayons with light crayons. It didn't really matter what colors they put together because all of the newly shaped crayons turned out awesome.


Walmart


Once the molded crayon is dry and no longer hot just pop them out of the mold and start coloring. The mix of colors is fun to see since they all streak together when you use your new crayon.

We gave our heart shaped crayons away as Valentine's Day gifts to our friends at Bible study and they were a BIG hit! At first the kids couldn't believe it was a crayon but once they started using them they had a blast coloring with them.

Since I had the supplies (broken crayons & heart shaped cupcake tin) on hand this project cost me $0!! Don't you just love projects like this? I certainly do.
Hobby Lobby

I've really gotten a lot of use out of these heart shaped cupcake pans too. Not only have I made cupcakes and rice krispie treats in them but I also used the mold to make seed bombs! I've put together a great tutorial in this post so you can make some too. They are super easy and also make great gifts for Valentine's Day. 


click HERE to read more

I hope these Valentine's Day craft projects were inspiring! If you enjoyed them please take a quick moment to pin them on Pinterest.

Looking for more inspiring crafts to do? Get a copy of my ebook, Secret Garden Crafts: 10 Nature Inspired Crafts, on Amazon Kindle today. Full tutorials with pictures included in this great book!