Showing posts with label rag quilt. Show all posts

Tuesday, March 8, 2022

How to Make A Simple Rag Quilt

Rag quilts are easy-to-make quilts, perfect for a beginning quilter or even for a seasoned pro who needs to make something quickly. I fell in love with rag quilts because of the soft edges created by the ragging process and how cuddly these types of blankets are!


This post contains affiliate links which means if you click on a link and make a purchase I may receive a small commission at no additional cost to you. Please see my disclaimer page for more information. Thanks!

One of my favorite gifts to give a new mom is a handmade baby quilt. I recently made a rag quilt for a new mom at our church. I had several yards of camo cotton print fabric I had been saving for the right project and this was it! 

My friend had a baby boy so it was fun using up this black/gray camo print in this quilt. I used a total of four different colors of fabrics from my stash on the front of the quilt and a solid oatmeal-colored cotton flannel for the back. The finished baby quilt measured about 42" x  54".


(You can find quilting fabric and quilting supplies for your project at Fat Quarter Shop.)

Shop at Quarter Shop


Rag Quilt Size Guide

The size of a rag quilt can be easily adjusted to fit your needs. To make a rag quilt larger simply increase the size of the fabric squares or add more squares along the perimeter of the quilt.  If you need a smaller size quilt do the opposite and decrease the size of the squares or don't add as many squares to the quilt. Make sense? Great!


Brainstorming Your Quilt Pattern

I like to sketch out some ideas on graph paper before I start cutting the fabric. This way I know what the finished quilt will kind of look like before I commit to cutting into the fabric. For this rag quilt, I wanted the camo print to be in the center and the remaining fabrics to fill in around it in a symmetrical pattern. 

After I finished sketching out my idea I was ready to cut all of the fabric into 7" squares. My rotary cutter and cutting mat came in handy for this project! If you don't have one yet - get one, they are totally worth it!


 Cut Time, Quilt More  


Batting - To Use Or Not To Use

Typically rag quilts have a middle layer of quilt batting sewn between the top and bottom fabric squares to give the quilt some weight and extra warmth. If you live in a warmer climate you might want to substitute quilt batting for a layer of cotton flannel so your quilt isn't so thick or too warm. You can even leave this middle layer out completely for a very lightweight quilt too. I chose to add quilt batting for the middle layer since I live in a colder climate. 

The middle layer of batting should be smaller than the top and bottom layers of fabric. I cut the batting into 6" squares. Once your batting squares are cut it is time to take all your top, bottom, and middle squares to your sewing machine. 


How To Make A Simple Rag Quilt

Follow along with these easy-to-follow steps to make your own rag quilt. 

Starting A  Rag Quilt - Complete Step-By-Step Tutorial

  • Using your sketch determine how many squares of fabric you will need from each of the fabrics you chose for the quilt top. My quilt was 7 rows by 9 rows for a total of 63 squares for the quilt top. 

Cut out all the squares from the quilt top fabric and then cut out the same number of fabric squares for the bottom of the quilt. For my quilt I had a combined total of 126 squares of fabric! 

  • Next, place one square of bottom fabric face down, then place one batting square on top of the bottom layer of fabric centering the batting in the middle of the bottom square. Lastly, place one quilt top fabric square face up on top of the batting. This is called a fabric sandwich - isn't it yummy! Repeat this step with all the fabric squares you cut out until they are all made into fabric sandwiches.


  • Starting sewing diagonally from one corner of the fabric sandwich to the opposite corner in a straight line. To make this step (and the next) go quicker you are going to want to chain stitch these square sandwiches. Chain stitching means you continue sewing one square sandwich after another without cutting the thread between them. 

How I like to chain stitch is to first sew across the square diagonally then when I reach the other side of the fabric I continue sewing a few stitches past the edge, lift up the presser foot and slide the corner of the next fabric sandwich under the needle, drop the presser foot and continue sewing from one corner to the next diagonally. Keep chain stitching until you sew all of the squares. 

Cut the threads between the chain stitched squares then chain stitch all of the squares across the opposite diagonal of each square until each square has an "X" sewn across it. Here is a picture of what I mean:


Sewing The Squares Together 

  • After I sew all the "X"s on the fabric squares, I lay out the squares on the floor (or another large area) into the pattern I sketched for the finished quilt. At this point, you will be sewing the squares together row by row. You want the seams to show on the top side of the quilt so start by placing two squares of fabric from the first row together with the wrong sides (backside) facing each other. Sew the squares together with a 1/2" seam allowance. Continue sewing until all of the squares are sewn together into rows.


Sewing The Rows Together

  • After sewing the squares into rows you are now going to sew the finished rows together. Stack the first two rows together, making sure the wrong sides (backside) face each other and the seam lines between each of the squares line up. To make sewing the rows together easier, it is helpful to "nest" the seams of each square along the rows then pin each row together so it doesn't shift when sewing. To nest the seams make sure all of the seam allowances for the squares on the top row face one direction and the seam allowance for the bottom row face the opposite direction. This way when you line up the rows the seams between the squares fit together snugly and there is no extra bulk due to doubled up seam allowances on top of each other.  

Sew the rows together using a 1/2" seam allowance again making sure the seams allowances show on the top of the quilt.


Here is my quilt all sewn together before I clip the seams: 


Your quilt should be all assembled and sewn at this point! But....we aren't done yet. Hang in there, we are almost done!

  • This is a very forgiving quilt however it is important to square up the entire quilt before the next step. I like to lay my quilt on my self-healing mat and trim any wonky edges with my rotary cutter. 
  • Next, sew around the entire perimeter of the quilt using a 1/2" seam allowance. (I actually like to sew around the perimeter twice but that is just personal preference.)


Start The Ragging Process

Grab a sharp pair of scissors or spring action rag quilting scissors, which I highly recommend if you think you might make more rag quilts in the future. These spring-action scissors are the bomb when it comes to rag quilting! 

Now, start cutting all of the seam allowances on the top of the quilt and around the perimeter. I usually make cuts about 1/4" to 1/2" apart as I cut the fabric. Be very careful when you are snipping the seam allowances - you DO NOT want to cut through any of the seams! When you finish cutting the seam allowances take the quilt outside and shake it out. Shake it really well and when you think you are done... shake it some more! There will be a lot of small bits of fabric flying everywhere. 

Washing Your Rag Quilt

After shaking the quilt out (forever) it is time to throw it into your washing machine with a few old towels for a quick wash then into your dryer. Do not use liquid fabric softener since it will gum up the ragged edges. Make sure you empty your lint trap because I guarantee it will be FULL when the dryer is done. 

I actually like to wash and dry a new rag quilt several times to encourage the ragging process and reduce the amount of lint produced after each wash/dry cycle. Every time you wash and dry a rag quilt the frayed edges will get softer and softer!

If you are gifting a rag quilt to someone who has never owned one it would be wise to let them know that the quilt will continue to give off lint but it should be drastically less as they use it and wash it.

What Kinds Of Fabric Are Best To Use For A Rag Quilt?

Fabric that frays like cotton or flannel is the best type of fabric to use for a rag quilt. For an extra soft rag quilt, you can combine cotton or flannel with non-fraying fabrics like jersey knit, Minky or fleece. The edges won't be as frayed and fuzzy but the softness of these other fabrics will still give the quilt a nice soft touch.

How Much Fabric Do I Need to Make a Rag Quilt?


The amount of fabric you will need to make a rag quilt will depend on the size of the quilt you want to make. The standard width of a bolt of fabric (WOF) is 42" so depending on the size of your squares you can easily calculate how many squares you can cut from a 42" long piece of fabric.  Remember that graph paper sketch you made earlier? Get it out and use it to help you figure out fabric requirements. Here is an example of how to figure out fabric requirements:

Example: 
Fabric for a baby size rag quilt measuring 30" x 40" requires 48 - 6" squares of your quilt top fabric. Assuming your fabric is 42" across (WOF) you can cut 7 squares for each 42" x 6" section of fabric (42/6 = 42). Therefore for the quilt top you will need about 1 1/4 yards of fabric. You will also need the same amount of fabric for the back of the quilt. If you choose to add batting you will need a 30" x 40" piece of batting of which you will cut 48 - 5" squares. 


Thursday, October 24, 2019

How To Make A Rag Strip Quilt - Full Tutorial

Rag Strip Quilts are the perfect starter quilt for beginners. Rag quilts are very forgiving and actually look best when made with a few crooked stitches. They whip up fast and look fabulous when done!


My husband's boss is having a baby in a few months and he asked me to make a baby gift for her. After pouring over various baby blankets and quilt ideas on Pinterest I decided to make a soft and cuddly rag strip quilt. Rag strip quilts are easy to make and always turn out beautiful. Rage quilts are a perfect project to do if you are a quilting or sewing beginner. 

Since I don't know the baby's gender I stuck to gender neutral fabric colors for the quilt. My favorite part is picking out the fabric! Here are my choices:

There was one more additional print fabric that I also included in my rag strip quilt that isn't pictured here. It was a last minute addition! The missing fabric has mini mint green stars on a white background. You can look for it in the completed pics of my quilt! 

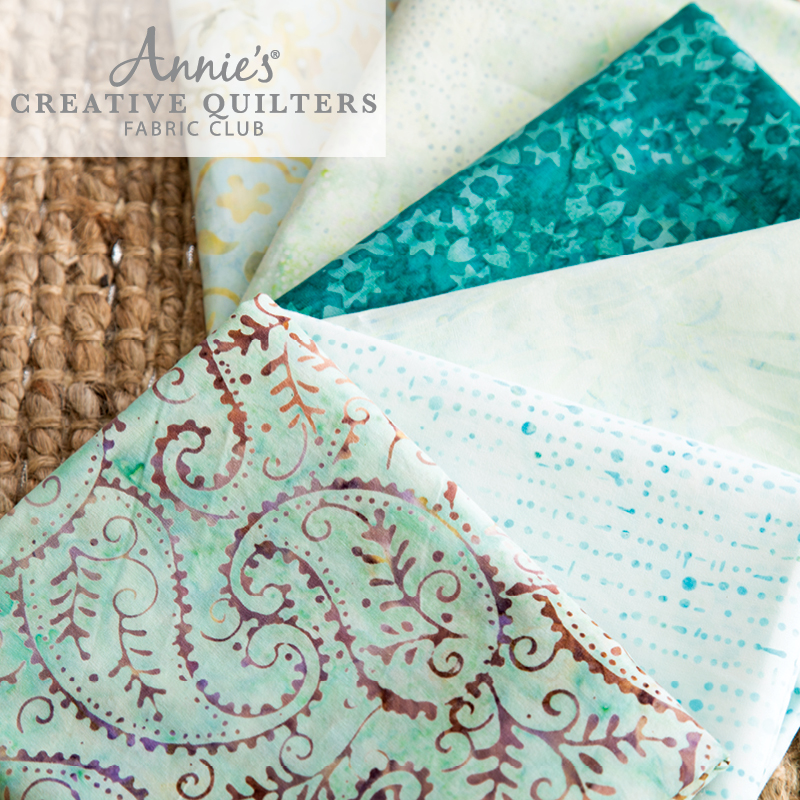
Not sure where to get color coordinated quilting fabric? I suggest giving Annie's Creative Quilters Club a try. Annie's offers color coordinated fat quarter kits! They also offer a monthly subscription club option that includes 6 fat quarters (18" x 22" inches) of 100% cotton coordinating quilting fabric from top American fabric companies. Also included is a bonus pattern that includes a step by step instructions.


To see where I found my inspiration check out my Pinterest board HERE and follow me so you can see what else inspires me. I loved the rag strip quilts that had varying size strips so I decided to do that with this quilt.

Want to make your own rag strip quilt? Don't worry if you have never made a quilt before - you can do this! This is a great quilt for beginners because it is such a forgiving kind of quilt. Follow along with me as I take you step by step through the process of making a strip rag quilt.

Supplies needed:
It is debatable as to whether you should or shouldn't pre-wash your fabric. You will hear pros and cons for both. I prefer not to pre-wash my fabric especially for this kind of a quilt partly because I just don't have the time and don't want to press it out after washing. This is your choice as to whether you want to pre-wash the fabric or not.

1. Cut Your Fabric Strips

To begin we will be cutting the fabric into long strips. I chose to make my rag strip quilt with two different fabric strip widths. If you choose to make your quilt with fabric strips that are the same width then you will want to cut your printed fabrics all the same width. Otherwise if you choose to make the strips vary in sizes then you can mix up the widths of the fabric strips. Make sense?


Tip - the wider your strips the faster the quilt will be finished since there will be less sewing and cutting

Here is a chart to show the sizes I cut each of my fabrics. I only used two different widths, 5" and 7".
I had a total of 15 strips so that the total width, once they were all sewn together with enough seam allowance to trim the edges to get that lovely fray was 44". My finished quilt measured 44" x 40" (standard crib quilt size is 40" x 42").


When cutting strips of fabric it is easiest to fold the fabric with the longest sides matched up and then measure your desired width and cut a straight line with your rotary cutter down the fabric using either a quilters ruler or a durable straight edge as a guide. You may have to fold the fabric twice to get it to fit on your self healing mat or table. Just make sure there are no wrinkles in the fabric when it is folded or you will have uneven strips.

2. Cut The Backing Strips

Now that you are finished cutting strips from the printed fabrics it is time to cut strips from the solid fabric that will become the backing to your quilt. You will need the same quantity of strips in the same sizes you cut from your printed fabrics. For example my quilt has 7 strips that are 5" wide and 8 strips that are 7" long therefore I cut a matching number of strips for each width for a total of 15 strips.

3. Cut The Batting/Fleece Strips (optional)

This next step is optional. Since I live in a state that gets super cold in the winter I wanted to add extra warmth to the blanket which means it needed an extra layer. I used white fleece fabric sandwiched between the printed top layer fabric and the bottom solid layer fabric. You could use a thin layer of batting (I recommend this one by Warm & Co.) instead of fleece but I just like the feel of the fleece so that is what I used. If you choose to add this extra layer you will need to cut the fleece or batting into the same number of strips as you have for the the top layer of the quilt - for my quilt I needed 15 strips of batting. The batting should be cut 1 inch narrower than the printed fabric so if you follow the same widths as I used you will need 7 pieces cut into 4" x 48" and 8 pieces cut into 6" x 48".

4. Time To Sew - Quilt Your Strips

Place one 7" strip of solid backing fabric face down then spread the correct size batting/fleece (6") on top of it in the center and finally take a 7" print strip and lay it face up on top of the batting matching the edges of the bottom layer to the edges of the top layer. Pin the layers together in several places down the center of the strip to make sure the layers don't shift when you bring it over to your sewing machine or while you are sewing. Sew straight down the middle of the strip long ways. I love the look of more quilting so I sewed two more lines down every strip about 1" apart from the center  stitched line. This stitching will keep your layers all together and give the the quilt that quilted look. Do this for all of the strips.

5.  Sew The Strips Together

I like to lay our my quilt strips into the pattern that I plan on sewing them together. It helps me stay organized as the quilt starts to take shape.


Grab the first two strips from one end of your quilt. Place the strips with the solid bottom sides facing each other. Pin the two strips together matching the outside edges together. Sew the strips together with a 1"  or 1/2" seam allowance (or however much you want to leave and snip for the rag effect). I used a 1" seam allowance for the blanket I made because I wanted a lot of soft rows of texture. Repeat this step sewing the third strip to the second strip and continue sewing the strips together until all of the strips are sewn together.


6. To Bind Or Not To Bind

No Binding Method:
Remember how I said this quilt was super easy for a beginner? To keep it simple you can choose not to add binding to the quilt and instead allow the edges of the quilt to have that same great rag quilt look that the strips will have. The quilt will still look great if you choose to leave it binding-less. 

If you choose not to bind your rag strip quilt you still will need to sew around the perimeter of the quilt with a 1/2" to 1" seam allowance (again your preference). This adds a little more stability to all of the sewn together strips and gives you a guide line to use when cutting the little slits. 

After sewing around the perimeter it is time to cut the slits into all the seam allowances and outside edges of the quilt. I recommend using these wonderful spring action rag quilter scissors to save your poor hand from all the squeezing it will have to do to snip all the slits. If you don't have these scissors make sure whatever pair you use are super sharp! Cut small slits about 1/2" apart on all edges and all seam allowances between each strip. Make sure you do NOT cut through the stitches!! 

Binding Method:
I chose to bind the perimeter of my quilt and to do so I made my own quilt binding from the same yellow fabric I used in the quilt strips. If you have never made your own binding before I recommend following this tutorial HERE from Simple Simon & Company. After your binding is finished it is time to sew it onto your quilt. Again, if you have never sewn binding onto a quilt don't worry I found this great tutorial HERE from Love Patchwork and Quilting that will walk you through it step by step. 

Once your binding is attached you will need to start cutting the slits into all seam allowances between the quilt strips. See above (in the not binding section) for instructions on how to do this. 

7. Wash, Dry, Repeat

Yeah, you made it to the last step! It is time to let your washer and dryer do their magic and start to turn your quilt into an actual rag quilt. This step will create A LOT of lint and small bits of fabric thread - be warned! I recommend washing and drying your quilt in cold water on the normal cycle at least twice so that all the stray threads come off and the slits you cut in the seam allowances begin to take on the classic soft rag quilt qualities that make this quilt a real rag quilt. The rag effect will continue improving every time the quilt is washed and dried. 

**Make sure to clean your lint trap out after you dry the quilt since it will probably be full and you don't want the extra lint to become a fire hazard. 

Congratulations! You did it - you made a Rag Strip Quilt. 

I'd love to hear how your quilt turned out! Please leave your comments below and a picture of your final quilt would be great too. These quilts make great baby gifts, Christmas presents and birthday gifts. 

More Rag Quilts + Tutorial

If you liked this tutorial, head on over to this popular post I wrote about a different type of rag quilt. Now that you have conquered the rag strip quilt it is time to try the traditional rag quilt with squares. 

click to read entire post

Wednesday, April 11, 2018

How To Make A Rag Quilt - Easy Quilting Project for the Beginner

Quilting for the first time? Start with a simple rag quilt. The perfect quilt project that is very forgiving for the beginner! 


mommysuburbia.blogspot.com


Years ago I was looking for a new hobby and so I picked up sewing. I am self taught which means I learned a lot by trial and error (more error than anything)! I still love to sew but my interests have expanded into quilting. 

This post contains affiliate links which means if you click on a link and make a purchase I may receive a small commission at no additional cost to you. For more information please see my disclaimer page. Thanks!

I love browsing Pinterest looking at beautiful quilts created by the professional quilters and designers. I love learning about the history of the various quilt block patterns as well as seeing the modern quilts with contemporary patterns. 

Quilts are practical artwork - they are nice to look at and can make a statement all while keeping you warm and cozy!

I started dabbling with quilt making when I first saw a baby rag quilt. As a mother of a newborn at the time I was in love with flannel fabric (it makes the best, most absorbent bibs). 

The patterns and prints on flannel fabric is endless and the softness is amazing. I made several rag quilts for my kids as well as gifts for others and I really enjoy the process of cutting the edging around the quilt so that it frays on purpose. (I recommend these scissors for cutting)

Check out this rag quilt listed in my etsy shop Sapucha:

blue baby rag quilt

If you have never made a quilt but have basic sewing skills this is a wonderful quilt to start with. It is so forgiving and always ends up looking good! 

This is the perfect project to do with your kids too! Measuring, cutting, coordinating fabric and then sewing are skills you can teach your kids. My girls have made many rag quilt doll blankets for their American Girl dolls. They love rummaging through my fabric scrap bin finding pieces of fabric to make a little mini rag quilt with. 

Rag Quilt Tutorial For The Beginner

Rag quilts can be made using different shapes of fabric like squares as shown in my blue one above or long rectangle strips. 

If you want to make a rag strip quilt I've put together a tutorial on how to make one here. Strip quilts are quick and easy to make even for a beginner. Check out the rag strip quilt (and tutorial) I made for my husband's boss. It is a baby size crib quilt that took me just a few hours to cut, sew and finish. 

click HERE to read more


If you are looking for another good tutorial to follow here is one I also recommend:

Click here for tutorial


Where to Find Rag Quilt Fabric

Besides Amazon there are many great places to get flannel fabric. Here are some I recommend to get you started: 

1. Jo-Ann Fabrics is a great place to start since their inventory of flannel fabric is huge! And they always have coupons! 

2. Walmart - our local Walmart has a fabric section that includes lots of flannel fabric and notions too.

3. Fabric.com - is an online fabric retailer with a variety of selection. I have used them in the past and have always like the fabric I've ordered.

4. Hobby Lobby - they always have coupons too! I think their selection is pretty good however I haven't had good luck finding sewing savvy salespeople. (that's what Google is for right!)

5. Bloomerie Fabrics - this online retailer has a great selection of beautiful fabric. I LOVE this online store.

6. Upcycle old flannel shirts or sheets! 


Rag Quilt Tools 


Having the right tools is an important part of quilting. There is nothing more frustrating than trying to learn something new with inadequate tools. 

Aside from fabric the next most important tool you will need is a basic sewing machine. My sweet husband bought me my first sewing machine as a Valentine's Day gift many years ago. He was wise to start with a basic Singer sewing machine with a few bells and whistles to get me started. 

Rag quilts require a lot of cutting (more like "snipping") so along with a basic sewing machine you will want a good pair of scissors. I've learned that you need to be diligent in hiding your good sewing scissors so that they are never used to cut things other than fabric. Even paper can dull them! Also, good sewing scissors are sharp - so please keep them away from young children. Here is the pair of scissors I use and LOVE! They even come with a little blade cover so I don't accidentally stab myself as I scrounge around inside my sewing basket looking for them. 

purchase here on Amazon

Other basic tools you will benefit from but don't necessarily have to buy right away are a good self healing cutting mat and a quilters ruler. Don't worry, if you don't have these things you can still make a great rag quilt. These are just great tools to have handy when you start getting serious about quilting. 

I hope this inspires you to stretch your sewing skills a little and try something new. Don't you just love making something that is beautiful and practical? I certainly do! 

Don't forget to pin this post so you can refer back to it when you start your own rag quilt. Follow my blog so you don't miss any future quilting posts - especially for beginners!