Showing posts with label quilting. Show all posts

Tuesday, March 8, 2022

How to Make A Simple Rag Quilt

Rag quilts are easy-to-make quilts, perfect for a beginning quilter or even for a seasoned pro who needs to make something quickly. I fell in love with rag quilts because of the soft edges created by the ragging process and how cuddly these types of blankets are!


This post contains affiliate links which means if you click on a link and make a purchase I may receive a small commission at no additional cost to you. Please see my disclaimer page for more information. Thanks!

One of my favorite gifts to give a new mom is a handmade baby quilt. I recently made a rag quilt for a new mom at our church. I had several yards of camo cotton print fabric I had been saving for the right project and this was it! 

My friend had a baby boy so it was fun using up this black/gray camo print in this quilt. I used a total of four different colors of fabrics from my stash on the front of the quilt and a solid oatmeal-colored cotton flannel for the back. The finished baby quilt measured about 42" x  54".


(You can find quilting fabric and quilting supplies for your project at Fat Quarter Shop.)

Shop at Quarter Shop


Rag Quilt Size Guide

The size of a rag quilt can be easily adjusted to fit your needs. To make a rag quilt larger simply increase the size of the fabric squares or add more squares along the perimeter of the quilt.  If you need a smaller size quilt do the opposite and decrease the size of the squares or don't add as many squares to the quilt. Make sense? Great!


Brainstorming Your Quilt Pattern

I like to sketch out some ideas on graph paper before I start cutting the fabric. This way I know what the finished quilt will kind of look like before I commit to cutting into the fabric. For this rag quilt, I wanted the camo print to be in the center and the remaining fabrics to fill in around it in a symmetrical pattern. 

After I finished sketching out my idea I was ready to cut all of the fabric into 7" squares. My rotary cutter and cutting mat came in handy for this project! If you don't have one yet - get one, they are totally worth it!


 Cut Time, Quilt More  


Batting - To Use Or Not To Use

Typically rag quilts have a middle layer of quilt batting sewn between the top and bottom fabric squares to give the quilt some weight and extra warmth. If you live in a warmer climate you might want to substitute quilt batting for a layer of cotton flannel so your quilt isn't so thick or too warm. You can even leave this middle layer out completely for a very lightweight quilt too. I chose to add quilt batting for the middle layer since I live in a colder climate. 

The middle layer of batting should be smaller than the top and bottom layers of fabric. I cut the batting into 6" squares. Once your batting squares are cut it is time to take all your top, bottom, and middle squares to your sewing machine. 


How To Make A Simple Rag Quilt

Follow along with these easy-to-follow steps to make your own rag quilt. 

Starting A  Rag Quilt - Complete Step-By-Step Tutorial

  • Using your sketch determine how many squares of fabric you will need from each of the fabrics you chose for the quilt top. My quilt was 7 rows by 9 rows for a total of 63 squares for the quilt top. 

Cut out all the squares from the quilt top fabric and then cut out the same number of fabric squares for the bottom of the quilt. For my quilt I had a combined total of 126 squares of fabric! 

  • Next, place one square of bottom fabric face down, then place one batting square on top of the bottom layer of fabric centering the batting in the middle of the bottom square. Lastly, place one quilt top fabric square face up on top of the batting. This is called a fabric sandwich - isn't it yummy! Repeat this step with all the fabric squares you cut out until they are all made into fabric sandwiches.


  • Starting sewing diagonally from one corner of the fabric sandwich to the opposite corner in a straight line. To make this step (and the next) go quicker you are going to want to chain stitch these square sandwiches. Chain stitching means you continue sewing one square sandwich after another without cutting the thread between them. 

How I like to chain stitch is to first sew across the square diagonally then when I reach the other side of the fabric I continue sewing a few stitches past the edge, lift up the presser foot and slide the corner of the next fabric sandwich under the needle, drop the presser foot and continue sewing from one corner to the next diagonally. Keep chain stitching until you sew all of the squares. 

Cut the threads between the chain stitched squares then chain stitch all of the squares across the opposite diagonal of each square until each square has an "X" sewn across it. Here is a picture of what I mean:


Sewing The Squares Together 

  • After I sew all the "X"s on the fabric squares, I lay out the squares on the floor (or another large area) into the pattern I sketched for the finished quilt. At this point, you will be sewing the squares together row by row. You want the seams to show on the top side of the quilt so start by placing two squares of fabric from the first row together with the wrong sides (backside) facing each other. Sew the squares together with a 1/2" seam allowance. Continue sewing until all of the squares are sewn together into rows.


Sewing The Rows Together

  • After sewing the squares into rows you are now going to sew the finished rows together. Stack the first two rows together, making sure the wrong sides (backside) face each other and the seam lines between each of the squares line up. To make sewing the rows together easier, it is helpful to "nest" the seams of each square along the rows then pin each row together so it doesn't shift when sewing. To nest the seams make sure all of the seam allowances for the squares on the top row face one direction and the seam allowance for the bottom row face the opposite direction. This way when you line up the rows the seams between the squares fit together snugly and there is no extra bulk due to doubled up seam allowances on top of each other.  

Sew the rows together using a 1/2" seam allowance again making sure the seams allowances show on the top of the quilt.


Here is my quilt all sewn together before I clip the seams: 


Your quilt should be all assembled and sewn at this point! But....we aren't done yet. Hang in there, we are almost done!

  • This is a very forgiving quilt however it is important to square up the entire quilt before the next step. I like to lay my quilt on my self-healing mat and trim any wonky edges with my rotary cutter. 
  • Next, sew around the entire perimeter of the quilt using a 1/2" seam allowance. (I actually like to sew around the perimeter twice but that is just personal preference.)


Start The Ragging Process

Grab a sharp pair of scissors or spring action rag quilting scissors, which I highly recommend if you think you might make more rag quilts in the future. These spring-action scissors are the bomb when it comes to rag quilting! 

Now, start cutting all of the seam allowances on the top of the quilt and around the perimeter. I usually make cuts about 1/4" to 1/2" apart as I cut the fabric. Be very careful when you are snipping the seam allowances - you DO NOT want to cut through any of the seams! When you finish cutting the seam allowances take the quilt outside and shake it out. Shake it really well and when you think you are done... shake it some more! There will be a lot of small bits of fabric flying everywhere. 

Washing Your Rag Quilt

After shaking the quilt out (forever) it is time to throw it into your washing machine with a few old towels for a quick wash then into your dryer. Do not use liquid fabric softener since it will gum up the ragged edges. Make sure you empty your lint trap because I guarantee it will be FULL when the dryer is done. 

I actually like to wash and dry a new rag quilt several times to encourage the ragging process and reduce the amount of lint produced after each wash/dry cycle. Every time you wash and dry a rag quilt the frayed edges will get softer and softer!

If you are gifting a rag quilt to someone who has never owned one it would be wise to let them know that the quilt will continue to give off lint but it should be drastically less as they use it and wash it.

What Kinds Of Fabric Are Best To Use For A Rag Quilt?

Fabric that frays like cotton or flannel is the best type of fabric to use for a rag quilt. For an extra soft rag quilt, you can combine cotton or flannel with non-fraying fabrics like jersey knit, Minky or fleece. The edges won't be as frayed and fuzzy but the softness of these other fabrics will still give the quilt a nice soft touch.

How Much Fabric Do I Need to Make a Rag Quilt?


The amount of fabric you will need to make a rag quilt will depend on the size of the quilt you want to make. The standard width of a bolt of fabric (WOF) is 42" so depending on the size of your squares you can easily calculate how many squares you can cut from a 42" long piece of fabric.  Remember that graph paper sketch you made earlier? Get it out and use it to help you figure out fabric requirements. Here is an example of how to figure out fabric requirements:

Example: 
Fabric for a baby size rag quilt measuring 30" x 40" requires 48 - 6" squares of your quilt top fabric. Assuming your fabric is 42" across (WOF) you can cut 7 squares for each 42" x 6" section of fabric (42/6 = 42). Therefore for the quilt top you will need about 1 1/4 yards of fabric. You will also need the same amount of fabric for the back of the quilt. If you choose to add batting you will need a 30" x 40" piece of batting of which you will cut 48 - 5" squares. 


Monday, December 20, 2021

How To Make A Coin Quilt - An Easy Quilt For The Beginner

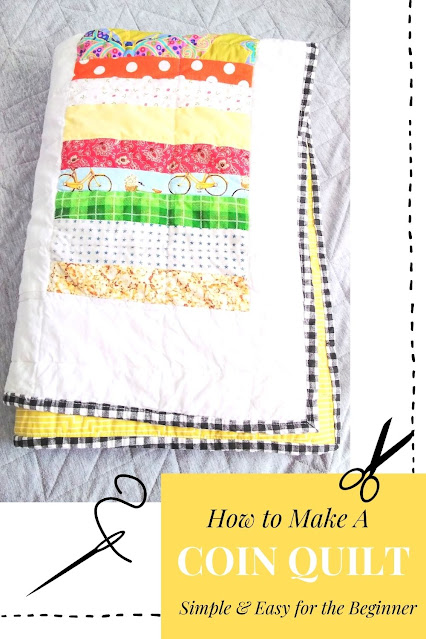
What is a coin quilt you ask? A coin quilt is a very simple quilt pattern that uses stacked rectangular-shaped pieces of fabric to mimic a stack of coins. Coin quilts are a great beginner quilting pattern because of their simplicity.  

The coin stacks are colorful and completely customizable too allowing you to mix solids with small print fabrics. They are also the perfect solution to an out-of-control fabric stash! I love projects that use up those smaller pieces of fabric from other projects that I just couldn't throw away. 


This post contains affiliate links which means if you click on a link and make a purchase I may receive a small commission at no additional cost to you. For more information please see my Disclaimer page. Thanks!

Choosing Fabric For Your Quilt

Another fabric option if your fabric stash doesn't have the colors you need is to use a jelly roll. Jelly rolls are precut strips of fabric that measure 2 1/2" x WOF (width of fabric). Most fabric shops (I love the Fat Quarter Shop!) as well as Amazon, carry a variety of jelly roll packs that are color coordinated so you don't have to do the hard work figuring out what fabrics match. 

Coin quilts can be made into any size quilt. The number of rows of coin stacks can be adjusted to meet your needs along with the sashing size. Sashing is the solid fabric pieces sewn between each long coin row. On my quilt, I used solid white for the sashing. 

Easy DIY Coin Quilt Tutorial

Today I am going to show you how to make a baby-size coin quilt. This is one of the easiest quilt patterns to make, perfect for a beginner, and still lots of fun for a seasoned quilter. Gather up the following supplies and follow the instructions below to get started.


Supplies:

Here's How To Make A Coin Quilt:

1 - Cut your fabric into strips that measure 2 1/2" x WOF. If using your stash fabrics then you might have a variety of lengths - that is OK as long as the strips are 2 1/2" wide! If you use jelly roll fabric cut the strips in half which will make them easier to work with. 

Tip - you might notice from the pictures of my quilt that my "coins" are not all 2 1/2" wide. I wanted the "coins" within the strips to be a little different for this quilt. This is another fun variation option you can play with on a coin quilt!

2 - Pick 4 strips of fabric and sew them together along the length of the strip using a 1/4" seam allowance alternating fabrics between dark and light-colored strips. Press the seams to one side with an iron. Repeat this step until all of your fabric strips are sewn into sets.


3 -  Next, use your rotary cutter to cut the strip sets into the desired length you want the coin stack to be. For the baby quilt I made, I cut my strip sets 8 1/2 inches wide. 

On a large flat surface like a table or the floor, lay the cut coin sets into rows until it is the length you want the coin strips to be for your quilt. Make sure to alternate the stack sets so the color combinations look good. Sew the coin sets together into several long rows and iron the seams flat. My quilt has 4 coin stack rows that measure about 30 1/2" long.

4 - For the sashing cut your solid fabric into strips the length of your coin stack rows. The width of your sashing will depend on how much space you want between your coin stack rows. I cut my sashing 3 1/2" wide by the length of my coin stack rows. Sew the sashing onto the coin stack rows with a 1/4" seam allowance then press the seams towards the coin stack rows. 

After the rows are sewn together measure and cut two pieces of sashing to sew to the top and bottom of the quilt. Congrats! Your quilt top is done!! My finished quilt top measured 36" x 51".


5 - Are you hungry  - because it is time to make a quilt sandwich! Cut your backing fabric and batting the same size as your quilt top. Place the backing fabric right side down on the floor. Then put the batting on top of the backing and finally put the quilt top on top of the batting right side facing up so you can see your pretty quilt top. I like to use big safety pins to pin the three layers together all over the quilt top so the layers stay put when I start quilting them. 

To keep this quilt simple I quilted the layers together with straight lines making sure to quilt in the ditch around the perimeter of the coin stack rows. If you like curvy squiggly quilting you might want to quilt with a stippling stitch.  To learn how to stipple a quilt check out Leah Day's video on Youtube.


6 - Lastly, to finish the quilt you need to bind it. I like to make my own binding because it is so easy to make and I can use whatever colorful cotton fabric I want (or have on hand!). If you don't have time to make your own you can purchase precut and folded binding at your local fabric store too. 

When I first started making quilts I found this amazing tutorial on how to bind a quilt with step-by-step instructions from Diary Of A Quilter. I highly recommend it! 

Congratulations! You just make a coin quilt! I'd love to hear how it turned out. 


Easy Beginner Quilts You Are Going To Want To Make


Friday, December 10, 2021

10 Festive Christmas Quilt Projects to Sew This Holiday Season

Decorating for Christmas is so much fun! My most precious holiday decorations are the handmade ones my children, family, and friends have created and given to me. A handmade Christmas quilt, table runner, or quilted wall hanging all make treasured presents to give to those you love. The problem is finding the perfect holiday quilt pattern that fits your level of skill. 

The problem of finding the right Christmas quilt block pattern has been solved! I scoured Pinterest looking for a variety of Christmas quilt patterns and I want to share what I found with you. Hopefully, this will save you time so you can get started sewing and quilting a handmade Christmas gift for the ones you love.


This post contains affiliate links which means if you click on a link and make a purchase I may receive a small commission at no additional cost to you. For more information please see my Disclaimer page. Thanks!

10 Festive Christmas Quilt Blocks

1. Christmas Tree Quilt Block

A Christmas tree, the most iconic symbol of this special holiday season makes for a wonderful quilt block. There are so many different ways to make a quilted Christmas tree but the one I liked best offers a simple tree pattern with swirling quilted stitches. I made this quilted Christmas tree into holiday ornaments that I gifted to friends and family. 

How To Make An Easy Quilted Christmas Tree Ornament from Me (mommysuburbia) 


2. Santa Belly Quilted Pillow 

Give a gift your loved one can cuddle with all winter long - a Santa Belly Quilted Pillow! This Christmas quilt pattern by My Quilt Infatuation is clearly Santa's belly - belt, beard, and red coat. Use a fun Christmas print for the backside of the pillow to keep the holiday cheer coming. 


My Quilt Infatuation

3. Christmas Wreath Quilt Pattern

Mini quilts make the best wall hanging. This Christmas wreath quilt is a great addition to your annual holiday decor. This pattern is simple to follow and easy to make. Find the full tutorial at Kelli Fanning Quilts. 


via: Kelli Fanning Quilts

4. Gift Box Quilt Block

Make this holiday-themed quilt and give a present for a present. This is a great beginner quilt since it is just squares sewn together and a few half-square triangles for the bow. Sew several of these blocks together to make the perfect Christmas table runner! The pattern for this block can be found at Scattered Thoughts of A Crafty Mom


via: scattered thoughts of a crafty mom

5.  Candy Cane Quilt Block

Half square triangles in holiday colors make this candy cane extra special. Whether you use white and red or red and green fabric, your candy cane quilt block is sure to look amazing. The finished block is 6" x 12" but you can adjust the size as you need for your project. Find the complete instructions at Inspired by Fabric. 


via: Inspired by Fabric


6. Angel Paper Pieced Quilt Block

This is a paper-pieced block that makes the most beautiful angel design. If you have never tried paper piecing don't let it scare you away! Once you start you are not going to want to stop! The Featherweight shop offers this pattern as an instant download after purchase that comes with complete easy to follow instructions. I wouldn't recommend this pattern for a beginner but once you have a few quilts under your belt give it a shot!  


via: Singer-Featherweight Shop


7. Gnome Mini Quilt  

Gnomes are all the rage at Christmas! Cute and adorable with an attitude everyone loves Christmas gnomes. Make this adorable gnome into a mug rug this holiday season to give as a gift - but don't forget to make one for yourself! The full pattern and tutorial can be found at Sew Can She


via: Sew Can She


8. Christmas Ornament Quilt Pattern

This fun pattern can be made as an individual ornament and turned into a holiday wall hanging or make several and make a beautiful lap quilt. Colorful Christmas themed fabric make this ornament the perfect holiday quilt pattern. The full tutorial for this quilt block can be found at My Quilt Infatuation.

via: My Quilt Infatuation

9. Christmas Candy Star

Here is a sweet treat for your Christmas decor - a Christmas Candy Star quilt block. Customize the colors to fit your decor. You can use this quilt block to make a lap quilt, wall hanging, pillow, or even a holiday table runner to display at your Christmas dinner party. The full tutorial can be found at Moda Fabrics.


via: Moda Fabrics


10. Christmas Candles Quilt Block

Candles make the holiday more festive and bright. This quilt block will not disappoint. You could even make this into an advent quilt block by making four candles, three in purple and one in pink. Follow the tutorial from Bonjour Quilts to make your own Christmas Candles quilt blocks. 


via; Bonjour Quilts


I wish you and your family a very merry and blessed Christmas! I hope you have some fun making these holiday quilts to give as gifts this Christmas season. Let me know which quilt block is your favorite!


More Fun Quilting & Sewing Projects

Check out these other fun quilting and sewing tutorials:


Sunday, August 22, 2021

Herringbone Baby Quilt

A friend at church is expecting her first baby this fall and the baby shower is just around the corner. I have had my eye on a herringbone quilt pattern for some time now but I didn't really have any reason to make a quilt...until now! Every new baby needs a cozy baby blanket or quilt to welcome them into this world which gave me a great reason to start making a baby quilt.


When I had my girls a co-worker gifted each of them a hand-quilted baby quilt. It was such a thoughtful and practical gift that I knew then that I wanted to learn how to make baby quilts to give as gifts. Both quilts had been loved by my girls when they were little and are now safely stored away for them when they start a family. 

This post contains affiliate links which means if you click on a link and make a purchase I may receive a commission at no additional cost to you. For more information please see my disclaimer page. Thanks!

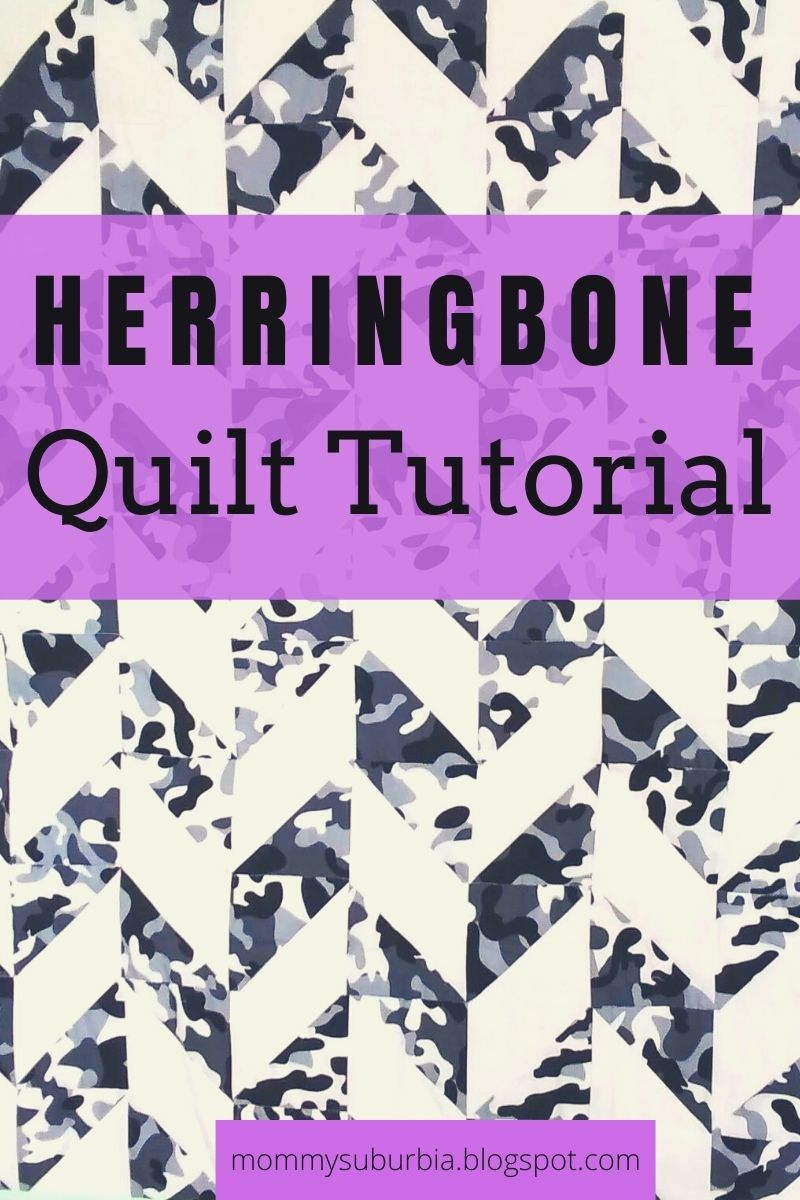
Now that I had a great reason to make a herringbone quilt it was time to pick out fabrics! I really wanted to stick to a gender-natural color palette with a simple modern style. I decided to use a black/gray camo print that I got from Fabric Wholsale Direct with white cotton for my half-square triangles and a light mint green cotton for the trim and back. 

Remember to PIN this post for future reference!!


If you are new to quilting or maybe you are interested in making a herringbone quilt this is a great pattern to get started with! It might look a little bit difficult from the finished quilt pictures but don't let that fool you. This quilt is made using half-square triangles (HST) arranged in a repeating pattern. 

Half square triangles are really easy to make and you can find tons of great tutorials on how to make them. Here is the tutorial I found to be very helpful when I first got started quilting: Modernly Morgan - How To Make Half Square Triangles.

For this quilt I made my HST's using 5 1/2" squares of fabric which when sewn and cut end up being 5". Once I sewed the triangles together they end up being about 4 1/2". This quilt is totally customizable to your liking by adjusting the size of the HSTs.  Have fun playing around with different-sized HSTs and see what you like. 

The key to this quilt is to lay out the HSTs in the herringbone pattern on a flat surface (a.k.a the floor) then sew them together one row or column at a time. Also, your iron will become your BFF with this project since getting the points of the HSTs to "nest" properly can only happen if you iron your seams in opposite directions before sewing. 

Here is a graphic to help you get started laying out your HSTs into a herringbone pattern. Add as many rows and columns as to adjust the size of your quilt. 


Right before I made this quilt I also made a small little ironing pad that sits right next to me on my sewing machine table so I can just sew, iron, sew, iron, sew....you get the point right? It has saved me a ton of time and it was super simple to make. I will be posting a tutorial on how to make one for yourself in the near future!!  Make sure to follow me so you get all the latest updates!


Ok, back to the herringbone quilt. I wanted to share some pictures of the process I followed to make the quilt with you that seem to be easier to follow than written instructions. I'm a visual learner so pictures are where it is at for me! 


How To Make A Herringbone Baby Quilt 

  • The first step is to cut out a bunch of 5 1/2" squares from the two main cotton quilt fabrics you chose. I had no idea when I started how big I wanted my baby quilt to be so I made a lot of squares. I had a pile of 5 1/2" white squares and a pile of 5 1/2" black/gray camo squares. Follow the HST tutorial I linked above and make the two different colored fabric squares into HSTs. 


  • Lay the HSTs into the herringbone pattern. I used the floor and part of my cutting mat to lay out the pattern. Once I had them all laid out I started sewing them together in rows. After the rows are finished sew the individual rows together to make the quilt top.  Square up the quilt top to make it square and even all the way around. 
  • Select a fabric for the back of your quilt. For the back of my herringbone quilt, I chose to use a solid light mint green cotton fabric. I purchased a little extra yardage because I knew I was going to make the binding from the same fabric. Make a "quilt sandwich" by laying your backing fabric down (right side down) on a flat surface then your batting then finally the quilt top (right side up). I use safety pins to baste the layers of the quilt sandwich together so they don't move when I start quilting. For this quilt, I stitched in the ditch along the horizontal rows and then added stitching along the camo print triangles on each row creating a zig-zag pattern. Use your imagination and quilt any way you like!
  • Time to add the binding. Since my quilt was going to be gifted to a baby I wanted to make sure it was very durable and could hold up to lots of use and washings so I chose to machine bind the quilt instead of hand-sewing it. To make binding I cut strips of fabric into 2 1/2" by the length of the fabric then ironed the strips in half. If this is your first time binding a quilt I suggest you follow this great tutorial from The Seasoned Homemaker . Go slow and remember you can always pick out stitches if you need to! 

I just love how this herringbone quilt turned out! Of course, I'm not a professional so there are some (OK several) imperfections but honestly, that is what makes this handmade quilt so special - it is one of a kind with lots of personal touches! The finished quilt measured 44 inches by 36 inches - the perfect size for a little baby. 

To add a little extra finishing touch to this quilt I had this sweet little quilt label in my sewing notions stash and I added it to the corner of the quilt (see pic below!). To gift the quilt I folded it twice then rolled it into a log then tied a piece of extra binding around the quilt and tied it up in a bow.


Quilting can be a pretty addictive craft! Once you make one you are going to want to make some more beautiful quilts. I have some more easy quilt patterns and tutorials you will enjoy just as much as this herringbone quilt. Check out these quilts:

Improve Spinners & Hourglass Quilt Tutorial

How To Make A Rag Strip Quilt

Quilting For The Beginner - Rag Quilts

Tips & Tricks To Make A Half Square Triangle Quilt


Sewing and quilting is a fun hobby that anyone can learn! Besides a good quality beginner sewing machine (I love my Singer!) there are some sewing notions (a.k.a. sewing supplies) that you will want to invest in as you get started learning how to sew and quilt. To help you out I put together a post with the 10 Must Have Sewing Supplies For The Beginner  to help you out and get you started. 


Thursday, December 24, 2020

The Improv Spinners and Hourglass Quilt - Easy Beginner Quilt

A handmade baby quilt is the perfect way to welcome a new baby into the family. My youngest sister just had her third baby and I was excited to have another opportunity to make a baby quilt to give as a gift to the new little one. 


This post contains affiliate links which means if you click on a link and make a purchase I may receive a small commission at no additional cost to you. For more information please see my Disclaimer page. Thanks!


I got started making this quilt before she had the baby but the only thing we didn't know was the baby's gender so I had to make it gender neutral. 


Of course before I settled on the quilt block pattern I wanted to use I scoured my favorite place for inspiration - Pinterest! Don't forget to follow me on Pinterest to see all of my other inspiring pins!  


Here are the quilts I found on Pinterest I was considering making for this baby quilt I wanted to share with you. I really wanted to make a gender neutral quilt that had little bits or blocks of color, which all of these quilts have. 


Baby Quilt Inspiration From Pinterest


Stacked Coins Pattern (via: sew-handmade.blogspot.com)


Modern Patchwork Baby Quilt (via: Etsy (DonnaWesterkamp)


Charm Pack Quilt (via: Sew Me


Spinners & Hourglasses (via: Stash Bee)


I love the pops of color each quilt offers and the texture the quilting brings out too. It was a tough decision but in the end I went with the Improv Spinners and Hourglass! 


Easy DIY Improv Spinners & Hourglass Baby Quilt


As someone who loves sewing and quilting I have an overflowing and growing fabric scrap bin and I knew this quilt would help me use up some of these scraps of fabric that I already have on hand. 


What I discovered while using the fabric from my scrap bin was the small bits of leftover fabric I used for this baby quilt were from the fabric I had used when making two baby quilts for my sister's first two kids. I love how each child's quilt has some of the same fabric bits in them. It kind of ties them all together - like a little sibling quilt family!


I followed the instructions for the improv spinners and hourglass block pattern from the Stash Bee  and I found her tutorial to be super easy and fun and I totally recommend it if you want to give this quilt block a try! 


The biggest tip, which the tutorial mentions is to make sure you sew your spinner fabric (the colorful long piece) to the same side of your base fabric on each square of the base fabric. This ensures that each spinner comes together and you don't have a random spinner blade facing the wrong way! 


I found that the most handy sewing tools, besides a sewing machine, to have on hand when making this quilt is a rotary cutter, self healing cutting mat and a straight edge like a quilting ruler (I couldn't find mine!!) or a wood ruler. There will be a ton of trimming for each block and it went really fast using a rotary cutter! I also used my iron and ironing board a lot to iron down the spinners and hourglasses as I made the blocks. 


For my base squares I used three different neutral color fabrics - white, oatmeal and light gray cut into 5" squares. The tutorial from Stash bee recommends using four but I didn't have an extra neutral color on hand. I also made extra white squares so that each quilt block of four squares had two whites that I sewed diagonal to each other.


While making each square I did not make each spinner blade or hourglass triangle the same size. I kind of eye-balled it depending on the print fabric I was using. I wanted that "wonky" look for each of the spinners and hourglasses. 


After I was done sewing the long spinner side an the small hourglass sides onto the base squares, I sewed four completed squares together into one full quilt block making sure the spinners and hourglasses all had mismatched fabric touching each other. Then I laid out all the completed blocks on my floor and placed them into the pattern I wanted for the final quilt. 


I had to do a lot of rearranging to get it just right but once I was satisfied with the placement of the blocks I began sewing the blocks together. I ended up with 5 full blocks across by 5 blocks down. 


After the blocks were done and all sewn together, I decided last minute to add some white sashing all around the border of the quilt sides. I wanted to make sure my binding stood out from the quilt blocks and the only way I could do this was to use plain white sashing.  


The back of my quilt is a print I found in a gender neutral mustard yellow color with white geometric lines that form mini crosses all over. I love the subtle cross theme because this is a child I will be praying for regularly and I like knowing that he or she will be covered in little crosses when they are sleeping. Sweet dreams baby!


Because there are lots of colorful spinners and hourglasses all over the quilt I wanted to make sure the quilting didn't distract from the design so I decided to quilt just a few diagonal lines through the squares and then I also quilted in the ditch around the perimeter of the quilt sashing. 


For the border I really wanted to give the quilt a pop of pattern so I used a black and white gingham print fabric. I cut the fabric into 2 1/2" long strips and made my own binding. I followed the tutorial from Simple Simon and Company  for making your own quilt binding. Their tutorial is easy to follow and has a ton of pictures! 


Here is my finished quilt!!


The finished quilt measured 50" x 50". I am super happy how it turned out! It was such a fun project that whipped together in no time at all. This certainly has become one of my favorite baby quilts and I'm sure I will be using it again in the future when I need to make another baby quilt. 


More Great Beginner Quilt Projects

New hobbies are fun but sometimes they can feel a little overwhelming. If you are new to sewing and quilting but not sure what you need to really get started I put together a super helpful post with the 10 Must Have Sewing Supplies For The Beginner you should check out. 

Are you looking for a simple beginner sewing or quilting project? I have the best beginner projects just for you! 

This rag strip baby quilt is fun to make and very forgiving especially if you are new to sewing and quilting (check out the full tutorial by clicking on the link below the picture) 


Here is another great beginner quilting project that is super forgiving too! The end result is beautiful and makes for a great gift. I keep a bunch of ready made blank quilted patchwork notecards on hand for those times when I need a simple little gift for a friend or I need to write a short thank you note. 


I love this little Christmas tree quilt block. I used mine to make little Christmas ornaments to give to my sisters as gifts but they could also be used to make a full quilt. Just increase the block size and then sew them together for a full quilt top. This would look nice on a guest bed during the winter!


Happy sewing & quilting my friends. I look forward to your amazing creations. Please share your favorite quilt block ideas with me in the comments. Also, if you have any questions about my Improve Spinners and Hourglass quilt please leave a comment and I will get back to you right away.