Showing posts with label breakfast. Show all posts

Friday, May 27, 2022

Healthy Jam-Filled Oatmeal Breakfast Bars

Is breakfast starting to get a little boring at your house? Maybe you are tired of eating the same thing every day because you don't have time to find a new recipe or time to make it. Having a few options available that are healthy and that everyone will eat and enjoy is essential for starting your day off on the right foot. 


This post contains affiliate links which means if you make a purchase through the link I may receive a small commission at no additional cost to you. 

My family loves these healthy jam-filled oatmeal bars because they taste so good! I like them because they are easy to make, satisfy my kid's hunger (especially my teenage boy!), and are full of healthy ingredients. I like to serve them with a big glass of cold milk for the kids or a cup of hot tea for myself. 

Jam-Filled Oatmeal Breakfast Bars

Oats are the star of the show in this recipe making the base upon which to build. Because I have teens it is important for me to serve them food that is high in fiber and complex carbs to fill them up so they aren't tempted to snack on empty, sugary junk food! Peanut butter adds a little protein which is also an important part of everyone's diet. 

This recipe can be made with either rolled-oats or instant oats. The only difference is if you use rolled oats you will need to put them into the food processor for a few seconds more than the instant oats before you make the recipe. 

What Kind Of Jam Should I Use?

The sweetness of these oat bars comes from the honey and the jam. What I love about these bars is that they are not overly sweet like other bars I"ve tried. The sweetness can be adjusted based on your preference but I think they taste great just the way the recipe is. 

I've tried a variety of different flavors of store-bought jam and natural preserves as well as homemade and they have all tasted delicious. What I found to be the most important aspect of this recipe is to make sure you don't use jam or a filling that is too liquidy or runny. 

The type of fruit-filling you use will determine how sweet your bars taste. Natural, fruit-juice sweetened or honey-sweetened will provide bars that are not super-sweet. However, if all you have on hand is a jar of jelly preserves go ahead and use it but know that the bards will have a higher level of sweetness. 

Food Sensitivities

Fortunately, our family does not struggle with food allergies but if your family does have food sensitivities this recipe is not only delicious but it can be modified to accommodate any allergies you or your children have. It is already egg-free and can be made gluten-free and nut-free too.  

Oat Bars Texture

These bars are soft and chewy not hard and crunchy. Served warm the jam will be soft and gooey and if served cold the jam will be a little more firm. If you are serving them to a toddler make sure to cut the bars into small bite-size pieces so they don't take too big of a bite!  

How To Store These Bars

The bars should be stored in an air-tight container to prevent them from drying out. They can be stored at room temperature or popped into the fridge if you prefer them cold. In a sealed container the bars will keep for 3-5 days. 


Jam-filled Oatmeal Breakfast Bars


Ingredients - 

2 cups instant oats or rolled oats

1/4 cup flour - whole wheat or gluten-free blend

1/2 tsp. cinnamon

1/4 tsp. baking powder 

1/4 cup honey

1/4 cup peanut butter

1/4 cup milk

1 tsp. vanilla extract

2/3 cup all-fruit jam or preserves


Instructions - 

  • Preheat the oven to 350 degrees Fahrenheit. Spray an 8x8 glass baking dish with non-stick spray or line it with parchment paper.

  • Place rolled oats into a food processor and blend until the consistency of coarse flour

  • Add honey and peanut butter into a large microwavable safe bowl for 30 seconds until warm

  • Mix the remaining ingredients into the warm peanut butter honey mixture EXCEPT for the jam. Stir until the mixture resembles thick cookie dough and holds together in your hands. If it is crumbly add a tablespoon of warm water to the dough. 
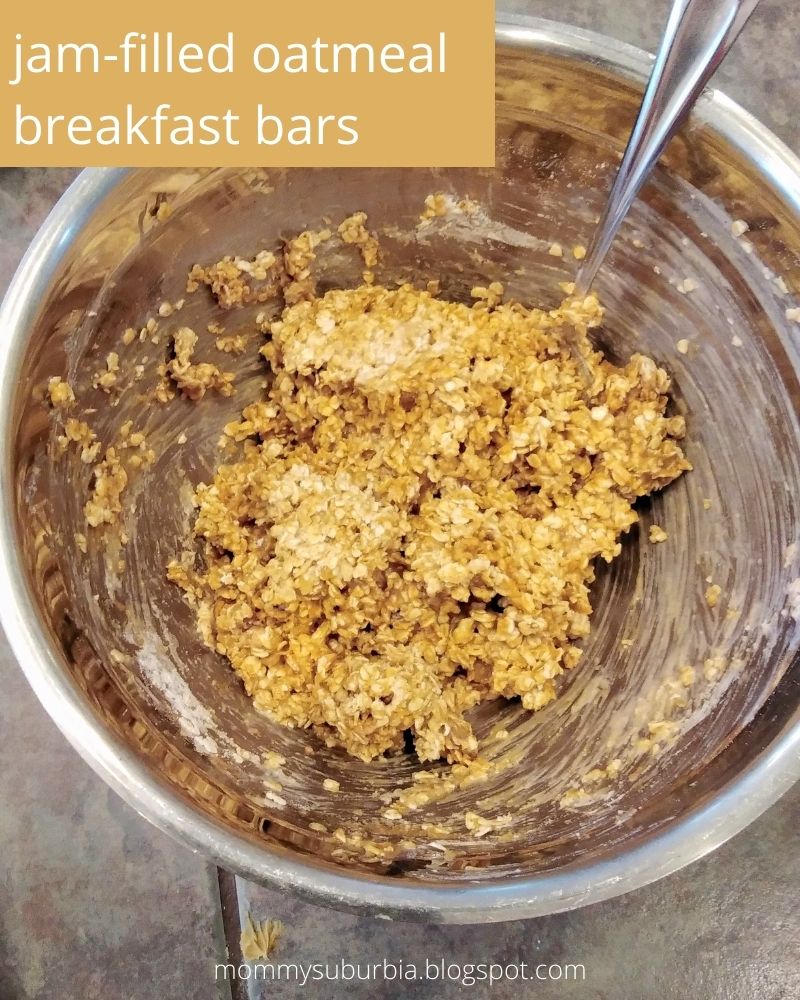


  • Set aside and reserve 3/4 cup of the dough mixture. 

  • Press the remaining dough into the bottom of the prepared baking dish


  • Spread the jam over the dough 


  • Crumble the remaining dough over the jam lightly pressing to spread it evenly over the jam


  • Bake for 20-24 minutes

  • Cool completely before serving. 


These bars can be made in advance so you are ready to serve the most amazing breakfast this week! They also make great snacks for hungry kids (and moms)! Double the recipe then freeze one for later too. Frozen bars can be thawed and popped in the microwave for a minute to reheat.

For more easy recipes make sure to check these out:

Easy To Make Granola Recipe

Chocolate Lovers Triple Chocolate Zucchini Bread

French Toast Breakfast Muffins


What is your family's go-to food for breakfast? 



Saturday, March 27, 2021

Easy To Make Homemade Granola

Granola is the perfect breakfast food whether it is served over thick creamy Greek yogurt, sprinkled over fresh fruit, or eaten by itself. Crunchy, sweet, but not too sweet, and completely customizable to fit your preference, granola is my go-to for breakfast or even for a mid-afternoon snack. 


This post contains affiliate links which means if you click on a link and make a purchase I may receive a small commission at no additional cost to you. For more information please see my Disclaimer page. Thanks!

The problems I always find with store-bought granola is how expensive a small bag costs or there aren't enough of the added mix-ins like raisins, nuts, and other seeds I thought I was paying the big bucks for. This can be so disappointing and it is what led me to start making my own homemade granola. 

At first, I was a little intimidated by making my own granola but after that first batch, I was hooked! It is so easy to make and completely customizable too. Want more walnuts or dried cranberries? Done! No more barely-there mix-ins because my homemade granola is overflowing with the added extras - just the way I like it. 

Making Your Own Homemade Granola is Easy

Making your own granola is also very budget-friendly even if you add extra mix-ins to suit our tastebuds. Our family loves to eat granola for breakfast and it seemed that the store-bought bags would be gobbled up and empty in less than a day. Now that I made my own granola I can make an extra big batch that doesn't even come close to the cost of what I would have to spend for the same amount at the store and not get upset when it gets eaten up. 

Since this simple recipe has just a few ingredients I don't have to worry about what hidden or unhealthy ingredients my family is consuming. Bonus - this recipe is also gluten-free and dairy-free for anyone with those dietary sensitivities.  

Granola Basics

Dry Ingredient Options

The dry ingredients are first. The base for granola is rolled oats. It is up to you if you want to use quick cook or old fashioned. I've tried both and they both turn out great. If you are gluten-free make sure to check that the oats you are using are certified gluten-free.

Nuts are a common mix-in in most granolas. If you have a nut allergy it is ok to leave them out but if you are a nut lover like my family then the more the better. You can use walnuts, pecans, peanuts, and almonds. It is best to roughly chop them before mixing them into the oats so that chewing them is easier and the texture doesn't contain huge whole nuts. 

Here are some other ideas for mixing into your granola too:

  • sesame seeds
  • flax seeds
  • sunflower seeds
  • rice cereal (Rice Krispies)
  • raisins
  • dried cranberries
  • dried blueberries
  • dried apricots (diced)
  • dried bananas 
  • chocolate chips
I would recommend adding the dried fruits after the baking process otherwise they have a tendency to turn rock hard. Also, don't add the chocolate until the granola is completely cool otherwise it will become a melted mess (I may or may not have learned this lesson the hard way)!

I like to flavor the dry ingredients with good quality cinnamon, a dash of nutmeg, and a pinch of salt before combining with the wet ingredients. These spices are completely optional too. If you like a little "kick" to your granola you could even add a pinch of cayenne to give your granola some heat.

Wet Ingredients Options

After you have settled on the dry ingredients it is time to work on the wet ingredients. Did you know that the wet ingredients are customizable too? Yeah! Feel free to experiment with flavors you like.

The base of the wet ingredients is honey or real maple syrup and coconut oil (or vegetable oil if you prefer). Here are some additional wet flavors you could add to this to customize your granola:
  • Peanut butter
  • Molasses
  • Vanilla extract - or another flavor of your liking
  • Carmel
  • Chocolate (dark or semi-sweet)
This morning I added in molasses and boy does my kitchen smell amazing! 


By now I'm sure you are ready for the recipe so go pre-heat your oven to 300 degrees Fahrenheit and let's get started.


Easy Homemade Breakfast Granola


Ingredients:

  • 2 cups rolled oats

  • 1 cup rice cereal (optional)

  • 1 cup chopped nuts (peanuts, walnuts, almonds or pecans)

  • 1/4 cup coconut oil (or vegetable oil)

  • 1/3 cup honey or maple syrup

  • 1 Tablespoon vanilla extract

  • 2 Tablespoons molasses (optional)

  • 1/2 cup peanut butter

  • 1 teaspoon cinnamon

  • 1/8 teaspoon salt

Instructions:

Pre-heat oven to 300 degrees Fahrenheit. 

  1. In a large bowl mix the dry ingredients* together including the salt and cinnamon.

  2. In a separate microwavable safe bowl add the oil, peanut butter, molasses, and honey. Microwave for 1 minute on high then stir. If the ingredients aren't completely melted microwave for additional 30-second intervals until completely melted. 

  3. Pour the wet ingredients into the bowl with the dry ingredients and stir to thoroughly combine. Spread the mixture onto a parchment paper-lined baking sheet. 

  4. Bake 20-25 minutes. Let cool completely before serving. Store in an air-tight container.


*Add in your favorite mix-ins with the wet ingredients except for any dried fruit which should be added after baking the granola. Also, customize the flavor to your liking by using the suggestions above. 

Now wasn't that easy? Feel free to double this recipe too. What mix-ins do you like in your granola? Do you prefer granola for breakfast or as a snack? Let me know your thoughts in the comments. 


For more easy-to-make and delicious recipes don't forget to follow MommySuburbia. 


Sunday, July 19, 2020

French Toast Breakfast Muffins Recipe


French toast is my husbands favorite breakfast dish. He loves the soft eggy toast flavored with a dash of cinnamon, nutmeg and vanilla, drizzled in warm syrup all topped off with a light dusting of powdered sugar. 

Is your mouth watering yet?

This post contains affiliate links which means if you click on a link and make a purchase I may receive a small commission at no additional cost to you. For more information please see my Disclaimer pager. Thanks!

I like French toast for those same reasons and because it whips up fast, you can add various toppings and it is super economical. 

Today I want to introduce you to a new kind of French toast - French Toast Muffins! All the great flavor of traditional French toast in the form of a muffin. 

Got an old, aging loaf of bread, or hotdog/hamburger buns hiding in the back of your pantry? Grab that bread or those old buns and head to the kitchen to start making a batch of French Toast Muffins.

Don't forget to Pin this for later and follow me on Pinterest! 


French Toast Breakfast Muffins


Ingredients:

Muffins
- 10 slices of old bread or 8-10 old hot dog / hamburger buns
- 1 1/2 cups milk
- 4 eggs
-4 Tablespoons brown sugar
-1 teaspoon ground cinnamon
-1/2 teaspoon ground nutmeg
-1 teaspoon vanilla extract
-4 Tablespoons powdered sugar 

Toppings:
-1 teaspoon ground cinnamon
-1 Tablespoon brown sugar or white sugar


1. Preheat your oven to 350F degrees.

2. Cut the bread up into cube sized pieces approximately 1/2" in size. Put the cut bread into a large mixing bowl and set it aside. 

3. In a separate bowl mix the milk, eggs, sugar, cinnamon and vanilla together. 

4. Next pour the wet mixture over the cut up bread chunks and mix well. It is best to use a wooden spoon or even your hands to ensure all pieces are well coated. 

5.  Spray a 12 cup muffin tin with non-stick cooking spray. Spoon even amounts of the bread mix into each muffin cup filling each up to the top. 

6.  In a small bowl mix the topping ingredients together then evenly sprinkle it over the bread filled muffin cups.

7.  Bake the muffins in a pre-heated 350 degree oven for 20-25 minutes until golden brown. Dust the tops of the muffins with powdered sugar. 

Store any uneaten muffins in a air tight container in the fridge. Reheat them in the microwave for about 30 seconds to warm them up. 

I love these muffins warm, covered in maple syrup and chopped walnuts alongside my morning cup of Chai tea. 

ENJOY! 

What toppings do you enjoy on your French toast? The options are endless! Please leave your topping favorites in a comment - I'd love to hear from you.


Looking for more great muffin recipes? Try these amazing pumpkin muffins! These are my go-to muffins to make in the fall when pumpkin flavor is all the rage. They are so flavorful, soft and comforting. 

Wednesday, February 22, 2017

Delicious Pumpkin Muffins with Crumble Topping

As the weather turns cooler and the trees begin to change color do you find yourself craving all things pumpkin flavor? Who can resist a fresh from the oven pumpkin muffin? I know I can't! This recipe will definitely satisfy your pumpkin cravings - at least until you and your family polish off the first dozen! (You're going to want to make a double batch to keep the whole gang happy)


See that yummy muffin in the picture above...yep that one? Well it lasted about 5 seconds before one of my kids grabbed it, took a big bite and asked, "oh, were you taking a picture of this muffin?". 

* This post may contain affiliate links which means I will make a small commission if you make a purchase at no additional cost to you. For more information please read my Disclaimer page.

"No, no, no I was eating it with my camera, new diet thing I'm trying!" was my snide reply. 

My poor sad child who by now felt pretty bad returned the muffin to the napkin with the bitten side facing the back and said, "sorry Mom it just smelled so good I couldn't wait any longer." (I totally get it kiddo!, really I do)

What can I say to that! Other than YOUR WELCOME! Because these pumpkin muffins are great! They are soft, full of pumpkin flavor and the crumble sends them over the top! These do not last long in my house (as you can see from what just happened). 

I always make these muffins, and any other kind of muffin I make in my favorite muffin tin. It has twelve wells which means for our family of six we each get two muffins each and this muffin tin is non stick-quick release. Don't just take my word for it - this great kitchen tool has a 5 star rating on Amazon, it is just that good! 


They are super easy to make and I'm sure you have most of these ingredients on hand in your kitchen already. So what are you waiting for - let's get baking!


 or click HERE to get the recipe.

Fall always puts me in the baking mood. How about you? What inspires you to bake? 

Have you ever made your own soft pretzels? Better yet, how about cinnamon sugar soft pretzels? 

They might seem a bit intimidating but don't worry they are super simple and I will walk you through the whole thing. All you need to do is follow my recipe on this post for the complete instructions. I guarantee these will disappear just as fast as the pumpkin muffins. Yum!