Showing posts with label healthy snacks. Show all posts

Friday, June 10, 2022

Cinnamon Orange Granola Recipe

This orange cinnamon granola bursts with flavor in every bite. The crunchy texture of the baked oats combined with a hint of cinnamon and the subtle sweetness of the orange peel makes this granola the perfect breakfast or snack food. 

This homemade recipe is incredibly easy to make requiring just a few simple ingredients so you can enjoy a delicious treat any time of the day!


Let's admit it, sometimes breakfast can seem a little...boring! It's easy to just eat the same old thing day in and day out because it's easy to prepare before you head off to school or to work every day. But if you are getting tired of the same-old, boring, and bland breakfast you are going to love this easy-to-make, flavor-packed cinnamon orange granola recipe. 

Wake up your breakfast routine with this soon-to-be new favorite!


Cinnamon Orange Granola 

I love granola that has a crunchy, chewy texture with a subtle sweet flavor. Not only does this recipe deliver on all of these main requirements but this cinnamon orange granola whips up in a snap, and can be eaten by itself or added to yogurt, sprinkled over a smoothie bowl, or added to your favorite fresh fruit cup. 

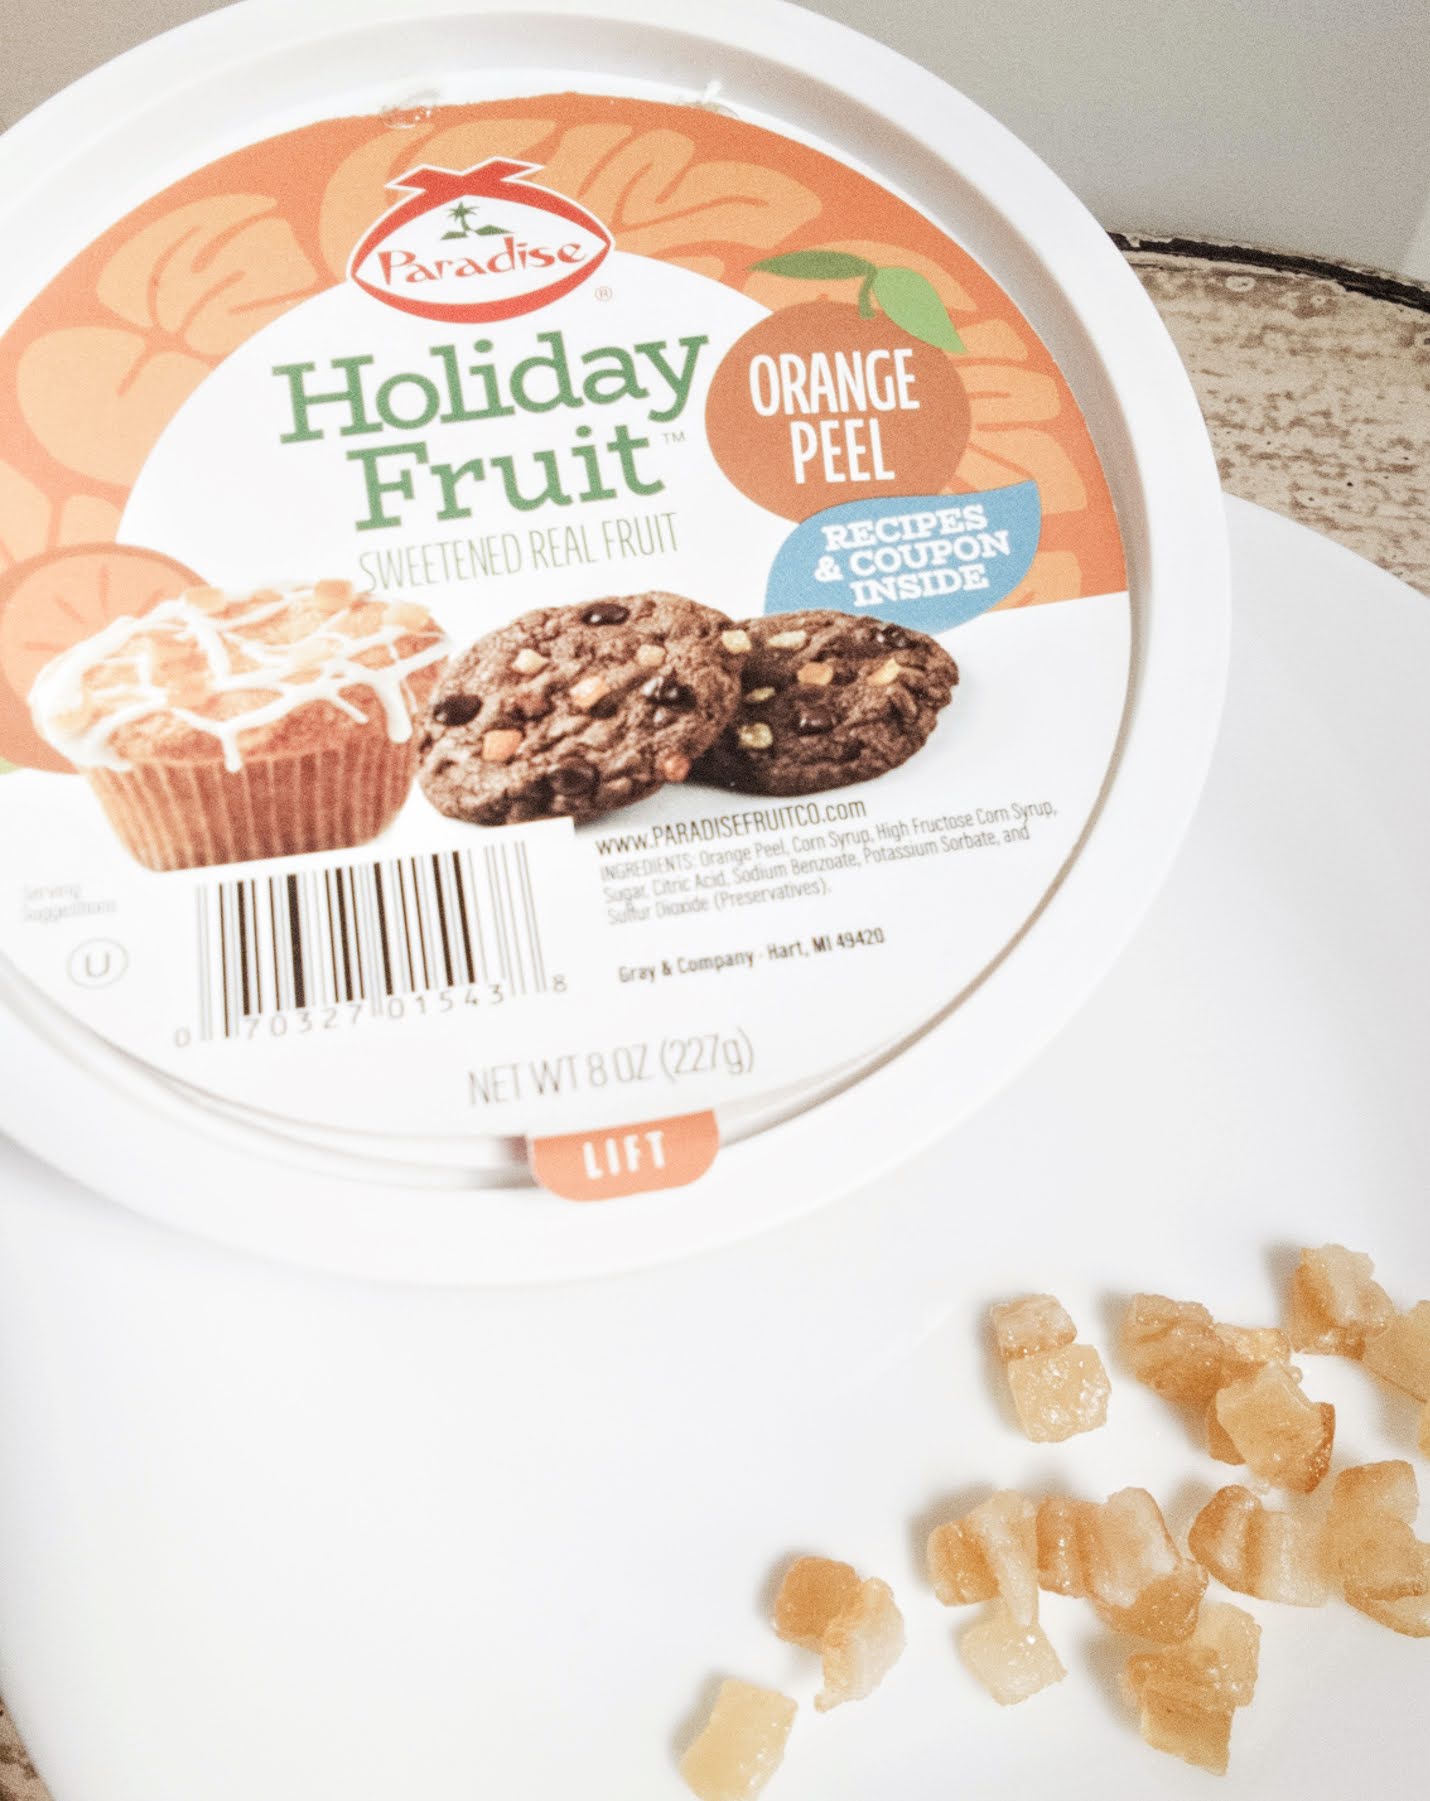
This post was written in partnership with Paradise Fruit Co. I received Paradise Fruit Co. products free in exchange for an honest, unbiased review.  

The Secret Ingredient

What makes this recipe so unique is the subtly sweet flavor and slightly chewy texture from sweetened, diced orange peel made by Paradise Fruit Co. that I added to the granola prior to baking it. If you have a sweet tooth but don't want to indulge in a decadent, calorie-laden treat, this cinnamon orange granola is sure to satisfy your cravings. A little bit of sweetened orange peel adds the perfect amount of sweetness! 


Granola is one of my family's favorite breakfast and snack foods. My girls love adding granola to just about anything, but smoothies are their favorite. They put their smoothie into a bowl, add fresh-cut fruit and top it off with a heaping scoop of orange granola. The boys however just like to scoop handfuls out of the mason jar or air-tight container I store the granola in for breakfast and snacks throughout the day. 

This orange granola doesn't last long around here, that's for sure!


Cinnamon Orange Granola Ingredients

  • Oats - this is the base for all granola recipes. Oats are so good for you since they are high in fiber and protein and are known to help lower cholesterol. I use whatever type of oats I have on hand such as rolled oats or instant oats. There is no difference in taste or nutrition between rolled or instant oats so feel free to use what you have in your pantry.
  • Walnuts - provide the perfect extra crunch to granola. Not only are they crunchy but they are good for you too! Walnuts provide healthy fats, fiber, vitamins and minerals. 
  • Cinnamon - adds a spicy depth to granola all while providing some pretty amazing health benefits. Known to be one of the healthiest spices cinnamon's health and medicinal benefits are supported by the scientific community.
  • Orange Peel - packs a flavor punch in this granola recipe. Orange peels are rich in vitamin C, fiber and many other nutrients.
  • Honey - the sweetener for this granola binds all of the other ingredients together. Adjust the sweetness by the amount of honey you add to this recipe.

Get the PRINTABLE version of this recipe!


How To Make Cinnamon Orange Granola

Recipe Ingredients:

  • 2 cups rolled oats

  • 1 cup rice cereal (optional)

  • 1 cup chopped nuts (peanuts, walnuts, almonds or pecans)

  • 1/4 cup coconut oil (or vegetable oil)

  • 1/3 cup honey or maple syrup

  • 1 Tablespoon vanilla extract

  • 2 Tablespoons molasses (optional)

  • 1/2 cup peanut butter

  • 1/2 cup sweetened diced orange peel (I used Paradise Fruit Co.)

  • 1 teaspoon cinnamon

  • 1/8 teaspoon salt


Recipe Instructions:

Pre-heat oven to 325 degrees Fahrenheit. 

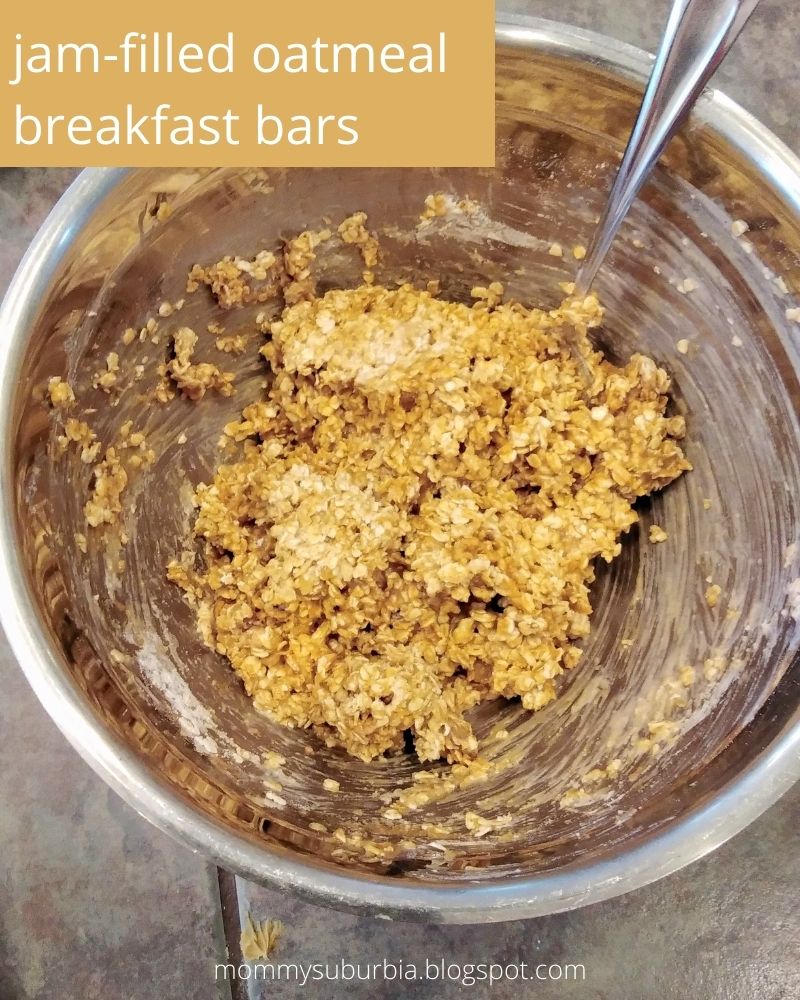
  1. In a large bowl mix the dry ingredients together.

  2. In a separate microwavable safe bowl add the oil, peanut butter, molasses, and honey. Microwave for 1 minute on high then stir. If the ingredients aren't completely melted microwave for additional 30-second intervals until completely melted. Stir in diced orange peel.

  3. Pour the wet ingredients into the bowl with the dry ingredients and stir to thoroughly combine. Spread the mixture onto a prepared baking sheet. 

  4. Bake 18-20 minutes. Let cool completely before serving. Store in an air-tight container.


How To Eat Granola:

  • eat with yogurt
  • sprinkle over fresh-cut fruit
  • eat with milk
  • make a parfait with a granola layer
  • piled on top of pancakes or waffles
  • combine granola with trail mix as an added ingredient
  • spread over ice cream for a crunchy topping
  • sprinkle over salad (in place of croutons)
  • by the handful!  

How do you like to eat your granola?  Enjoy!


Friday, May 27, 2022

Healthy Jam-Filled Oatmeal Breakfast Bars

Is breakfast starting to get a little boring at your house? Maybe you are tired of eating the same thing every day because you don't have time to find a new recipe or time to make it. Having a few options available that are healthy and that everyone will eat and enjoy is essential for starting your day off on the right foot. 


This post contains affiliate links which means if you make a purchase through the link I may receive a small commission at no additional cost to you. 

My family loves these healthy jam-filled oatmeal bars because they taste so good! I like them because they are easy to make, satisfy my kid's hunger (especially my teenage boy!), and are full of healthy ingredients. I like to serve them with a big glass of cold milk for the kids or a cup of hot tea for myself. 

Jam-Filled Oatmeal Breakfast Bars

Oats are the star of the show in this recipe making the base upon which to build. Because I have teens it is important for me to serve them food that is high in fiber and complex carbs to fill them up so they aren't tempted to snack on empty, sugary junk food! Peanut butter adds a little protein which is also an important part of everyone's diet. 

This recipe can be made with either rolled-oats or instant oats. The only difference is if you use rolled oats you will need to put them into the food processor for a few seconds more than the instant oats before you make the recipe. 

What Kind Of Jam Should I Use?

The sweetness of these oat bars comes from the honey and the jam. What I love about these bars is that they are not overly sweet like other bars I"ve tried. The sweetness can be adjusted based on your preference but I think they taste great just the way the recipe is. 

I've tried a variety of different flavors of store-bought jam and natural preserves as well as homemade and they have all tasted delicious. What I found to be the most important aspect of this recipe is to make sure you don't use jam or a filling that is too liquidy or runny. 

The type of fruit-filling you use will determine how sweet your bars taste. Natural, fruit-juice sweetened or honey-sweetened will provide bars that are not super-sweet. However, if all you have on hand is a jar of jelly preserves go ahead and use it but know that the bards will have a higher level of sweetness. 

Food Sensitivities

Fortunately, our family does not struggle with food allergies but if your family does have food sensitivities this recipe is not only delicious but it can be modified to accommodate any allergies you or your children have. It is already egg-free and can be made gluten-free and nut-free too.  

Oat Bars Texture

These bars are soft and chewy not hard and crunchy. Served warm the jam will be soft and gooey and if served cold the jam will be a little more firm. If you are serving them to a toddler make sure to cut the bars into small bite-size pieces so they don't take too big of a bite!  

How To Store These Bars

The bars should be stored in an air-tight container to prevent them from drying out. They can be stored at room temperature or popped into the fridge if you prefer them cold. In a sealed container the bars will keep for 3-5 days. 


Jam-filled Oatmeal Breakfast Bars


Ingredients - 

2 cups instant oats or rolled oats

1/4 cup flour - whole wheat or gluten-free blend

1/2 tsp. cinnamon

1/4 tsp. baking powder 

1/4 cup honey

1/4 cup peanut butter

1/4 cup milk

1 tsp. vanilla extract

2/3 cup all-fruit jam or preserves


Instructions - 

  • Preheat the oven to 350 degrees Fahrenheit. Spray an 8x8 glass baking dish with non-stick spray or line it with parchment paper.

  • Place rolled oats into a food processor and blend until the consistency of coarse flour

  • Add honey and peanut butter into a large microwavable safe bowl for 30 seconds until warm

  • Mix the remaining ingredients into the warm peanut butter honey mixture EXCEPT for the jam. Stir until the mixture resembles thick cookie dough and holds together in your hands. If it is crumbly add a tablespoon of warm water to the dough. 


  • Set aside and reserve 3/4 cup of the dough mixture. 

  • Press the remaining dough into the bottom of the prepared baking dish


  • Spread the jam over the dough 


  • Crumble the remaining dough over the jam lightly pressing to spread it evenly over the jam


  • Bake for 20-24 minutes

  • Cool completely before serving. 


These bars can be made in advance so you are ready to serve the most amazing breakfast this week! They also make great snacks for hungry kids (and moms)! Double the recipe then freeze one for later too. Frozen bars can be thawed and popped in the microwave for a minute to reheat.

For more easy recipes make sure to check these out:

Easy To Make Granola Recipe

Chocolate Lovers Triple Chocolate Zucchini Bread

French Toast Breakfast Muffins


What is your family's go-to food for breakfast? 


Thursday, January 16, 2020

Easy No-Bake Oatmeal Peanut Butter Energy Snack Bites


Our family is always on the go which is why I am constantly on the lookout for homemade, healthy, easy-to-make, budget-friendly snacks to bring along with us.


Even better is when I have all of the ingredients on hand in my cupboard!


This post contains affiliate links which means if you click on a link and make a purchase I may receive a small commission at no additional cost to you. For more information please read my Disclaimer page. Thanks!

These easy no-bake oatmeal peanut butter energy bites (whew....long name for a little snack!) meet all of the above requirements. I can't believe how easy they are to make! 

And guess what....my kids love them too!! Win - win.

I know there are a lot of great energy bites or energy ball recipes out there but this one has a special secret ingredient the other recipes don't have. It is a total flavor-boosting game changer, my friends. I came up with it by chance when I was just a bit short-handed on one of the ingredients and I was blown away at the difference it made. 

Want to know what my secret ingredient is.......flavored instant oatmeal! Surprised?


My favorite is maple & brown sugar instant oatmeal. All you need is one small packet added with the rest of the ingredients and the flavor just explodes! 

This is the perfect recipe to let your kids help make too! We do a lot of baking and cooking for school since there is always a lot of math, science, and reading involved. 

Go grab a large mixing bowl, a spatula, or wooden spoon, and let's get mixing shall we?


Delicious No-Bake Oatmeal Peanut Butter Energy Bites

Ingredients:

1 1/2 cups oatmeal 
1/2 cup peanut butter
1/3 cup maple syrup or honey

Optional add-ins:
1/4 cup chopped almonds, pecans or peanuts
1/8 cup sunflower seeds
1/4 cup dried cranberries, cherries, or raisins


Make This Recipe:

1. In a small microwave-safe bowl, melt the peanut butter for 30 seconds so it is easy to mix.

2. In a large bowl mix all the remaining ingredients including the melted peanut butter together. 

3. Scoop out a heaping tablespoon of the mixture and roll it into a ball. (To keep the mixture from sticking to your hands, lightly wet you hands with water). Repeat with the remaining mixture making about 16-20 energy balls depending on size.

4. Place the energy balls onto a parchment lined baking sheet and put them in the refrigerator for 30 minutes.

Store the peanut butter snack bites in a sealed tupperware container in the fridge. Trust me though, they won't last long! 


This yummy snack is perfect for on-the-go families! Why fill up those little tummies with junk food when they can eat a few energy bites, feel full and you can know that they are getting a healthy snack. These little bites even satisfy your sweet tooth cravings too!

If you need some more great snack ideas check out these posts that are full of great snacking ideas:


10 Healthy Game Day Snacks For Kids

Big game today? Prepare the right way - with the right type of pre-game and post game snacks! Boost your kids energy with these tasty and kid approved snacks. Click HERE to read the full post.


11 Popular Snacks You Should Avoid Feeding Your Child


Worried your child's snack habits are doing more harm than good? Check out this great post to know what snacks to avoid and what you should give them instead.

Tuesday, October 29, 2019

How To Make Homemade Cinnamon & Sugar Soft Pretzels

Homemade soft pretzels are such a delicious and easy treat to make at home. As the weather turns colder do you find yourself craving all those wonderful comfort foods like pot pie, hot chocolate, apple pie and warm soft pretzels? At our house we are in full comfort food mode. The crock pot is churning out meals while tag teaming with the oven! 


Our latest comfort food recipe is homemade soft pretzels. At first this seemed so intimidating since pretzel making is a three step process, but once I made my first batch I realized there is nothing to be intimated about homemade pretzel making! They are quite simple and easy to make at home thank goodness, otherwise I was considering buying stock in Auntie Anne's due to our frequent stops there for warm soft pretzels. 

I am a participant in the Amazon affiliate program which means if you click on an affiliate link within this post and make a purchase I may receive a small commission at no additional cost to you. For more information please see my Disclaimer page. Thanks

If you have never made anything with dough before, making soft pretzels is a great one to start with. As I mentioned before making soft pretzels is a three step process broken down as follows:

  • Make the dough and let it rise, 
  • Shape the dough and give it a quick water/baking soda bath
  • Bake the pretzels
Let's make a batch together shall we? Here is the recipe I used to make mine that I think you will love:


Easy Homemade Cinnamon & Sugar Soft Pretzels


Ingredients
  • 1 cup warm water
  • 1 pkg dry active yeast
  • 1 Tbsp sugar
  • 1 Tbsp melted butter
  • 1/2 tsp salt
  • 2 1/2 cups all purpose flour
  • 2 Tbsp vegetable oil
  • 1 egg white

Baking Soda Bath

  • 6 cups water
  • 1/4 cup baking soda

Cinnamon & Sugar Topping

  • 1/4 cup melted butter
  • 1/4 cup sugar + 1/4 tsp cinnamon mixed together


Step #1 Make the Dough

In a metal mixing bowl pour in the warm (see Tip below) water, yeast and the tablespoon of sugar. Let the yeast activate or proof (technical term) for 10 minutes. The yeast will feed off of the sugar and begin to foam and get frothy. 


Tip: If it bubbles up and gets frothy you know your yeast is active and well. Causes of "dead" yeast can be too hot water, too cold water, old yeast or too much sugar. The water should feel warm to the touch on the inside of your wrist - not hot. 


After the yeast is proofed add the melted butter, salt, flour and cinnamon and mix for about 10 minutes. I find it easiest to mix everything in my Kitchen Aid mixer starting with the mixing paddle then switching to the dough hook once the ingredients come together. Using the dough hook is how you are going to kneed the dough. 

If you don't have a stand mixer you can do all of the mixing by hand using a solid wooden spoon and then once the ingredients come together dump it out onto a lightly floured surface and kneed it by hand. (if you need a quick lesson in how to kneed dough here is a great video). The dough should not stick to the bowl at all and feel smooth and elastic. 


The dough needs to rest and have time to double in size. We don't want the dough to stick to the bowl so you should pull the dough out of the metal mixing bowl, pour in the vegetable oil and spread it around the inside of the bowl with a kitchen brush and then place the dough back in the bowl. 

Completely cover the top of the bowl with a piece of saran wrap or a towel. It is best to put the bowl in a warm location to help the dough rise. The dough should be doubled in size after 60 minutes.


Tip: Since it is super cold where I live I like to turn my oven on low for about 15 minutes then turn it off and set the bowl with the dough on it to rise.  

Once the dough is double it's size pour it out onto a lightly floured surface and divide it into 8 to 10 equal size pieces. If you want huge pretzels go with 8 pieces otherwise for medium size pretzels divide the dough into 10 pieces. 


Step #2 Baking Soda Bath

Pour the six cups of water into a large pot, mix in the baking soda and turn the stove top on medium high temperature. You want the water to come to a full boil. 


While you are waiting for the water to reach the boiling point you can use this time to shape your 8 or 10 pieces of dough into pretzel shapes. 
  • Shape your dough by rolling each piece into a long rope about 24 inches long. 
  • On your work surface lay the dough rope into a "U" shape.
  • cross the ends of the U two times to make the center twist
  • fold the top of each U shape down towards the bottom of the U and pinch the ends down. 
The dough should now resemble the shape of a pretzel. You can easily adjust to dough into the proper shape of your liking. 


Tip - If you don't want to make the traditional pretzel shape you can cut the long rolled rope of dough into small 1" pieces to make pretzel nuggets instead. 


Once the baking soda water bath is boiling carefully drop one pretzel at a time into the water. You do not want to crowd the pot so you may only be able to bathe one pretzel at a time. Remove the pretzels from the water after 30 seconds and place them on a parchment lined baking sheet. 


Mix the egg white with 1-2 tablespoons of water and brush each pretzel top with this mixture. Since we are making Cinnamon pretzels I don't recommend sprinkling salt on the unbaked pretzels. 


Tip - if you want to make traditional pretzels, skip adding cinnamon to the dough in the first step. After the pretzels are brushed with the egg wash sprinkle salt on each pretzel to your liking. 


Step # - Bake The Pretzels & Add Toppings
Bake the pretzels in a 425F oven for 10-12 minutes. Allow the pretzels to cool on a wire rack for 5 minutes before serving. Melt the 1/4 cup of butter in a small dish. Brush the baked pretzels with melted butter then sprinkle the sugar & cinnamon mixture over the pretzels. 

Enjoy!


Tip - if you aren't going to eat the pretzels right away (or within an hour after baking) I recommend flash freezing the pretzels then storing them in a Ziploc freezer bag to keep them fresh. When you are ready to eat place the pretzels on parchment paper on a baking sheet and put them in a 425F oven for 10-12 minutes until thawed and warm.
Wasn't that easy? There are so many different toppings you could put on your homemade soft pretzels like - poppy seeds, drizzled chocolate with chopped nuts and Parmesan cheese.
What's your favorite pretzel toppings? Share your favorites in the comments or follow me so you don't miss out on future recipes, crafts and useful parenting tips.
While you're in the kitchen in full comfort food snack mode why not whip up a batch of this amazing carmel corn? I have the perfect recipe for you that is fast, easy and YUMMY! 

Tuesday, April 3, 2018

The Best Cookbook Collection for Cooking at Home

mommysuburbia.blogspot.com
THIS POST MAY CONTAIN AFFILIATE LINKS. PLEASE READ MY DISCLOSURE FOR MORE INFO.

When we got married (many years ago!) one of the most useful gifts I received was a Betty Crocker cookbook. I knew the basics of cooking but this book helped me hone my skills and venture into new recipes I might not have tried. 

I remember pouring over the pages of my Betty Crocker cookbook looking at the pictures and planning out what I wanted to make and try next. It was a lot of fun - it still is! 

Collecting cookbooks has become one of my passions. I love reading them, learning new tips and tricks as well as expanding our family's menu. We all get stuck in a "rut" sometimes - especially when it comes do the dinner menu. The seasonal recipes we all look forward to making tend to lack their flare after several months of use. 

Now that we are at the end of the winter season, and my "winter recipes" have run their course I am totally ready to switch gears and start implementing some spring/summer dishes into our weeknight meals. New cookbooks are a great way to expand your menu and discover new dishes to serve your family. 

I put together a great list of cookbooks that I hope will help you, like it did me, get out of the seasonal menu rut and breathe new life into your kitchen! 
Do you use cast iron to cook with? No? Well what are you waiting for? I don't know what I'd do without my cast iron skillet and grill pan! These wonderful kitchen tools take food to the next level. I use my iron skills for everything - even dessert!


Ever had a cast iron chocolate chip cookie pie? Simple and so yummy - all I do is make a batch of cookie dough (find the recipe here), spread it into the cast iron skillet and bake it. If it starts to get a little too done around the edges just put a piece of aluminum foil over it while it is baking and this will help it keep from burning around the edges.


Click here to find the recipe
I don't even take it out of the pan when we bring this dessert to a party. Yep, I bring the whole skillet with the cookie pie inside still. I love how it looks a little rustic but the skillet keeps the cookie warm for a long time so when you are ready to serve the pie it is still warm! Scoop a little vanilla ice cream on top and you are all set! 

Thursday, April 27, 2017

10 Healthy Game Day Snacks for Kids

provide healthy snacks for your child and teammates
read about it here.

Healthy Game Day Snacks for Your Child


Spring marks the kick-off to many spring sports like baseball, tee-ball, soccer, track and many other great outdoor (and indoor) activities. Keeping your child athlete healthy means making sure they are eating healthy snack options instead of filling up on junk food.

Our two boys are both starting their spring baseball leagues and at least once or twice will be asked to bring a snack to share with their teammates.

When it comes to game day snacks for the kids I'm a little concerned about the message conveyed to a child athlete who just participated in an athletic event/game when sugary drinks and sugary snacks are passed out. Seems kind of backwards to me!

I get that a little treat now and then is ok but come on let's not take all that hard work and exercise and wash it down with sugar and other unhealthy ingredients!

Look around - it is no surprise that kids all over our great country are struggling with obesity -even young athletes. Seems like a great time to reinforce healthy eating is by encouraging it through healthy snacking as a team. Why not tap into the power of peer pressure and encourage the team to snack together on healthy foods.

Sugary sports drinks, or "adult kook-aid", as I call it, gets pushed so hard onto our young athletes. Look at the convenient "kid size" bottles it comes in - just making it so easy for a parent to grab and pass out to the team after a game. Have you read the label? Yikes! This stuff is horrible. From my little bit of research into these drinks they are useful for athletes who have been participating in a high intensity sport for more than 90 minutes.

Even the American Academy of Pediatrics warns that these sports drinks which are high in carbohydrates, minerals, electrolytes and artificial flavorings can contribute to childhood obesity and tooth decay.

So as a parent what kind of snacks and drinks can we send with our kids to share with their teammates on game day? Well here is a quick list of ten healthy snacks and drinks you can encourage your child's teammates to eat after the big game


This post may contains affiliate links which means if you click on a link and make a purchase I may receive a small commission at no additional cost to you. Please see my disclosure here.


1. An apple with peanut butter or almond butter


source: joyfulhealthyeats

If you are in a hurry you could slice up the apples, pop them into ziploc bags and pair them with a small single peanut butter packet to go (Jiff To Go). To keep the apples from browning splash a bit of orange juice on them before zipping the bag closed.


2. Trail Mix


source: love bake read

If you have never made your own trail mix and are looking for a great recipe Love.Bake.Read has a simple and healthy recipe that is sure to please a crowd. If you are in a hurry it is easy to find single pack trail mixes in bulk from Costco or through Amazon.


3. Larabar


click HERE

The Larabar is a real food option if you need to but a snack for the team. It is somewhat high in sugar but it isn't the processed sugar you would find in other snacks. The sugar is a natural food based sugar.


4. Breakfast Cookies


source: spend with pennies


I know these delicious snacks are called "breakfast" cookies but really they can be eaten anytime for a healthy energy boosting snack or for a post workout/game snack. This recipe I found is super simple, healthy and downright delicious!! You can find the recipe here.


5. String Cheese + Crackers

Now here is a snack that you can easily find in bulk - Goldfish Crackers & String Cheese. Healthy and tastes great - a win for both you and your little athlete.


6. Applesauce

I just love the little plastic to-go cups you can pick up in bulk or the squeezable pouches. This is a great way to promote a healthy snack post game time all while keeping it simple for a busy parent to grab on the way to the game.


7. Turkey Cheese Roll-Ups

source: healthysnacksforwork

This is a great snack to make ahead, pop into the fridge and grab before the game starts. Stacking the easy to grab roll-ups in a tupperware container and then passing them around to the team after the game is a great way to provide a healthy snack to the team.


8. Chocolate Milk


Who doesn't love chocolate milk? Young athletes need milk especially post workout so why not add a little chocolate to up the "cool" factor to this healthy snack. Shelf stable milk doesn't even need to be refriderated however a nice cold milk always tastes good after working out!


9. Fruit Kabobs


Source: happy home fairy
Here is a make-ahead team snack you can whip up in no time and store in the fridge until game day. The mix of fruit and color makes them look so yummy any child athlete will be tempted to gobble them up.


10. Citrus Infused Water


source: lifesanity
Mix up a big jug of this citrus infused water to share with the team! It might seem a little strange to some of the kids but one sip and they might change their minds. Some teams have those big water dispensers with paper cups for the team to use during the game. Why not add some flavor (and good healthy benefits too) to the water for the team to share. Water is the best thing you can give your child to drink before, during and after the game but it doesn't have to be plain old boring water - add some flavor and see what happens.

I hope these ideas have provided you with some inspiration as you get ready to cheer on your kids and share a healthy snack with the team. You might want to pack a few extra for siblings and friends who might be curious about these healthy (and yummy) snacks!

Maybe you have some great healthy snack ideas - yes, please share with the rest of us!! Leave a comment and tell me about it.