Showing posts with label zulily. Show all posts

Thursday, June 23, 2022

7 Fun Summer Activities Your Kids Will Love

Summer is here which means your kids have more time to play, craft, and enjoy some new activities. Keeping kids active is important but sometimes it can be hard to come up with new and exciting activities for them to do during summer break. 


Having a few ideas tucked into your back pocket that you can whip out at a moment's notice - rain or shine could save the day! To help you out I've put together a helpful list of 7 fun summer activities your kids will love.

This post was written in partnership with Zulily. Check out The Find by Zulily for more awesome crafts, recipes, and parenting tips to help out all busy moms! 


7 Fun Summer Activities For Kids


Best Bubbles Ever

Blowing bubbles is the classic activity kids have been doing for years. Playing with bubbles doesn't have to be the old-school bottle of bubbles with a short wand we all had as a kid. Up your kids bubble-blowing experience with a few tweaks. 

  • Snake bubbles are easy and fun!  Cut a small 16 oz plastic water or pop bottle in half then cover the large cut opening with an old sock securing it with duct tape. Dip the sock end into a mixture of 1 part dish soap + 1 part water + a few drops of food coloring then blow through the top of the bottle. Watch your snake bubble grow as you keep blowing! 
  • Make your own unpoppable bubbles with this recipe: mix together 3 cups distilled water + 1 cup dish soap + 1/2 cup corn syrup. Use a bubble wand to blow your unpoppable bubbles!


Paper Mache Pinata

Summer is the perfect time to make a pinata since it can be a pretty messy craft - perfect for doing outside! A balloon covered in paste-coated strips of newspaper or wrapping paper makes the perfect pinata. Find several great homemade paper mache paste recipes here

For complete pinata-making instructions check out this post: How To Make A Paper Mache Pinata


Make-Your-Own Puzzles

My kids love putting together puzzles so when we made our own they were even more excited! I've got two kinds of puzzles to share with you that your kids can make:

  • Cereal box puzzles only require three things - a pencil, scissors, and an empty cereal box. Cut open an empty cardboard cereal box, trimming around the side edges and flaps. Next, draw puzzle piece shapes on the blank cardboard side then cut out the shapes. Mix up the cutout pieces and try to solve your puzzle. Share your puzzle with friends and family then store the puzzles in large ziplock bags. Follow the tutorial here to make your own cereal box puzzle.


  • Popsicle stick puzzles are easy to make for kids of any age. Grab some plain popsicle craft sticks, masking tape, and washable markers. Line up 6 to 8 popsicle sticks flat side down on a sturdy flat surface, then put a strip of tape along the back making sure the sticks are secured together. Flip the taped popsicle sticks over then color the untaped side with markers. Take the tape off of the craft sticks, mix them up and then try to solve the puzzle by putting them in order to re-create the picture you drew. It is harder than you think! (For younger kids I recommend numbering the back side of the craft sticks to help them solve the puzzle more easily)


Tie-Dye (Anything!)

Tie-dying is a popular summer camp activity that your kids can do at home too! Almost anything made from cotton material can be tie-dyed so let them use their imagination and go crazy finding something unique to tie-dye like socks, robes, pillowcases, and of course a t-shirt. 


Tie-dying socks is super simple and I know your kids will love doing it as much as mine do! Grab a pack of white cotton socks so your child can make their own tie-dye socks - a different tie-dyed colored pair for each day of the week! Learn how to tie-dye socks here.   


Wildflower Vase Display Board

Spring and summer yield a bounty of beautiful wildflowers. Kids love picking flowers so help them create a lovely wildflower vase display board to show off their pickings. With a little adult help and a few supplies, your kids will be ready to make their own wildflower vase in no time.  

To get started you need a piece of cardboard (roughly 10" x 12"), markers, and a sharpened pencil. On the cardboard freehand draw the outline of a vase then have your child color it any way they like. Take the sharp pencil then poke several holes along the top edge of the vase (adult supervision suggested). 

Now let your kids go crazy picking dandelions or whatever wildflowers they can find and insert the flower stems into the holes. 


Chalk Painting

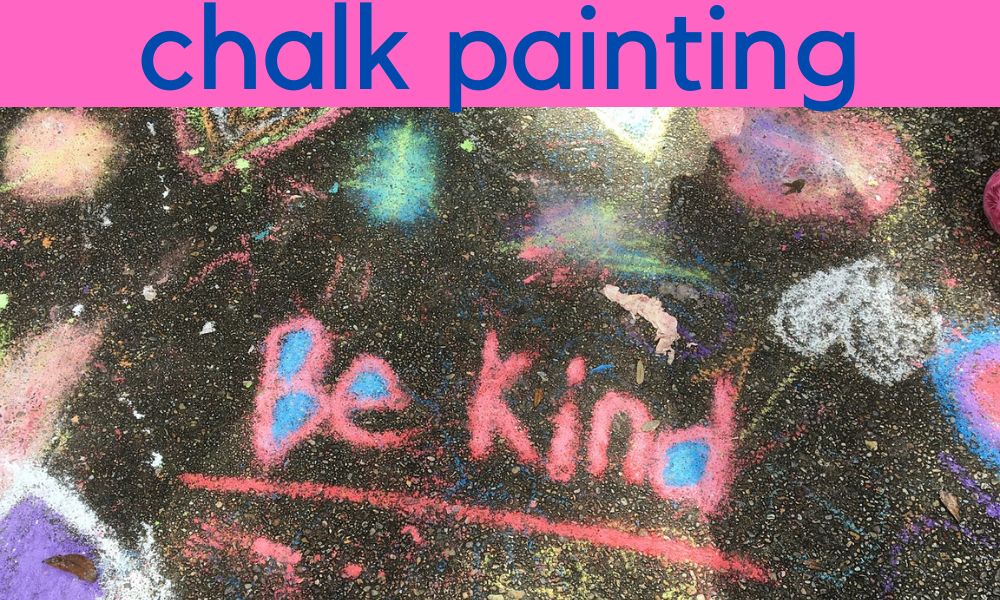
Are you kids bored of plain old sidewalk chalk? Breathe new life into sidewalk chalk with this fun new twist - chalk painting! Chalk painting actually doesn't require chalk but the results look very similar to chalk. 

mommysuburbia.blogspot.com


  • Using an empty metal muffin tin add 1 heaping tablespoon of cornstarch to each well 
  • then add a few drops of food coloring into each (dissolved watercolor paint will work too!) 
  • Add water almost to the top of each well then stir to mix everything together. 

Using a wide paintbrush or foam brush let your child paint their designs and pictures all over the sidewalk or driveway. Don't be discouraged if at first, the "painting" doesn't look very bold - just wait until it dries completely to see the painting come to life. 


Leaf Rubbings

Introduce a little botany (science) and learning into those long summer days while your kids are out of school with this fun activity. Plan some short nature hikes or even walks through your neighborhood or favorite park to collect leaves from different trees. Once home, give your child a notebook with blank pages and a box of crayons. Place a leaf under one page in the notebook then rub over the paper with the long side of a crayon to create a leaf rubbing. 

Remember to PIN this leaf journal printable for later!


With your guidance help your child identify the type of tree the leaf came from so they can write it down in their leaf journal.  Your local library is a great place to find books that will help your child with their leaf identification project. 

Make this a summer-long project that they can even do while on vacation! They will be so proud of their leaf journal and all they learned throughout the summer.

Have an amazing summer! Check back here often for more activity ideas, crafts, and tasty recipes. 

6 Fun Pool Games For Kids To Play This Summer

How To Color Dye Pasta Noodles For Kids Crafts

Top 10 Outdoor Games For Kids

The Ultimate Camping Scavenger Hunt For Kids


Thursday, June 16, 2022

How To Make A Paper Mache Pinata

Looking for a simple, multi-age craft project that costs next to nothing to do with your family? A homemade paper mache pinata is a fun and easy craft project your kids are sure to enjoy. When their pinata is finished, fill it with individually wrapped candy, hang it up outside and let everyone take a turn trying to crack it open with a stick while blindfolded! Turn a kid's craft project into a pinata party!


Before your kids start complaining that they are bored send them to the recycling bin to gather the most important material they will need to make this project - paper! Newspaper, magazine, or catalog pages all make great materials for a paper mache pinata. Tear the paper into 1" strips (torn paper works best!).

While they gather up the paper you can start whipping up the no-cook paste for the project. Follow these simple instructions to make the paste:

Easy Paper Mache Paste Recipe

1 part flour (all purpose) 

2 parts water

1 teaspoon salt

1 Tablespoon all-purpose glue (optional)

In a large plastic bowl combine all the ingredients. Use a whisk to stir until all the lumps are gone. Add more water or flour if needed to create a "soupy" paste. Store covered in the refrigerator for up to three days. 

For more paper mache paste recipes check out this post I wrote for The Find by Zulily! 


Gather up the following supplies to get started making your own paper mache pinata: 

Supplies:

  • 1 large balloon per person
  • plastic tablecloth
  • paper mache paste
  • torn strips of paper
  • stand for balloon (small bowl or round cut section of an oatmeal container work well)
  • duct tape
  • crepe paper (optional)

How To Make A Paper Mache Pinata


Instructions:

This project can get messy so be sure to cover a large table with a plastic tablecloth before you start. Then have each child blow up a large balloon to the size they want their pinata. The balloon will be the base shape for the pinata. 


Step 1 - Set the balloon on the stand. If it falls off consider taping it down gently to the stand. Dip strips of paper one at a time into the paste then run the strips between two fingers to wring off any extra paste. Apply the paste-covered paper strips all over the balloon in a random overlapping fashion. 


Step 2 - Allow the first layer of paper strips to dry completely. Refrigerate the extra paste in a sealed container. 

Step 3 - Apply a second layer of paste-covered strips of paper over the balloon covering it completely. Then allow the second layer to dry. 

(OPTIONAL - if you think your pinata needs a third layer of paper repeat the steps once more then let it completely dry.) 

With a pin or pair of scissors pop the balloon and allow it to deflate. Remove the balloon. 

Step 4 - Time to decorate! Paint the surface of the pinata with acrylic craft paint - be as creative as you want! Glue on strips of crepe paper around the pinata for more added texture and fun. 


Step 5 - Once the paint is dry, remove the paper mache pinata from the stand. Place a strip of duct tape along the top open edge of the pinata to give it extra strength. To hang the pinata make two holes just under the taped edge then string a thin piece of rope through the holes. Fill the empty core with candy and small prizes then hang the pinata about 4 feet off the ground.


Party Time

If your kids thought making the paper mache pinata was a blast wait until they get to crack it open! Invite all their friends over for a pinata party. 

Line up the kids by age (or size) and have them stand a safe distance away from the pinata (so they don't get hit by the person swinging a stick). Each child when it is their turn is blindfolded, spun in a circle three times, given a long stick (or plastic baseball bat) then gently directed towards the pinata where they get three swings to hit the pinata. 

If you have big kids you might consider giving them one swing each so everyone gets a turn. Once the pinata bursts open everyone gets a chance to gather up as many prizes as they can!  

I guarantee this fun craft project and paper mache pinata party will become an annual event because it is just so much fun!

Pin this post for later!

How did your paper mache pinata turn out? I'd love to hear from you so please leave a comment and make sure to follow me here or on Pinterest for more great kid's craft projects. 


More Kids Crafts

Here are some additional crafts your kids will love:

How To Make A Birdseed Ornament Birdfeeder

Tie-Dye Coffee Filter Butterflies

Simple & Fun Watercolor Process Art For Kids

How To Make A Cereal Box Jigsaw Puzzle


Saturday, May 28, 2022

The Ultimate Camping Scavenger Hunt For Kids

Camping is the perfect family vacation especially if you are trying to leave the busyness of life behind and reconnect as a family. One way you can reconnect with your kids while camping is through activities like a family scavenger hunt. Whether you pair up in teams or search for the items on the scavenger hunt individually this activity is perfect to do on your next camping trip. 


This post was written in partnership with Zulily. Make sure to check out the Camping Essentials Checklist For Beginners as well as many other great ideas at The Find By Zulily.


Camping Scavenger Hunt For Kids

Since camping happens in the great outdoors it makes sense that this scavenger hunt should include outdoor treasures as well as camping-specific items too! To keep your job easy I've put together a great family scavenger hunt you can take along with you on your next camping trip. Invite other campers to join in with the fun too. 


Scavenger hunts are fun because they encourage those participating to look more closely at the surrounding area while they hunt for the items on the list. They can also be quite competitive (especially in my family), so consider offering a prize for the first person to complete the scavenger hunt - like an ice cream cone or an extra s'more for dessert. 

Lastly, scavenger hunts are great for any age to participate which is why it is the perfect activity to do while camping with your family or a big group.

Here is the printable link for this cool camping scavenger hunt!


Ultimate Camping Checklist For A New Camper

If you are new to camping it might seem a bit overwhelming to know what to bring when you go on your first camping trip. No need to stress - I've got you covered with this post I wrote The Ultimate Checklist For A New Camper for The Find by Zulily. Click to get the full checklist before you adventure out on your first camping trip.  

What's For Dinner?

Now that you have a great activity planned for the family the next thing to figure out is what to serve for dinner! Don't worry I've provided you with 5 Easy Meals To Make On Your Next Camping Trip so you don't have to stress about dinner while on vacation! 

Thursday, February 17, 2022

10 Easy Butterfly Craft Projects for Kids

Butterflies, though small and delicate, have become a symbol of new life, transformation, and beauty captivating the hearts of both children and adults alike. Their colorful wings and graceful movement are the inspiration for crafters of all ages and abilities.


Butterfly crafts are the perfect way to kickstart your spring and summer kid’s craft projects. 


This post was written in partnership with Zulily. For more great posts click here


Every Spring my kids and I visit our local conservatory during their annual butterfly exhibit. The exhibit has hundreds of butterflies floating and flying through the indoor garden as well as butterflies hatching from their chrysalis. I always know that once we get home the kids will want to break out the craft supplies and make their own butterflies in order to mark this memorable field trip. 


10 Easy and Fun Butterfly Kids Craft Projects To Make This Summer


If you have a butterfly-loving child and are looking for a fun and easy butterfly-themed craft to do with them I made your job easy by putting together a list of 10 easy-to-make and fun butterfly crafts for kids. 


  1. PIPE CLEANER BEADED BUTTERFLY


Kids practice their fine motor skills as they string beads onto a pipe cleaner to make these butterflies. My kids love to make color-coordinated butterfly wings so we also use this craft to discuss patterns, color coordination, and counting. 


  • String colorful pony beads on two of the pipe cleaners leaving one inch empty at both ends of the pipe cleaners. 

  • Twist the empty ends of the pipe cleaner together creating a circle. With your fingers separate the beads in half dividing them onto opposite sides of the pipe cleaner circle. 

  • Next Twist the beaded pipe cleaner into a figure 8 shape. Repeat this step with the second pipe cleaner. 

  • Cut the third pipe cleaner in half then bend one of the shorter pieces in half matching cut end to cut end. Put one bead on each of the cut ends and twist the pipe cleaner around the bead to secure it in order to make the butterfly’s antenna. 

  • Spread craft glue onto one flat side of the clothespin then sprinkle glitter over the glue. Let the glue dry completely. 

  • Pinch open the clothespin and insert both beaded figure-eight-shaped pipe cleaners into the clothespin at the center twisted section of the pipe cleaner. Before closing the pipe cleaner insert the bend side of the beaded antenna at the end of the clothespin. 


You may want to add a dab of hot glue to securely close the clothespin if your child will be playing with their butterfly. Add a small button magnet to the backside of the clothespin to turn your butterfly into a magnet to display proudly on the refrigerator. 


  1. COFFEE FILTER TYE DIE BUTTERFLY


Your child is going to love watching the marker colors mix and spread on the coffee filter once they spritz it with water. Once dried they will have a beautiful and delicate-looking butterfly. I highly recommend doing this craft on a protected work surface so the markers don’t stain your table. 


  • Lay the coffee filters flat then color all over the coffee filters with markers then lightly spray them with water so that the entire surface is damp. The colors will begin to blend together. Let the coffee filter air dry completely.

  • Fold the coffee filters accordion style and stack them one on top of the other

  • Fold the pipe cleaner in half then place the center of the stacked coffee filter on the fold. Twist the pipe cleaner around the center of the coffee filters a few times to create the butterfly body. Gently curl the ends of the pipe cleaners into the butterfly antennae 

  • Open the coffee filters to create butterfly wings


Once your child has made one of these colorful butterflies they won’t want to stop crafting! Insert a wooden skewer into the pipe cleaner and stick the butterfly in a houseplant to make an indoor butterfly garden. 


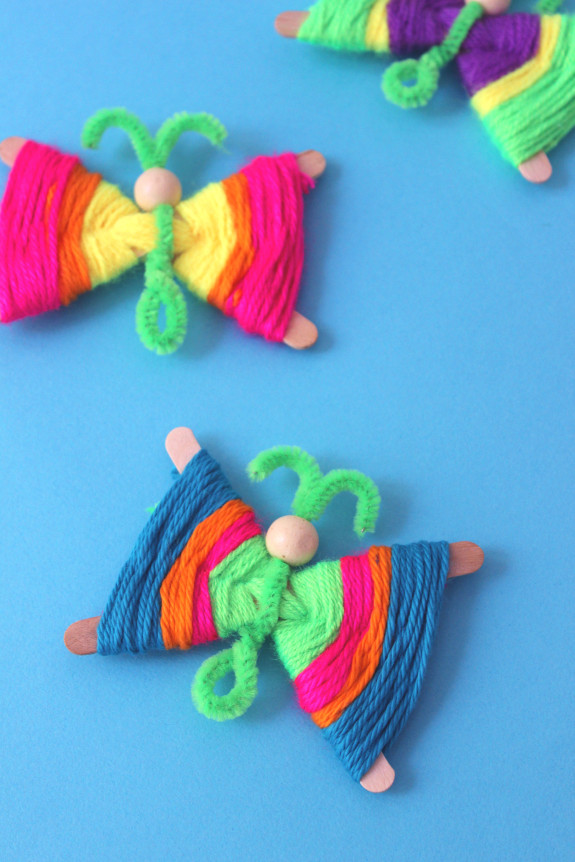
  1. WOVEN YARN WRAPPED BUTTERFLY


Yarn woven around a few craft sticks topped off with some beads results in a fabulous butterfly cute enough to give as a gift. 


  • Place one craft stick on top of another in an uneven “x” shape. Select one color of yarn and tape the end to the center of the craft sticks where they cross. 

  • Begin wrapping the yarn around the center of the craft sticks weaving around the sides so that they no longer can move. Start weaving outwards along the craft sticks in a figure-eight pattern. 

  • To add another color of yarn to your butterfly wings, cut the yarn of the first color then take the second color yarn and begin wrapping it where the cut piece is left off making sure to overlap the cut yarn to prevent it from unraveling. To tie off your weaving tie a double knot around the last woven loop, cut the yarn and tuck it into the weaving. 

  • To create the butterfly body fold the pipe cleaner in half and twice the fold around itself two times. Place the center of the woven butterfly into the center of the folded pipe cleaner above the twist. 

  • Thread 2-3 beads onto the bottom of the pipe cleaner and one large bead onto the top. Curl the two long ends of the pipe cleaner to make the antenna. 


My girls always drew faces onto the larger top bead of their butterflies and of course named them. These little insects flew with us all over town visiting the grocery store, friend’s houses, and even a quick trip to the ice cream parlor. 


  1. BUTTERFLY WINDSOCK


Time to raid your recycle bin for this craft. Empty toilet paper rolls star in this easy craft for kids. 


  • Paint the outside of the toilet paper roll and let it dry

  • To make the butterfly wings, fold a piece of construction paper in half and cut out a capital “B” shape along the fold. Next, using a different color cut out a skinny oval shape for the body. Glue the body onto the center of the wing. Cut out two circle shapes from two different colors of paper. Glue the circles in each section of the wings. 

  • Glue the butterfly body to the middle of the painted toilet paper roll. 

  • Attach lengths of the crepe paper streamer with glue to the inside bottom of the toilet paper roll. Cut the crepe paper streamers to all the same length.

  • At the top of the toilet paper roll punch two holes on opposite sides and thread the yarn through the holes. Tie the ends of the yarn together. 


Hang your finished butterfly windsock near an open window and watch the streamers flutter in the breeze. 


  1. CLAY BUTTERFLY ORNAMENTS


Introduce your children to homemade clay as an art medium for this craft project. The finished clay butterfly can be displayed as outdoor garden art if you seal it with a water-based sealer once the paint is dry. 


  • Prepare a batch of clay using this 3 ingredient clay recipe.

  • Roll out the clay until it is ¼” thick. Use your plastic knife to cut out a butterfly shape. Press the straw into the top of one wing to create a small hole.  Place the clay on a baking sheet and let it dry. 

  • Paint the dry clay butterfly in multiple colors and let the paint dry. Thread a piece of yarn through the hole for hanging.

  • (Optional) Spray the front and back of the painted butterfly with a water-based spray sealer and let it dry completely.


String your clay butterflies onto a length of twine to display around your garden this summer. Rain or shine these fun crafts will keep your child entertained and engaged as they make their very own butterfly.


  1. Handprint Butterfly


via: One Little Project


A beautiful craft project that turns into a family keepsake of your little one’s handprint! 


  • Fold a piece of colorful construction paper in half then trace your child’s hand onto the paper lining up the palm of their hand with the folded edge of the paper. Cut out the traced handprint, to reveal the wings. 

  • Decorate the wings with markers, sequins, and glitter. 

  • Glue a wood craft stick down the center of the wings then hot-glue small pom-pom balls down the center of the craft stick to form the butterfly body. 

  • Fold a 4-inch long pipe cleaner in half, tuck the folded end under the top of the craft stick and glue it in place then curl the ends of the pipe cleaner to form the butterfly’s antenna. 


  1. Nature Craft Butterfly


via: Crafts on Sea


Venture outside to gather up all the materials for this project. Bring nature into your home with this “green” butterfly craft. 


  • On a sheet of paper draw the outline of a butterfly shape leaving the center empty.

  • Gather large and small leaves, twigs, and wildflowers. Glue a small twig down the center of the butterfly shape to make the body. 

  • Next, fill in the wings with the large and small leaves gluing them down to the paper.

  • Decorate the wings with wildflowers, petals, and other natural treasures making sure to glue them to the leaves. 


  1. Egg Carton Butterfly


via: Crafty Morning


A fun upcycling project your kids will love to craft. 


  • Cut a cardboard egg carton into a 2 cup by 2 cup shape making sure to snip off the edges making them round around the cups. 

  • Paint the egg carton with bright colors making sure to cover all of the cardboard cups. 

  • Once the paint is dry take a long pipe cleaner, fold it in half, wrap it around the bottom center between the cups then twist it closed at the top center to make the butterfly’s antenna. 

  • Poke a hole through the top two egg cups and insert a string, knot it and hang up your beautiful butterfly.


Make several of these beauties and hang them along the top of a window as a spring or summer decoration.


  1. Sponge Butterfly Print


via: The Keeper Of The Cheerios


A sponge isn’t just for cleaning! This project is proof of that. Rinse out the sponge and try new colors to create a family of colorful butterflies. 


  • Tightly wrap a rubber band around the center of a regular-sized household cleaning sponge. 

  • Squeeze dabs of colorful paint along one side of the sponge then press both sides of the sponge together folding it at the center. 

  • Press both sides of the sponge onto a piece of paper, carefully lift up the sponge to reveal your symmetrically painted butterfly. 

  • With a marker draw a body down the center between the wings and add the antenna.


10. Bowtie Pasta Butterflies


These cute little butterflies would look great attached to a homemade card for someone special. 


  • Paint several pieces of bowtie pasta in bright colors with craft paint. Allow the paint to dry completely. 

  • Fold a piece of heavy cardstock paper in half to make a blank card. Then hot-glue three or four pasta pieces to the front of the card. 

  • With a marker draw the butterfly’s antenna as well as dotted looped lines behind each butterfly showing the path they are flying. 


Not only are these craft projects easy and fun but they also provide an opportunity for your children to improve their fine motor skills. Rain or shine, make great memories this summer with your children creating a beautiful butterfly. 


Did you know Zulily offers a huge selection of good quality arts and crafts supplies, kits, and books? Unlock your creativity at the Craft & DIY Shop!


Wednesday, February 9, 2022

How To Make A Unicorn Dreamcatcher

Everyone loves unicorns - those mythical horse-like creatures with a beautiful, long horn on their head! These cute and easy unicorn dreamcatchers are a fun and easy kid-friendly craft that is sure to put a smile on their face and a bit of magic into their room.


This post is brought to you in partnership with Zulily. While I may have been compensated, as always, all opinions are my own.


Unicorns bring kids’ (and adults’) imaginations to life transporting them to their own creative, fairy-tail fantasy land where unicorns live and thrive. 


One thing I love best about this cute kid’s craft project is how simple it is to make! If you love doing simple craft projects with your child this is the perfect craft for you. Not only is it simple but it doesn't cost much to make plus handmade crafts are always more special. 


Crafting Memories With Your Kids


Do you love making craft memories with your kids? Some of our favorite memories were “crafted” during family craft time! These magical unicorn dream catchers certainly will become a memorable craft for you and your kids. 


The unicorn dream catcher kid’s craft would make the perfect group project for a birthday party craft or sleepover activity to do with friends. Because it is inexpensive and doesn’t require mad crafting skills, kids, especially older elementary and middle school ages, can certainly make them without much supervision or help. 


For more amazing dreamcatcher-themed craft projects check out this post on The Find by Zulily.


How To Make A Unicorn Dreamcatcher

Gather up your crafting supplies and let’s get crafting these magical unicorn dream catchers!

WHAT YOU NEED:

  • Hot glue gun & glue sticks

  • Wood embroidery hoop 

  • Yarn 

  • Felt - pink & white

  • Glitter paper

  • Faux flowers

  • Ribbon

  • Scissors


Step-by-step Instructions

Step 1 - Securely tie yarn around the top of the embroidery hoop by the adjustment screw. Wrap the yarn tightly around the entire perimeter of the embroidery hoop until the whole hoop is completely covered with the yarn. The length of yarn you need to completely cover the hoop will vary depending on the size of the embroidery hoop you choose to use. 


Once the hoop is covered tie the yarn off at the same place you started. Dab a little bit of hot glue under the yarn to prevent it from unraveling. 


Step 2 -  Next, cut a 16” piece of yarn in a coordinating but different color from the yarn used to wrap the hoop. Securely tie the yarn to one side of the hoop then begin wrapping the yarn across the hoop in a criss-cross web-like pattern. Tie off the end of the yarn onto the hoop and dab a little hot glue under it to hold it firm. 


Step 3 - Take some faux flowers or other decorations and hot glue them to the top edge of the embroidery hoop so that the hoop adjuster is hidden behind the flowers. 

Step 4 - Cut two triangle-shaped ears with rounded edges from the white felt and two smaller shaped rounded edge triangle pieces from the pink to make the inner ear. Use the hot glue to secure the pink inner ear to the top of the white outer ear. Along the bottom flat side of the ear slightly pinch the ear to give it a 3-D appearance. Place a dab of glue inside the pinched felt to hold it together. Hot glue the ears to the back of the embroidery hoop on either side of the hoop adjuster making sure to leave room for the unicorn horn.

Step 5 - From the sparkly paper, cut out a horn-shaped triangle and hot glue it to the back of the embroidery hoop just behind the hoop adjuster. 

Step 6 - To add some extra fun and dimension to the dream catcher tie various colors of yarn and ribbon to the bottom. If you have thicker yarn you only need one strand but if you use thinner yarn I recommend using 4 to 5 strands of yarn bunched together. 

To make a six-inch-long yarn tassel cut the yarn 12” then fold it in half matching the cut end to the cut end. Insert the loop side of the yarn through the bottom of the embroidery hoop then thread the two cut ends through the yarn loop pulling them tight to secure the yarn to the hoop. Repeat this process with other colors of yarn and ribbon until you are happy with the results. 


Step 7 - The last step is to add a small loop of yarn to the back of the unicorn dream catcher so you can hang it up. Cut a 2” piece of yarn and tie the cut ends together in a tight knot. Then use hot glue to secure the knot to the back of the unicorn horn. 

Vibrant colors, textured yarn, and shiny ribbons combined with soft felt and faux flowers bring the unicorn dreamcatcher to life. Hang up the dream catcher in your child’s room or nursery for a pop of color. 


More Fun Kid's Crafts

Here are some more fun kid-friendly crafts you should check out!  

How To Make Slime - An Easy Homemade Slide Recipe

Awesome Magic Paper Towel Trick

Dala Horse Paper Craft For Kids

Do you love doing fun crafts with your kids? What are your favorite craft projects to do with your kids?

Check out other great kid-friendly crafts at The Find by Zulily!