Showing posts with label baby gift. Show all posts

Sunday, August 22, 2021

Herringbone Baby Quilt

A friend at church is expecting her first baby this fall and the baby shower is just around the corner. I have had my eye on a herringbone quilt pattern for some time now but I didn't really have any reason to make a quilt...until now! Every new baby needs a cozy baby blanket or quilt to welcome them into this world which gave me a great reason to start making a baby quilt.


When I had my girls a co-worker gifted each of them a hand-quilted baby quilt. It was such a thoughtful and practical gift that I knew then that I wanted to learn how to make baby quilts to give as gifts. Both quilts had been loved by my girls when they were little and are now safely stored away for them when they start a family. 

This post contains affiliate links which means if you click on a link and make a purchase I may receive a commission at no additional cost to you. For more information please see my disclaimer page. Thanks!

Now that I had a great reason to make a herringbone quilt it was time to pick out fabrics! I really wanted to stick to a gender-natural color palette with a simple modern style. I decided to use a black/gray camo print that I got from Fabric Wholsale Direct with white cotton for my half-square triangles and a light mint green cotton for the trim and back. 

Remember to PIN this post for future reference!!


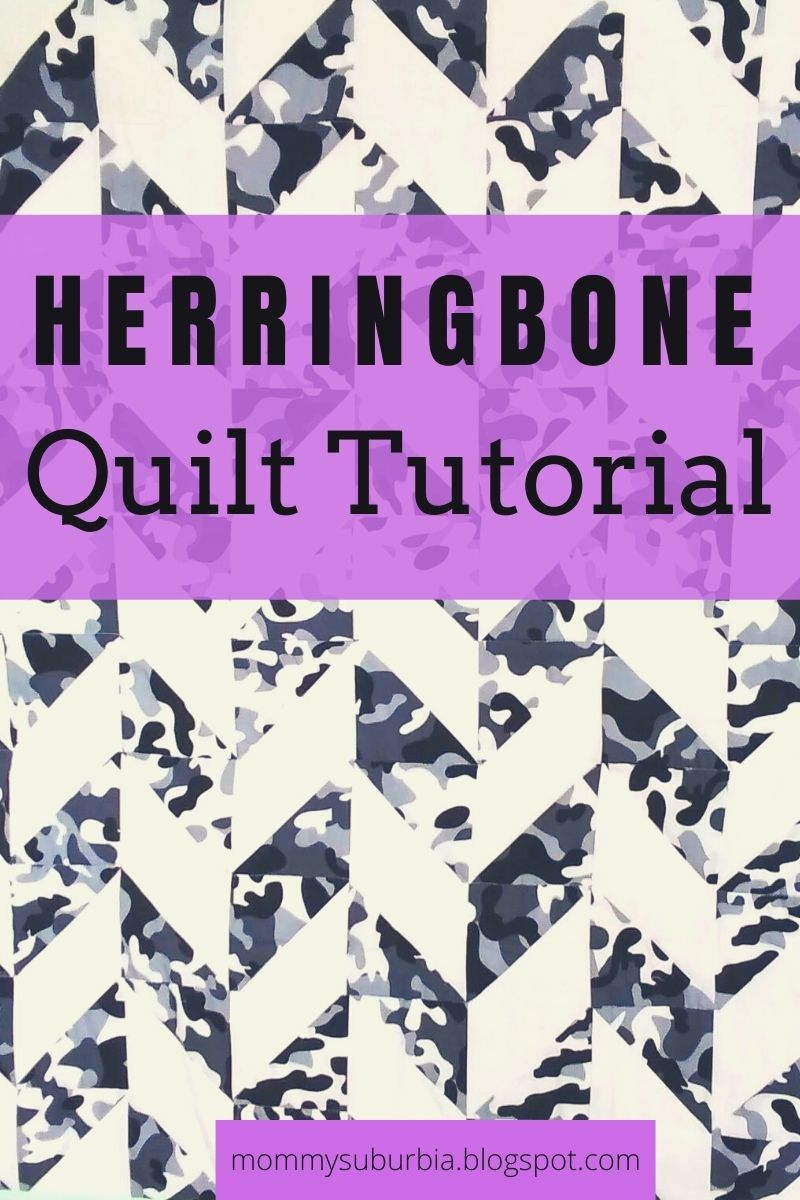
If you are new to quilting or maybe you are interested in making a herringbone quilt this is a great pattern to get started with! It might look a little bit difficult from the finished quilt pictures but don't let that fool you. This quilt is made using half-square triangles (HST) arranged in a repeating pattern. 

Half square triangles are really easy to make and you can find tons of great tutorials on how to make them. Here is the tutorial I found to be very helpful when I first got started quilting: Modernly Morgan - How To Make Half Square Triangles.

For this quilt I made my HST's using 5 1/2" squares of fabric which when sewn and cut end up being 5". Once I sewed the triangles together they end up being about 4 1/2". This quilt is totally customizable to your liking by adjusting the size of the HSTs.  Have fun playing around with different-sized HSTs and see what you like. 

The key to this quilt is to lay out the HSTs in the herringbone pattern on a flat surface (a.k.a the floor) then sew them together one row or column at a time. Also, your iron will become your BFF with this project since getting the points of the HSTs to "nest" properly can only happen if you iron your seams in opposite directions before sewing. 

Here is a graphic to help you get started laying out your HSTs into a herringbone pattern. Add as many rows and columns as to adjust the size of your quilt. 


Right before I made this quilt I also made a small little ironing pad that sits right next to me on my sewing machine table so I can just sew, iron, sew, iron, sew....you get the point right? It has saved me a ton of time and it was super simple to make. I will be posting a tutorial on how to make one for yourself in the near future!!  Make sure to follow me so you get all the latest updates!


Ok, back to the herringbone quilt. I wanted to share some pictures of the process I followed to make the quilt with you that seem to be easier to follow than written instructions. I'm a visual learner so pictures are where it is at for me! 


How To Make A Herringbone Baby Quilt 

  • The first step is to cut out a bunch of 5 1/2" squares from the two main cotton quilt fabrics you chose. I had no idea when I started how big I wanted my baby quilt to be so I made a lot of squares. I had a pile of 5 1/2" white squares and a pile of 5 1/2" black/gray camo squares. Follow the HST tutorial I linked above and make the two different colored fabric squares into HSTs. 


  • Lay the HSTs into the herringbone pattern. I used the floor and part of my cutting mat to lay out the pattern. Once I had them all laid out I started sewing them together in rows. After the rows are finished sew the individual rows together to make the quilt top.  Square up the quilt top to make it square and even all the way around. 
  • Select a fabric for the back of your quilt. For the back of my herringbone quilt, I chose to use a solid light mint green cotton fabric. I purchased a little extra yardage because I knew I was going to make the binding from the same fabric. Make a "quilt sandwich" by laying your backing fabric down (right side down) on a flat surface then your batting then finally the quilt top (right side up). I use safety pins to baste the layers of the quilt sandwich together so they don't move when I start quilting. For this quilt, I stitched in the ditch along the horizontal rows and then added stitching along the camo print triangles on each row creating a zig-zag pattern. Use your imagination and quilt any way you like!
  • Time to add the binding. Since my quilt was going to be gifted to a baby I wanted to make sure it was very durable and could hold up to lots of use and washings so I chose to machine bind the quilt instead of hand-sewing it. To make binding I cut strips of fabric into 2 1/2" by the length of the fabric then ironed the strips in half. If this is your first time binding a quilt I suggest you follow this great tutorial from The Seasoned Homemaker . Go slow and remember you can always pick out stitches if you need to! 

I just love how this herringbone quilt turned out! Of course, I'm not a professional so there are some (OK several) imperfections but honestly, that is what makes this handmade quilt so special - it is one of a kind with lots of personal touches! The finished quilt measured 44 inches by 36 inches - the perfect size for a little baby. 

To add a little extra finishing touch to this quilt I had this sweet little quilt label in my sewing notions stash and I added it to the corner of the quilt (see pic below!). To gift the quilt I folded it twice then rolled it into a log then tied a piece of extra binding around the quilt and tied it up in a bow.


Quilting can be a pretty addictive craft! Once you make one you are going to want to make some more beautiful quilts. I have some more easy quilt patterns and tutorials you will enjoy just as much as this herringbone quilt. Check out these quilts:

Improve Spinners & Hourglass Quilt Tutorial

How To Make A Rag Strip Quilt

Quilting For The Beginner - Rag Quilts

Tips & Tricks To Make A Half Square Triangle Quilt


Sewing and quilting is a fun hobby that anyone can learn! Besides a good quality beginner sewing machine (I love my Singer!) there are some sewing notions (a.k.a. sewing supplies) that you will want to invest in as you get started learning how to sew and quilt. To help you out I put together a post with the 10 Must Have Sewing Supplies For The Beginner  to help you out and get you started. 


Thursday, January 28, 2021

5 Creative Ways To Welcome A New Baby

Are you looking for a unique way to congratulate a friend or a family member who just had a new baby? Sharing in their excitement as they welcome a new baby into the world is so much fun! 


This post contains affiliate links which means if you click on a link and make a purchase I may receive a small commission at no additional cost to you. For more information please see my disclaimer page. Thanks!


My sister recently had a baby and since we don't live close to her we decided to throw her a new baby welcome home party in a box. Our whole family got in on the welcoming party by sending her loads of cool cards, homemade quilt, origami folded paper treasures, and many more fun gifts. We enjoyed welcoming our new baby cousin (nephew) so much and know that these unique gifts made it even more special for her and her husband. 

I wanted to share the fun ideas we came up with for my sister's baby shower in a box with you so you can bless a family or friend with their own baby shower in a box party! 

Don't forget to PIN this for later and follow me on Pinterest for more great ideas!


5 Fun & Creative Ways To Welcome A New Baby


1. Matching Family T-Shirts:     

This idea is fun because everyone gets a gift including the new baby! When a new baby arrives older children sometimes feel left out or neglected. By giving a gift to everyone in the family no one has to feel left out anymore! Etsy is full of great ideas for custom matching family t-shirts! This set is made by CosmicRebelShop.


2 - Diaper Cake:     

Everyone knows newborns go through A LOT of diapers so why not help the parents get a little bit ahead of the upcoming diaper rush with a super cute diaper cake. For a great tutorial on how to make one check out The Craft Patch!


3. Housecleaning Certificate & Custom Card:     

A great way to welcome a new baby is to offer to help clean their house! A sleep-deprived new mom will be grateful for your help even if it is just helping her catch up on laundry. If you don't live close by how about hiring a service to come clean. It is probably best to ask before giving this to make sure the family is comfortable with a house cleaner. 

You could tuck the homemade house cleaning certificate into a custom card too! Check out these great FREE printable new baby cards from the FTD.com blog. Choose from one of the 8 designs to print, cut, and send and will work in any situation (simple, funny, baby boy and baby girl cars). No need to rush to the store to pick out a card - use one of these great printables instead. 

Oh, and if you aren't sure what to say to the new parents to congratulate them FTD.com has you covered with a ton of great new baby wishes that you can include inside the card too. For the complete set of printable cards and baby, wishes visit the FTD.com blog!


4. Edible Fruit Arrangement:     

When our youngest was born my husband's boss sent us an edible arrangement as a new baby gift. We LOVED it! A mixture of fresh fruit and chocolate-dipped fruit arranged on skewers in a cute pot really made us feel loved. 


5. Restaurant Gift Cards Bundle:    

It is pretty common for friends and family to make a meal for a family who just had a baby. Instead of making a meal how about giving a variety of restaurant gift cards to the new parents which are kind of the same as bringing them a meal but with a twist. You could even include take-out menus for each of the restaurants you get gift cards to make it just that much easier for the family. 

No matter how you choose to celebrate the new baby and welcome them home I'm sure the new parents will appreciate your thoughts and gifts! 

For more great baby gift ideas, baby blanket sewing tutorials, and fun kids projects check out these other posts:

More Baby Themed Ideas To Check Out

HOW TO MAKE A RAG STRIP QUILT - FULL TUTORIAL

AWESOME GENDER NEUTRAL BABY GIFT IDEAS

HOW A VINYL TABLECLOTH AND A PAIR OF SCISSORS SAVED MY DAY


How did your friends and family welcome home your newborn baby? I'd love to hear from you. Share your stories in the comments!

Friday, April 27, 2018

Tips and Tricks to Create a Half Square Triangle Quilt

Looking for a new quilting block? Half square triangle blocks look great and are easy to make. Find out how with this simple tutorial.


mommysuburbia.blogspot.com

Quilting is a somewhat new hobby for me. I'm really enjoying the amazing patterns and creativity a quilt offers. I love being able to use up all the fabric scraps I have stored up in a big tote piecing them together in a new way to create something beautiful. 

My new challenge is learning how to make Half Square Triangle blocks.

In a previous post I showed you the first type of quilting I learned which was rag quilting. If you are interested in learning more about rag quilting you can read about it here: Quilting for the Beginner - Rag Quilts. 


A technique that has troubled me for some time and I have worked hard trying to improve my skills is the half square triangle. 

What is a half square triangle (HST) you ask? Well it is a square made from two different fabric triangles. Picture two triangles sewn together to form a square. Got it?

There is a special way to sew these two triangles together in an easy and efficient time saving way. The key is taking time to cut out your fabric first, marking some lines in pencil or washable pen and then chain sewing the fabrics together.

Half Square Triangle Tutorial 

Would you believe that in order to create the HST you first start by placing two different colored square fabrics together, one on top of the other right sides facing? 

I found a great tutorial I follow showing how to place the squares together, mark sewing lines and how to chain sew them. I used this method and tutorial from Coral & Co. and it worked out very well!


You know the saying "There's more than one way to skin a cat?", well this applies to HST's too! The great tutorial from Coral & Co. has at least 4 tutorials of different methods you can use to make your own HSTs! Try them all and find what works best for you!!

Completed HST Quilt

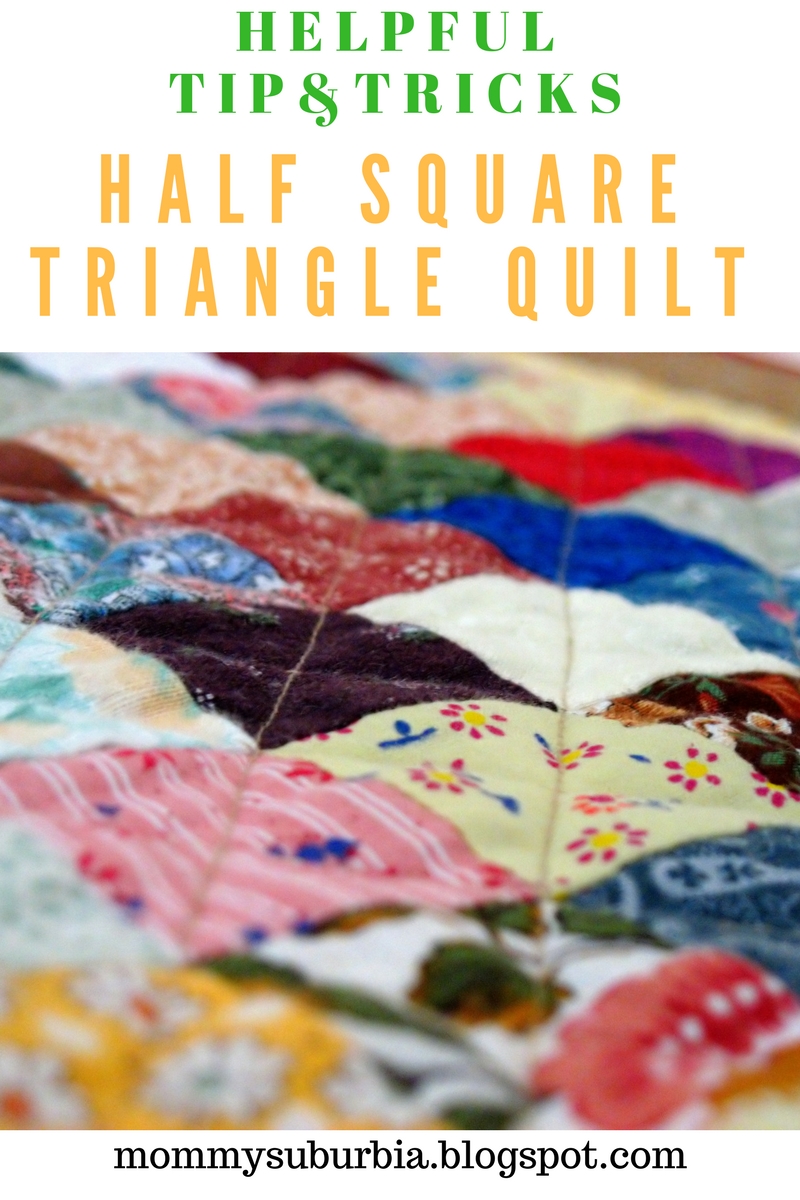
I am proud to say that I finished my first HST quilt block quilt and I love how it turned out!! I made it for my new niece as a gift. 

The finished dimensions of the quilt were 42"x 36" which for a baby quilt is a very generous size. Here are some pics of the finished quilt I wanted to share with you.


I realize that some of the points don't like up exactly, but that's OK! The beauty of a quilt in my opinion is the little quirks and "personality" the quilt has. I know with each quilt I piece together my skills will improve and maybe, just maybe someday the points will be perfect.


The picture above shows the finished, bound and completed quilt. I forgot to take a picture of the backing which is just a very pale light green solid fabric.

The fabrics I chose for this quilt are so special to me and each one has a specific memorable meaning. Over the years I have made various quilts for others and I'm always left with some scrap pieces from those projects. Since this quilt was going to my new niece I thought it would be cool to include fabrics used in other quilts that have been given to other family members. 

The light green/butterfly print is from my mom who used it to make Christmas stockings for one of her grandkids. The orange and brown fabric is from a quilt I made one of my sisters for her 40th birthday. The orange dot, green dot and white with green dot fabric was from my new niece's older sister's quilt I made a few years ago.

I like to think that this quilt is a way that this new little baby is being sewn into our family as a new "block" as the family grows. 

The story of quilts, even ones we create can carry such rich meaning. I will always look at this quilt and be reminded of the other special people in my family!

I hope you give HST's a try! Let me know how your quilt turns out and if you have any great ideas to share on how you make your HSTs.

Book Recommendation About History & Quilting

The history of quilting and the many patterns is fascinating. The stories hidden within traditional quilt blocks contain rich history, biblical meanings, reflections of nature and many other wonderful meanings.

I recently finished a touching fictional novel set in the 1850's about a fugitive slave named Joanna who creates a hidden map within quilt blocks in hopes to escape slavery. The quilt is her only map to freedom as she travels the Underground Railroad to reach a safe haven. The book, The Lost Quilter, can be found here on Amazon. I enjoyed reading this book and would recommend it to you to read as well.


Here is the description of the story:

Just as Joanna could not have foreseen that, generations later, her quilt would become the subject of so much speculation and wonder, Sylvia and her friends never could have imagined the events Joanna witnessed in her lifetime. Punished for her escape by being sold off to her master's brother in Edisto Island, South Carolina, Joanna grieves over the loss of her son and resolves to run again, to reunite with him someday in the free North. Farther south than she has ever been, she nevertheless finds allies, friends, and even love in the slave quarter of Oak Grove, a cotton plantation where her skill with needle and thread soon becomes highly prized. 

Through hardship and deprivation, Joanna dreams of freedom and returning to Elm Creek Farm. Determined to remember each landmark on the route north, Joanna pieces a quilt of scraps left over from the household sewing, concealing clues within the meticulous stitches. Later, in service as a seamstress to the new bride of a Confederate officer, Joanna moves on to Charleston, where secrets she keeps will affect the fate of a nation, and her abilities and courage enable her to aid the country and the people she loves most. 


The knowledge that scraps can be pieced and sewn into simple lines -- beautiful both in and of themselves and also for what they represent and what they can accomplish -- carries Joanna through dark days. Sustaining herself and her family through ingenuity and art during the Civil War and into Reconstruction, Joanna leaves behind a remarkable artistic legacy that, at last, allows Sylvia to discover the fate of the long-lost quilter.


This book is worth the read! I hope you find some time to read it yourself.