Monday, January 2, 2023

7 Fun & Crafty Ways to Reuse An Old Calendar

No need to throw out your old calendar at the end of the year! Instead, turn those pretty pictures into something new and unique.


Just because the year is over and your favorite calendar is no longer relevant doesn't mean you have to stop enjoying the beautiful pictures and artwork from the old calendar. Did you know you can reuse your old calendar and calendar images? All you need is a little imagination and some simple craft supplies. Consider new uses for those old pages and give yourself more time to enjoy all the pictures you love.    

This post contains affiliate links which means if you click on a link and make a purchase I may receive a small commission at no additional cost to you. Thanks!

The Best Calendar For The New Year

Before you start crafting with your old calendars make sure to get a replacement for the new year? 

I'm still kind of old school when it comes to calendars. I prefer a paper calendar over the online version. For our family calendar, I really like the large full-size ones that I can hang up so everyone can see what is scheduled. The other requirement for a calendar is large open spaces for each day so I can write down all of our activities. With four kids our schedule is pretty full so I need a lot of room to fill out these details on the calendar. 

Shop Coloring Books at Calendars.com Now! 

I got my husband a desk calendar for Christmas with Green Bay Packers and NFL trivia questions that he really loves! 

If you still need a calendar make sure to check out Calendar.com. Their site has a ton of great options and styles for everyone!


7 Crafty & Fun Ways To Reuse An Old Calendar


I've pulled together 7 easy and fun projects you can do with your old expired calendars. I hope you are inspired to upcycle your calendar and make something new and exciting with it!

1. DIY Postcard

Sending postcards to friends and family is a great way to stay in touch when you don't have a lot to say or want to send a quick note. Postage for postcards is also cheaper than sending a full-size card or letter too. 

You can make your own postcards from old calendar pages which is a great way to recycle them! Gather up the following supplies to make your own postcards:

The acceptable dimensions for a postcard are 4.25" x 6" (maximum) to 3.5" x 5" (minimum). Measure out the dimensions for the postcard you want to make using these dimensions on the cardboard and old calendar page then cut them out. Spread a thin layer of glue on the cut-out cardboard then place the calendar page on top of that with the picture side facing up. Smooth down the calendar page making sure there are no air bubbles.  Your postcard is now ready to use! 


2. Custom Calendar Picture Tile Coaster

Making your own custom coasters is easy and fun. This is a great project to use your old calendar pictures because you can continue to enjoy them for long time. They really are very simple to make too! Follow the full tutorial at Neat Houses Sweet Home!

Supplies: tile coaster, mod podge, foam brush, spray sealer, felt or cork, scissors


3. Decorative Tin Can Planter

Another way to preserve those lovely calendar pages is to cut them out and Mod-Podge them to the outside of a tin can. After disposing of the can label and cleaning off the glue reside your can is all ready to be turned into a beautiful planter. To make your own vase follow the full tutorial at Positively Splendid. 

Supplies: empty tin can, old calendrer, Mod Podge or white craft glue, scissors, potting soil, a small plant or succulent


4. DIY Jig Saw Puzzle

When my kids were little I was always looking for ways to keep them busy. There were really into puzzles and I used to make them their very own puzzles cut from empty cereal boxes. Using old calendar pictures to make your own jigsaw puzzles is another great way to reuse outdated calendars! The pictures are a lot nicer than the pictures on a cereal box too! If your calendar page is thin you could always glue the picture to a thin piece of cardboard before cutting out the jigsaw pieces. Follow my full tutorial on how to Make Your Own Jig Saw Puzzle.

Supplies: old calendar, marker, scissors (optional: empty cereal box, craft glue)


5. DIY Wood Frame Picture Holder

Years ago I had a calendar with vintage artwork that I LOVED! After the year was over I couldn't bring myself to throw it away so I hung onto it knowing that I would eventually find a great use for the beautiful pictures. I ended up making a simple wood frame picture holder for the calendar prints and I just love how it turned out! Don't let the woodworking "stuff" scare you away - it is super simple and beginner friendly, I promise. Follow my full tutorial for this DIY Wood Picture Holder to make your own. 

Supplies: calendar page, wood (1" x 8' x 1/4"), hand saw, sandpaper, wood glue, leather cord, clamps, wood stain (optional)


6. DIY Calendar Collage Art

Depending on the type of calendar you have this project might be the perfect upcycle idea for you to use. I love making collages and typically use newspapers or old magazines but using an old calendar is another great way to upcycle an expired calendar into something new and useful. Collage art is also fun for kids to make too! Here is a tutorial I used to make a multi-media DIY Collage Art that will be helpful for you.  

Supplies: calendar, scissors, glue, cardstock


7. Mini Calendar Notebook

It is always nice to have a small notebook handy in my purse or in the car or even in a diaper bag. Making your own mini-notebook is simple and fun and a great way to reuse old calendar pictures that you love. I found the simplest tutorial to make your own mini-notebook at A Beautiful Mess that I encourage you to follow! 

Supplies: calendar picture, embroidery floss, embroidery needle, washi tape (optional), lined or blank paper (8.5" x 11"), scissors


Why not ring in the new year with a fun recycling project? Grab your old calendar and get crafting today! 

Don't forget to PIN this post and follow me here on Pinterest for more great inspiring ideas!


Fun & Easy Craft Projects

Easy No-Sew Sock Bunny Tutorial

Rock Picture Holder

How to Make A Paper Mache Pinata


Friday, November 18, 2022

How to Make A No-Sew Fabric Rag Wreath the Easy Way

A no-sew rag wreath is a perfect addition to compliment your home decor or add to your holiday decorating. With the holiday season only a few weeks away I wanted to get started crafting something new to add to my holiday decor and this fabric rag wreath did just the trick. 


Not only is this an affordable craft project but it requires no special skills or tools so just about anyone can make a no-sew fabric strip wreath! 

This post contains affiliate links which means if you click on a link and make a purchase I may receive a small commission at no additional cost to you. For more information see my Disclaimer page. Thanks!

I love that you can customize this wreath using any color fabric you like. My favorite place to find fabric online is The Fat Quarter Shop! They have a great selection of fabrics including tons of pre-cut options.  

If you already have a growing stash of fabrics on hand or even something like an old curtain or bed sheet you no longer use consider upcycling them to use with this project. This will save you money making this project even more budget-friendly. 

Shop Fabric at Fat Quarter Shop 


Besides fabric, the only other supply you will need is a wire wreath form. I found a small 8" one at Dollar Tree but you can get a larger-sized wire wreath form from Walmart

The fabric I used for this project I had been saving (hoarding) for quite a while in my big tote bin of scrap fabrics. I'm super excited to use up some of my scrap fabric with this new project! 

Let's get started making a no-sew fabric rag wreath before Christmas comes, shall we? 


Gather up the following supplies to get started:

Supplies

cotton fabric (4-5 fat quarters should be enough for an 8" wreath frame)

8" wire wreath form  

scissors


No-Sew Fabric Strip Rag Wreath Tutorial

Step 1 

Cut or tear the fabric into 1/2" x 5" strips. You are going to need a whole lot! (the exact number will depend on how tightly you scrunch the strips together when you tie them to the metal frame)


Step 2 

The metal wreath frame I used had three separate metal rings around the perimeter of the wreath. I started by tying fabric strips all around the outermost metal ring first. To tie the strips fold them in half lengthwise matching up the cut ends and slip the fabric loop under the metal frame then thread the cut ends through the loop pulling tightly to tie the fabric onto the metal frame. Continue tying the fabric strips on until the entire outer ring is full. 


Trim the ends of the fabric strips all around the wreath so that they are all the same length.


Here is what the first layer looks like up close. Make sure all the knots face the same directions and are snug tightly together around the metal frame. 


Step 3 

Repeat the last step for the remaining metal wreath form rings. I trimmed each layer a little shorter than the one under it so that you can see the fabrics of each layer. 


Step 4 

Tie a small length of yarn or twine to the back of the wreath for hanging.


Customized Wreath Ideas

Christmas - use a variety of solid and print fabrics in different shades of green. Add a few "pops" of red to represent berries

Easter - pastel fabrics tied onto the frame in block sections or just mix up the colors all over the wreath.

Minimalist - use all one-color fabric strips like white or gray, for the wreath to create a simple yet stylish wreath

Rainbow  - use bold bright colors of the rainbow in block sections to create a rainbow wreath.

Ombre - gather several shades of the same fabric then start tying strips from the lightest color first working your way through each shade until you end with the darkest shade.


Let your imagination go wild with all of the fun ways to customize a fabric rag strip wreath! Change out your wreath as seasons and holidays come and go. 


These wreaths make great gifts for Christmas, housewarming, or even baby shower gifts! Share your no-sew fabric strip rag quilt with me in the comments!


Looking for more easy crafts? I've got you covered. Make sure to check out these fun, affordable, and easy DIY crafts you can make today. Follow me here at MommySuburbia, Facebook or Pinterest to get the latest inspirations! 


Easy No-Sew Sock Bunny Tutorial

How To Make A Wire and Rock Picture Holder

How To Make A Paper Mache Pinata

Fun & Easy Yarn Wrapped Flower Tutorial


Award Winning Kids Craft Kits Delivered!

Sunday, November 13, 2022

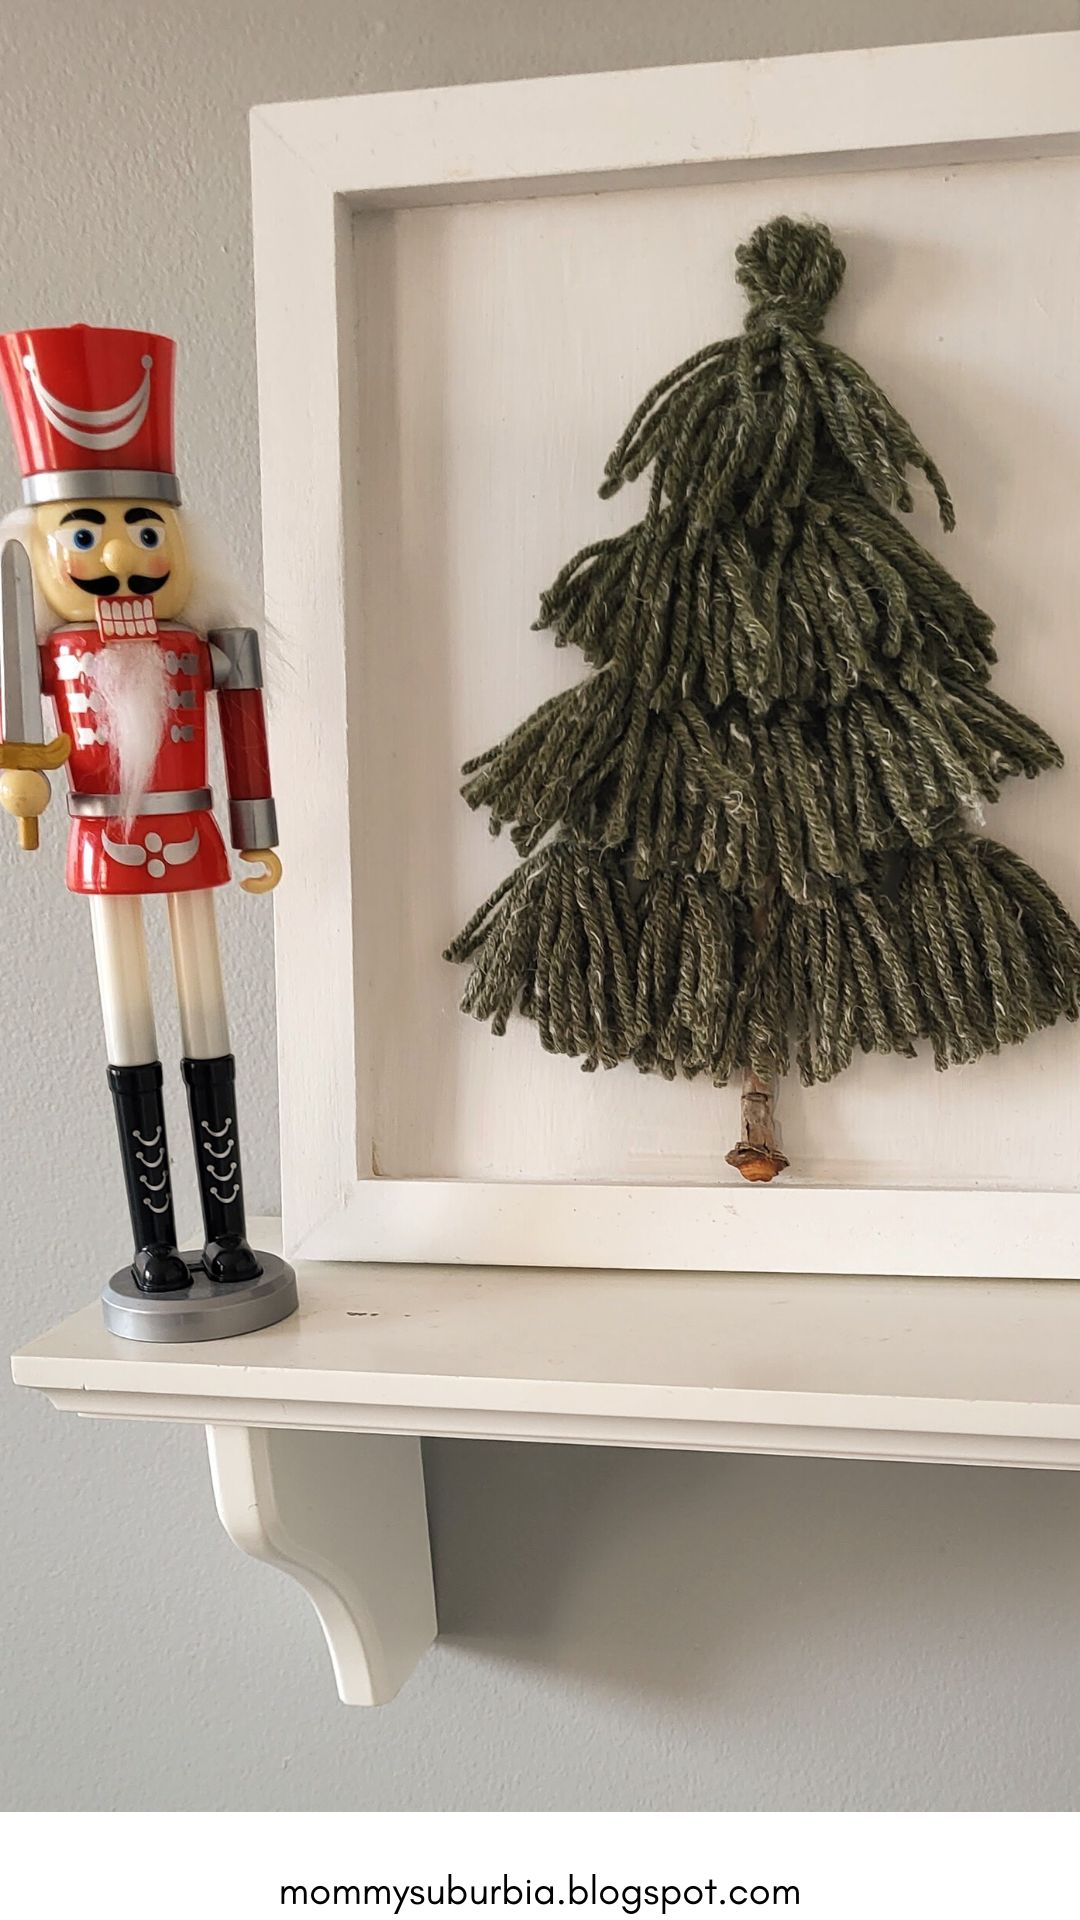
How To Make A Yarn Tassel Christmas Tree Sign

Decorating for Christmas makes for such a joyful time. To add a little farmhouse style to your Christmas decor add this simple DIY yarn tassel Christmas tree sign. 


This yarn tassel tree is so simple to make anyone can do this! I love this cozy handmade holiday sign which warms up any room you choose to display it. You can even keep it displayed as part of your home decor all year round too! 

This post contains affiliate links which means if you click on a link and make a purchase I may receive a small commission at no additional cost to you. For more information please see my Disclaimer page. Thanks!

Wouldn't this tassel yarn tree sign be a beautiful gift to give this holiday season too? Who wouldn't want a special handmade gift this Christmas? 


How To Make A Yarn Tassel Christmas Tree Sign

Gather up the following supplies to get started making your own DIY tassel Christmas tree sign. To help you find these supplies I've added a link to help you find them quickly.


Supplies Needed:

blank wood sign (from Walmart) or a thin piece of plywood cut to size (8" x 10")

acrylic craft paint & brushes

thick yarn ( I used this yarn)

scissors

small thin tree branch 

hot glue gun & glue sticks

tassel maker (this one works well) or a 3" piece of cardboard or just use your hand 


Instructions

STEP 1

Prepare your wood sign or piece of plywood by painting it. Dry brushing the paint onto the sign will give the wood a more rustic look. Let the paint dry completely. 


STEP 2 - 

While the paint for the sign is drying you can start making the tassels. There are some great tassel-making tools you can buy online that easily make a variety of different size tassels. For this project, the number of tassels you need to make will vary depending on the size of your wood sign. You will want to make your tassels about 2" to 3" in length. 

For this tutorial, I'm going to explain how to make a tassel using your hand. To begin, cut a length of yarn 5" long and set it aside. Next, hold one hand flat with fingers together then wrap the yarn around all of your fingers approximately 15-20 times creating a thick loop of yarn. 


Remove the loops of yarn from your hand making sure to keep them together. Tie the short piece of yarn around the top third of the tassel to create the head. Cut open the loops on the opposite end from where you tied the yarn.


After the tassel is securely tied trim the long ends of the yarn so they are even in length. 


Continue making tassels until you have 10 - 15 tassels.


STEP 3 - 

Lay out the tassels and the small tree branch (stick) onto your wood sign in the shape of a tree. Adjust the length of the tree branch by cutting it shorter if needed. 


Start at the bottom with the stick (tree trunk) and work your way to the top of the tree laying the tassels down in layers. For a taller tree start with 5 tassels on the bottom and reduce the number of tassels by one for each row as you go up. The tassel heads should be covered by the next top layer of tassels as you work your way up the tree. 


STEP 4 - 

Once you have the tassels arranged how you like, it is time to hot glue them onto the wood sign. Again start with the bottom row first.


Next, glue the second row of tassels just above the first row making sure to slightly overlap the new row.


Add the final tassel to the top of the tree gluing it securely to the wood sign. 


Yeah, you are all done! 


I know you are going to want to make more than one of these fun tassel tree signs! Consider making the tassels in a variety of different lengths for each sign you make as well as using a different color yarn for each tree too. You could even add small beads to the yarn tassels as ornaments or a wood star to the top too! The ideas are endless. I'd love to know how your tassel Christmas tree turned out!


More DIY Christmas Crafts To Try

How To Make A Candy Cane Christmas Countdown Calendar

Easy DIY Gnome Christmas Ornament

How To Make A Mini Christmas Wreath Ornament

Easy DIY Christmas Tree Craft


I pray your holiday season is full of blessings and lots of crafting! Share your Christmas crafts and ideas with me in the comments and make sure to follow me on Pinterest, Facebook, and here at MommySuburbia!