Wednesday, December 19, 2018

Easy DIY 3-D Christmas Tree Craft To Make This Holiday Season

mommysuburbia.blogspot.com

Christmas crafting is in full swing around here! Glitter, glue, cardboard, beads and many other kinds of craft supplies are strewn across our table this time of year. Christmas is just so inspiring and it is so much fun making holiday themed crafts with your kids at Christmas. Today I am going to share with you a craft my kids and I are currently working on together. We are making 3D Christmas trees! 

This craft requires minimal supplies and turns out looking amazing. I got the inspiration for this craft while my kids were helping their grandparents (my parents) decorate their Christmas tree. My mom pulled out a set of wooden 3D Christmas trees my sister and I had made way back in our childhood as a gift to her one year. My dad, a retired shop teacher, had cut out these Christmas tree shapes from wood had my sister and I paint and decorate them and we wrapped the up and gave them to my mom for Christmas. She still has them! I was just so inspired by those trees and the memories of making them I wanted to do something similar with my kids this year. 

In an effort to simplify the craft from the original wood tree I wanted to make our 3D Christmas trees out of corrugated cardboard. This type of cardboard is sturdy and seems to be in abundance this time of year due to all the boxes being delivered to my house (thanks Amazon) - and it is FREE!! 


mommysuburbia.blogspot.com

After creating a template to use for our 3D tree we got to cutting, painting, gluing and full on decorating to create the cutest 3D Christmas tree ever. If you are looking for a great craft project to do with your kids this one is perfect! These would also make great gifts to give to grandparents or aunts & uncles. 

To make this project super easy for you I created a tree template for you to use. I really like the rounded edges of the tree boughs but if you prefer a more triangular shape you can adjust the pattern to fit your taste. Also, if you want to make your tree taller or bigger simply enlarge the pattern or trace a wider line around the shape I created to make the three size you want. 

Shall we get started? 

OK, go print off the pattern below on 8 1/2" x 11" printer paper, grab a cardboard box, scissors or whatever you like to use to cut cardboard and let's get started. 


On a side note - do you do a lot of crafting with cardboard? We do! After many, many projects that required scissors or an exacto knife to cut cardboard my hand was getting tired! I was really getting tired of this but didn't want to stop crafting. The solution I found was a cardboard cutter! This handy tool is specially designed to cut cardboard effortlessly! Yes - effortlessly! And no need to worry about a super sharp exacto blade or box cutter blade injuring you or your child, this special tool is much safer and doesn't have a pointy sharp tip. This tool is awesome and I highly recommend you get one to use for this project and future cardboard cutting projects. 


This post contains affiliate links which means if you click on a link and make a purchase I may receive a small commission at no additional cost to you. For more information please read my Disclaimer page. Thanks!
mommysuburbia.blogspot.com


3D Christmas Tree Tutorial 


Supplies: (a list of what I used and links where I got them at at the end of this post)

Tree template - printed out and cut out of regular printer paper 

Cardboard - 2 pieces at least 9" x 8" (if using the template provided) 
Canary cardboard cutting tool (if you don't have this use Scissors or an Xacto knife)
Ruler or straight edge tool 
Craft paint 
Paint brushes 
Glue (hot glue or Elmer's will work) 
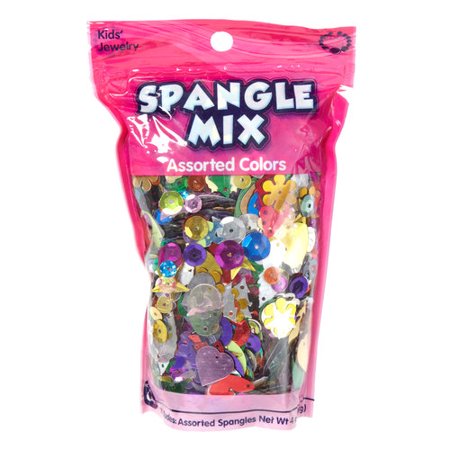
Decorations to decorate your painted tree with (sequins, buttons, pom-poms, string - the sky is the limit!)


Instructions:

After printing out the Christmas tree template onto a printer paper, trace the pattern onto two pieces of corrugated cardboard and cut out the two tree shapes from the cardboard. This is a step that an adult should do since it requires sharp tools - please use caution and be careful! 


In order to make our tree 3D we are going to have to cut slits in the center of each cardboard tree piece so we can slide each piece together to make a tree that stands up on its own. So now that you have the cardboard trees cut out it is time to measure for the slits that need to be cut out. 


See the slits I cut out of each piece above.

The slits only need to be as wide as the thickness of your cardboard. For each cardboard tree make a light pencil mark at the center of the tip of the tree and at the center point at the bottom of the tree. Take one of the tree cutouts and from the bottom center mark you just made in pencil measure up the middle of the tree 5 inches and make a pencil mark connecting these two points. Now with the second cardboard tree start from the top of the tree and measure down the middle of the tree 4 inches again connecting the two points with a pencil mark. Using a straight edge or ruler measure and mark in pencil a line just 1/16" over on each side of the center line you have marked on both cardboard tree pieces. Because the cardboard is probably 1/8" or less thick you are going to want to be careful not to cut the slits too wide otherwise the trees will be wobbly. 


With your cutting tool of choice cut the cardboard where you just marked creating one slit in each tree like I did in the picture below. Fit the two cardboard tree shapes together and make adjustments if necessary. If there is a small gap when the trees are connected don't worry! When the trees are sitting up right on a flat surface the bottom of each tree will make it flush. 


At this point you can choose to glue the assembled tree together but I recommend if you are going to glue it to set the tree up on a flat surface and glue it then so that the tree isn't wobbly and the bottom of the tree is flush against a flat surface. 


The tree is now ready to be painted and decorated! You could paint it whatever color you choose or maybe even use chalkboard paint so that you can write a message on your tree. The options are endless and so much fun for anyone making one of these 3D Christmas trees. 


I'd love to see your finished 3D Christmas trees! Please share in the comments section. Also, if you have any questions please ask!


Merry Christmas!


Looking for more fun holiday craft projects? Check out this tutorial for a mini sock snowman craft project! It is super fun and makes such a cute snowman!


for the full tutorial click HERE

Where I Got My Supplies:
If you don't happen to have the same supplies I used handy here is where you can find them at a reasonable price:

find HERE on Amazon

Acrylic Paint: 
find HERE at Walmart

Friday, December 7, 2018

DIY Mini Sock Snowman Craft Tutorial

Super Easy Winter Craft Project - Mini Sock Snoman!! 

mommysuburbia.blogspot.com

I just love holiday themed crafts for kids, especially kids' Christmas crafts. For the past several years my kids and I have hosted a pre- Christmas crafting party for our homeschool bible study class at our house. I love finding simple and fun crafts that work for a variety of ages and abilities. Oh, and the crafts have to be boy and girl friendly since this is a co-ed group.

I thought I would share with you one of the projects we did including a tutorial in case you want to make it too! 

Now onto the fun kids Christmas craft project and tutorial. We are going to make a sock snowman! Excited? Good, let's get started.


mommysuburbia.blogspot.com
This post contains affiliate links which means if you make a purchase I may receive a small commission at no additional cost to you. For more information please see my Disclaimer page.

Mini Sock Snowman Tutorial


Supplies Needed :(links included to help you find the supplies)

White tube sock
Hot glue gun & hot glue sticksFiberfill 
(I got mine at Joann Fabric Store)
Rubber bands
Fabric paint or markers (Sharpies work great)
Fat quarter of fleece fabric (used for scarf and hat)
Dry beans (any kind will do)
Thick thread or twine
Scissors
Buttons or flat rhinestones 

Instructions:
To begin you will need the dry beans, one white tube sock and the Fiberfill stuffing. Measure 1/4 cup of the dry beans and dump it into the bottom of the sock. 

Next grab a few hand fulls of stuffing and stuff it into the bottom of the sock on top of the beans. This section of the sock will become the bottom of the snowman. Shape the sock and stuffing to look round and full.

Once you have a shape that looks good to you take one rubber band and loop it a few times over the sock just above the ball of stuffing. This will ensure the bottom ball of stuffing stays put. Later we will be tying a scarf around this rubber band to hide it so don't worry if you can see it now.

Now we will start making the second body section for our snowman. Grab another handful of stuffing and stuff it into the sock above the rubber-banded section. This part will be your snowman's head. Shape the stuffed sock into a smaller size ball adding more stuffing if you need more. You will want this section smaller than the first body section. Once you are satisfied with the shape and size of the head secure a rubber band just above the stuffing. Trim off the extra sock material at the top of the sock.

It is now time to work on your snowman's hat and scarf. Take the fleece fabric and cut a long skinny rectangle from one edge of the fabric. It should be long enough to wrap around the snowman's neck and tie in the front plus a little extra length to allow the scarf to hang down a bit. Since the size of your snowman will vary, an exact measurement isn't possible. You will just need to eyeball it.  Feel free to trim several small slits at both ends of the scarf to give the scarf a frayed edge just like a real scarf.

For the snowman's hat take the remaining piece of fabric and wrap it around the snowman's head positioning it where it should sit on his head just above the forehead. With a pencil draw a light mark on the fabric where the edges meet. Take the fabric off of the snowman and with your hot glue gun place a small bead of hot glue on the fabric where you placed the pencil mark and match the fabric edges together creating a fabric tube. Turn up the bottom edge of the fabric to create a cuff for the edge of the hat and secure it with more hot glue. Try the hat tube on your snowman's head making adjustments if necessary. 

Once you are satisfied with how the hat looks it is time to hot glue it to the snowman's head. I find it is easier to leave the hat on the snowman's head and gently lift the hat edges up squirt a little bead of hot glue under the hat at a time and press it down with your finger. Continue to do this around the entire perimeter until the hat is securely glued to the snowman's head.

You should now have a fully stuffed two section snowman with a scarf tied around it's neck and a tall tube shaped hat glued to it's head. Depending on how tall or short you want the snowman's hat use the thick thread to tie off the hat tube at a length that looks good on your showman. Trim off the extra fabric 1/2 inch above the thread you tied it with. Cut small slits around the extra 1/2 inch of fabric to create a pom-pom end to your hat. 

It is now time to draw on a face to your snowman. Using the sharpie markers or fabric markers draw on eyes, a nose and mouth on your snowman's face. If you prefer using beads or other crafting supplies to create the facial features - go for it! Next glue on buttons or flat sided rhinestones to make buttons down your snowman's belly. 

Lastly, dab a spot of hot glue on each side of your snowman's body and stick a small stick into each dab of glue to make arms for your snowman. 

Feel free to add any additional embellishments to your snowman to make him/her unique! These little guys/gals make great gifts for Christmas too! 

So how did your snowman turn out? Please share pictures of your snowmen - I'd love to see them! This makes for a great project for kids of all ages and requires minimal supplies. It is also a fun group project if you need a group project to do for the holidays. Have fun with it and Merry Christmas!

Here is a list of some of the supplies I used in this project and where you can find them too!
find at Joann Fabric Store

find at JoAnn Fabric Store

find at Walmart


find at Walmart

Looking for a unique rustic holiday snowman to give as a gift or to use as a holiday decoration? I have just what you are looking for in my Etsy shop Sapucha! Check out these cuties! 


Sunday, November 18, 2018

Black Friday WEEKEND Steals And Deals You Don't Want To Miss


Can you feel the excitement building? It is kind of like a Christmas volcano waiting to erupt. As the days draw closer the excitement is building all for that one special day - BLACK FRIDAY!
There are a ton of cool electronics, chic clothes, fun toys and kitchen gadgets to add to your Christmas list this year. The best part is you still have time to get your list to Grandma or Aunt Susie before Christmas arrives.

This post contains affiliate links which means if you make a purchase I may receive a small commission at no additional cost to you. For more information please read my Disclaimer page.

Black Friday Steals & Deals You Won't Want To Miss - Gift Guide

1. For the gadget guru this portable solar power bank charger is the perfect stocking stuffer!
find on Amazon
2. Do you have a crafter in your life? You know that person who makes amazing stuff with their hands - things you could never make yourself! Well here is the perfect Christmas gift for that crafty person in your life they will LOVE. The Cricut Explore Air 2 cutter takes crafting to a whole new level. 

find on Amazon

3. Do you know someone who loves to play video games (who doesn't!)? The Nintendo Switch is the perfect gaming device and is a hot gift item this year. Play it at home or take it on a trip. All of your favorite games can come along with you! 

find at Amazon
4. The kitchen is the heart of the home for many families so how about a gift that is perfect for the cook or baker in the family. The super popular Instant Pot pressure cooker is all the rage and will be for awhile. Cook healthy food in no time at all! Also, don't forget to read my honest review of the Instant Pot here.

find at Walmart


5. If video games aren't your thing how about a board game? The Monopoly Fortnite game incorporates the popular video game and makes it fun as a Monopoly game! 

find at Walmart

6. Speaking of Fortnite, you know the most popular video game right now, how about gifting this to your favorite teen this year? Available for most gaming systems this is sure to be one of the most popular gifts this year.

find at Walmart
7. Legos is a gift that never disappoints! If you want to be the "cool" aunt/uncle this year give your niece or nephew a Lego kit. Lego has kits for all ages and abilities so the choices are endless.

find at Walmart
8. Matching Christmas pajamas will keep you and your family cozy and warm this holiday season, plus it makes for some awesome family pictures! 

find Here

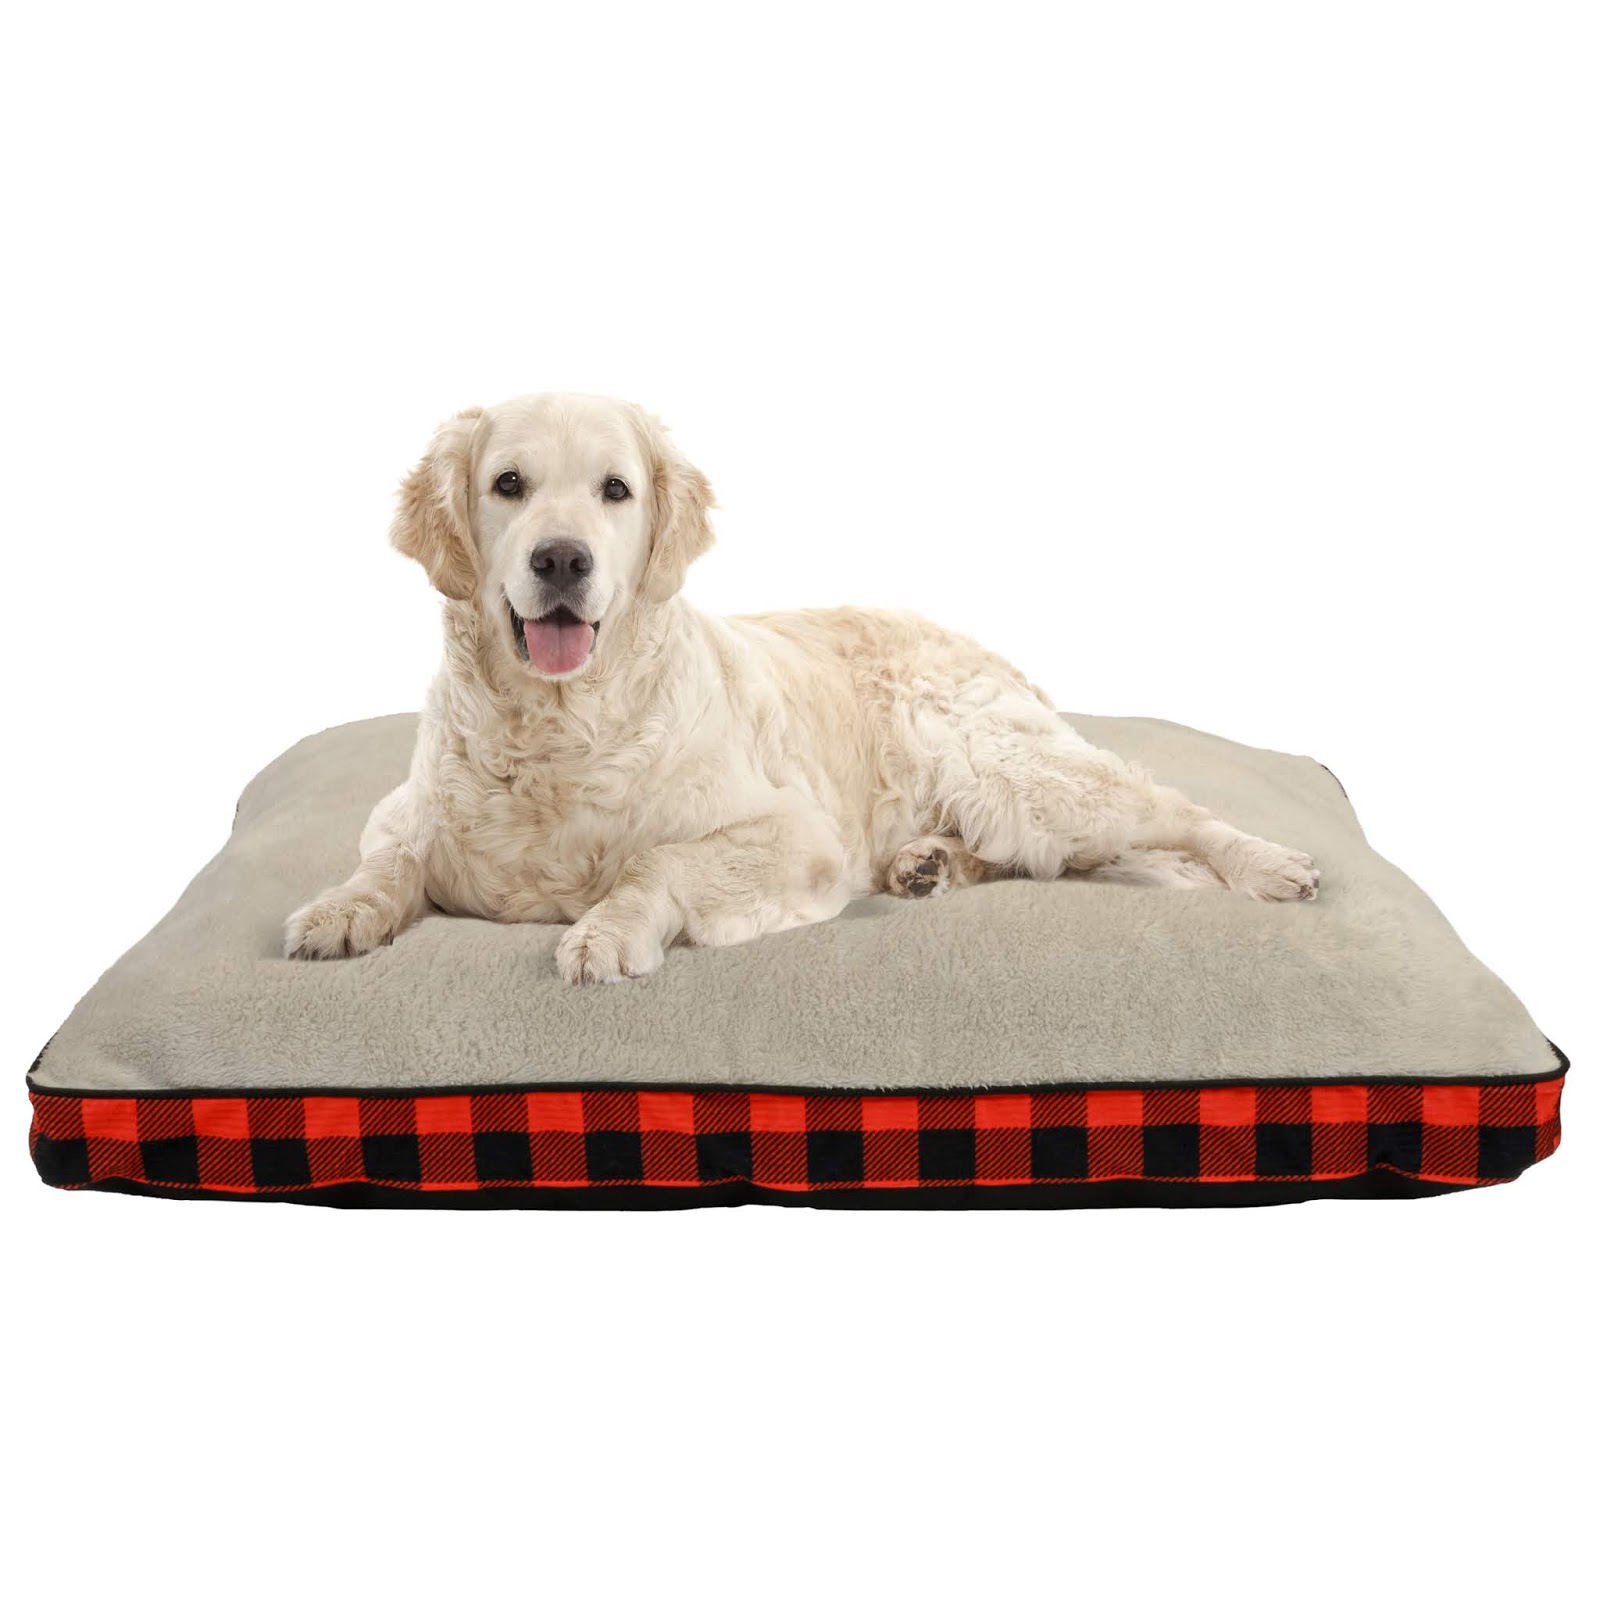
9. Don't forget your pet this holiday season. Give Rover a new soft gusseted pet bed this Christmas to show him your love. Pet gifts are popular and fun to shop for!

find it HERE
10. This last black Friday deal would make the perfect gift for anyone of any age! A tablet is the perfect gift for anyone who likes to read ebooks, connect on social media, play games or pinterest like a pro. Look for smokin' deals this year on Black Friday for deep discounted prices on these fun gadgets.

find on Amazon

Don't miss out on these great black Friday steals and deals this year! Amazon and Walmart have week long deals so keep your eye out for flash sales! Happy Shopping!!

Before you go here is another amazing Black Friday deal you don't want to miss - checkered Vans, the most popular tennis shoe/sneaker for teens. Make their Christmas extra special with a cool new pair of shoes!!


Friday, November 16, 2018

Honest Review Of The Instant Pot

mommysuburbia.blogspot.com
photo credit: Walmart


Have you heard of the Instant Pot? It has been all the rage this last year and continues to be one of the most popular kitchen gadgets still. But what exactly is the Instant Pot and why is everyone buying one? In a nutshell the Instant Pot is a modern day version of a pressure cooker that you can use to quickly cook almost any kind of food. It is about the same size as a crockpot with a bunch of additional settings and buttons.

This post contains affiliate links which means if you click on a link and make a purchase I may receive a small commission at no additional cost to you. Thanks for your support. For more information please read my Disclaimer Page.

Growing up my mom used a pressure cooker to can tomatoes. Her pressure cooker was enormous and kind of scary!  Every year she would dig it out of storage, lug it into the kitchen and use it to can the veggies we grew in our garden. The Instant Pot is the upgraded version of your Grandma or Mother's old pressure cooker. This modern unit is sleek, user friendly and is used to make all kinds of food.

I'm not one to rush out and buy the latest and greatest kitchen gadget until I've read or heard real testimonials. I have to know if it is worth spending the money on and if it is worth finding some extra space in my kitchen for a new appliance.

So before splurging on purchasing an Instant Pot of my own, I decided borrow one and take it on a test run in my own kitchen. I used the Instant Pot Duo Plus 60, 6 quart 9-in-1 multi-use programmable pressure cooker. I wanted to try a few recipes that I have cooked before using traditional (stove/oven) methods and crockpot cooking so I could compare the results of the Instant Pot.

mommysuburbia.blogspot.com


Instant Pot Honey Ginger Chicken Breasts


The first recipe I chose to make using the pressure cooker feature of the Instant Pot was Honey Ginger Chicken Breasts (find the recipe HERE). I've made this exact recipe in a crockpot as well as in the oven and it is quite a hit with my family. Like a crockpot, all I had to do with the Instant Pot for this recipe was just dump in the ingredients, close the lid and let it cook. The BIG difference was the amount of time it took for the Instant Pot to cook the chicken breasts compared to cooking it in a crockpot. In about 35-40 minutes the chicken was completely done and the pressure in the pot was released and safe to open. If I had used a crockpot for this recipe it would require anywhere from 4-6 hours of cooking low and slow.

If you haven't used an Instant Pot you may not realize that before the pressure cooking starts the unit will need to heat up which can take anywhere from 10-15 minutes. After the machine has heated up the pressure cooking begins. I set the pressure cooking time for 11 minutes for 4 large chicken breasts. Once the 11 minutes of pressure cooking were done the machine requires some time to de-pressurize. This can take anywhere from 10-40 minutes. You can speed it along by manually releasing the pressure but this is where you need to use caution - the steam is HOT and you should never open the pressure cooker until the pressure inside the pot has dropped to a safe level (there is a small pressure indicator on the top of the machine so you don't have to guess)! The total time it took to pre-heat, cook and release pressure was about 35-40 minutes. This is quicker than a crockpot but about the same time for baking in an oven.

After removing the chicken from the metal pot I used the Instant Pot's saute feature to turn the juices from the chicken and sauce into a thicker gravy. I love that I didn't have to pour the liquid into a pan on the stove to do this - I just pushed the saute button, added a cornstarch slurry and whisked until it was thickened.

The overall results of the chicken breasts with gravy were excellent. The chicken breasts were tender, flavorful and everyone loved it! In my opinion the pressure cooking method took the same amount of time as an oven (less time than a crockpot) but resulted in a much more juicy and tender chicken breast than the oven baking method.

mommysuburbia.blogspot.com

Instant Pot Mashed Potatoes


The next recipe I wanted to try in the Instant Pot was mashed potatoes. Typically I make mashed potatoes on the stove top or in the microwave. The stove top method always results in a pan covered in starchy potato water along with a messy stove top. The microwave results are about the same! I guess I am just not really good at keeping a close eye on the boiling potatoes!

I peeled and cubed 7 large russet potatoes, put them in the Instant Pot and covered them with water. Again the machine had to come up to temperature (10 minutes) before the pressure cooking feature started but once it reached temperature the potatoes were soft and ready in 8 minutes. To get the pressure down more quickly I used a wooden spoon handle to open the pressure valve. I was surprised at the forceful starchy steam that spewed out of the top of the machine. I covered the steam release valve with a kitchen towel so that my cupboards weren't coated in starchy potato water. By releasing the pressure manually this sped up the total cooking time and only took about 10 minutes to finish so I could open the lid. I left the potatoes in the Instant Pot's metal pot and mashed them with my electric beaters.

My favorite part about using the Instant Pot to make mashed potatoes was that there was no overflowing potato water on the stove or pot. I had way less clean up than if I had used the stove cooking method. The mashed potatoes tasted just as good as the stove top method since I used the same recipe. I would definitely make this recipe again using the Instant Pot! I hate scrubbing pans especially ones that have baked on food and I did not have this problem after using the Instant Pot.

mommysuburbia.blogspot.com

Instant Pot Yogurt


Because there are many different types of cooking methods offered by the Instant Pot I wanted to try the popular yogurt feature. I've never made homemade yogurt so I can't compare the process to traditional methods. Honestly using an Instant Pot seemed so much less intimidating than other yogurt making methods that I couldn't resist trying to make my own.

The first step was to pour cold milk into the metal pot and start the machine by pressing the yogurt function button. This step scalds the milk and brings it up to a certain temperature to ensure any bad bacteria in your milk is killed off before the yogurt making process can start. There are mixed reviews as to whether this first step is necessary if you are using pasteurized milk (milk that has already been heated to 145-165F). If you choose to skip this first step you should still heat the milk to 110 degrees Fahrenheit

When this first step was done I took the temperature of the milk to make sure it reached 180 degrees Fahrenheit. Unfortunately the milk was not up to temp after the first yogurt (boil) so I pushed the saute button on the machine, stirred the milk and got it to temp very quickly.

The next step in the process was to whisk together 1 cup of the warm milk with 2 tablespoons of good quality yogurt that has active live cultures. After the mixture was combined I poured it back into the Instant Pot, secured the lid and pushed the Yogurt button again and set the timer for 9 hours and left it to do its thing. I read that the longer you set the timer the thicker and tarter the yogurt. Most of the recipes I read suggested using 8-10 hours so I settled for 9 hours which is right between the recommended amount of time. One additional step I did not follow was to add any flavoring or sweetener to the yogurt. I wanted to be able to compare the flavor of plain Instant Pot yogurt with what I buy at the store which is plain too.

Because I got a late start making this recipe the 9 hour timer finished at around 10:30pm which meant that I was not going to be able to strain the yogurt (separate the whey) as the recipe I was using recommended. So I pulled out the metal pot, covered it with aluminum foil, popped it in the fridge and went to bed. In the morning when I took the yogurt out of the fridge it still looked the same as it had the night before. There was very little whey (clear watery substance) on the surface and when I stuck a spoon into the yogurt the texture was thick enough to hold the spoon upright.

After handing out a clean spoon to each of my official taste testers, a.k.a. my kids, we all scooped out a spoonful of yogurt to taste the results. It was SO GOOD! The yogurt had a perfect creamy texture with the right amount of tang I expect from good quality plain yogurt. The "taste testers" also approved of it though they did ask for a little vanilla extract and honey be added to their yogurt.

Clean up was a snap too. After pouring the yogurt into a sealable container all I had to wash was the Instant Pot metal pot and wipe off the inside of the lid. I will certainly be making this again! Not only was it more economical but it was fun and super simple to make!

Since I can't compare the traditional method of making yogurt to the Instant Pot method all I can say is that I am no longer intimidated to make my own yogurt. The biggest bonus I found using the Instant Pot was the cost. When I buy store bought good quality yogurt it costs about 3-6 dollars for a large container. The cost for me to make my own was $1.99 which was the current price for a half gallon of whole milk. The best part was that the half gallon of milk resulted in twice as much yogurt than what the container I buy at the store costs me. TWICE!! For our family of six making our own yogurt in the Instant Pot is much more economical than buying it at the store and I'm always looking for ways to save money.

My overall conclusion after testing out the Instant Pot is that this machine is the real deal! I'm not quite ready to ditch the crockpot but the Instant Pot has surely given it a run for the money. I hope this review and my testimonial has helped give you a little better perspective of the functions and usefulness of the Instant Pot.

Do you have an Instant Pot? What do you like or dislike about it? Got a favorite recipe you can share? I'd love to hear your comments so please leave me your thoughts and ideas in the comment section. In the meantime, happy cooking!

Here are some additional kitchen tools I think you might find handy:

Digital Thermometer 
find at Amazon
Serving Platter 
find at Amazon
Serving Utensils:
find at Walmart

Wednesday, November 14, 2018

Thanksgiving Themed Craft Roundup For Kids - Plus Free Gratitude Game Printable

mommysuburbia.blogspot.com

Are you ready to get your Thanksgiving themed crafting on? Gather up your glue, scissors, construction paper and markers and get ready to make something amazing with your kids.

There are so many amazing Thanksgiving Day themed crafts it is hard to pick which one to do! Luckily I've done the hard work and pulled together some of the best crafts I could find for you. When you think of Thanksgiving do you have visions of pumpkins, turkeys, corn, Pilgrims and cornucopias? I tried to find a variety of ideas and projects that incorporate one or two of the most popular Thanksgiving themes and symbols.

Don't forget to scroll down to the bottom of this post where you can find a FREE Gratitude Game printable as well as the instructions on how to play!

Five Fun Thanksgiving Themed Crafts for Kids


1. Yarn Pumpkin Craft


from One Little Project

Glue + yarn + balloons = cutest pumpkin craft ever! What a great project for your older tween/teen children. This is an excelled tutorial from One Little Project that I'm sure you will love. Just imagine a garland of these colorful yarn pumpkins strung across your mantel or set them on your table for a festive table scape for Thanksgiving dinner!

2. Thanksgiving "Handy" Wreath


from Education.com

Each child could make their very own wreath or you could make a mixed size handy wreath that uses everyone's hand. Make sure to write what you are thankful for on your paper hand before assembling them into a wreath. I love Education.com - check out my previous post about their wonderful worksheets here!

3. Indian Corn Craft


from Fantastic Fun and Learning.com

Not only does this blog contain this cool Indian corn craft but a link to resources to learn about Indian corn. What a great fall art project and history lesson wrapped into one. You just need simple household supplies to make this project. Love it!

4. Felt Pumpkin Treat Bag


from Hello Wonderful

5. Button Cornucopia


from The Pinterest Parent.com

When I was little my grandma has a button box which was just a tin box filled with buttons she had collected over many years. I loved to sort through the buttons and look at each one. This craft reminded me of her button box and how much fun it is to find cool colorful buttons. Your child is sure to have a blast looking for the right button to fill their cornucopia with.

mommysuburbia.blogspot.com

Gratitude Game Printable

This is the perfect game to play during your Thanksgiving dinner while everyone is gathered around the table. The game is simple to play and all you need is a bag of M & M's and the Gratitude Game printable. To play start have one person pick one M & M from the bag and match the color of the candy with the colored circle on the Gratitude Game printable. The person then follows the prompts on the printable to say what or who they are thankful for. After they are done pass the bag of M & M's to the next person and continue to play as many rounds as you want and enjoy hearing what everyone is thankful for!


Click HERE to get the FREE printable


mommysuburbia.blogspot.com

Here are some great supplies for your crafting needs;

1. Construction Paper:
find at Walmart


Tuesday, November 6, 2018

How To Celebrate Being Thankful With Your Kids This Thanksgiving - Includes A FREE Bible Themed Printable

mommysuburbia.blogspot.com

Being thankful and reflecting on what we have to be thankful for is so important. Thanksgiving in our family is a time to reflect on what we are thankful for. Since our kids ages are a bit spread out we try to incorporate activities like crafts and stories that help teach them about being thankful and grateful.

We started tradition a few years ago during the month of November that we call the Thankful Box. We  put a decorated box called the "thankful box" on our dining room table along with a small stack of papers next to it and each day everyone has a chance to write something or someone they are thankful for on a slip of paper. After you finish writing what you are thankful for the piece of paper is slipped it into the Thankful Box.

mommysuburbia.blogspot.com

On Thanksgiving we open the Thankful Box and everyone takes a turn randomly drawing out a slip of paper and reading what it says -it's OK if it isn't a "thankful" that they wrote. There is just something so special listening to everyone's thankfuls! I love seeing my kids eyes light up when they hear someone read that they are thankful for them.

The Bible has many verses about thankfulness but this one in particular resonated with me this year:
Psalm 9:1 - I will give thanks to you, LORD, with all my heart; I will tell of all your wonderful deeds.
When we set aside time to think about all we have to be thankful for and write those thoughts down it is a very powerful reminder of how much we are loved, treasured and cared for. It changes our perspective from a self-centered focus, to a selfless focus of gratitude and thankfulness for what we have and Who has provided all things to us.

As a way to say "Thank you" to you, my readers I created a FREE gift just for you! I hope you like this free holiday printable and that it reminds you to be thankful for all things and share what you are thankful for with others.

click HERE to download


In addition to our Thankful Box there are many other great activities I love to do with our kids to prepare for Thanksgiving. Reviewing the story of how the first Thanksgiving celebration came to be is always one of my kids favorite activities. In the past we have read stories or watched videos telling of our great country's humble beginnings. The Peanuts A Charlie Brown Thanksgiving movie is my kids' current favorite holiday movie to watch and it tells the historical story in a fun cartoon way.

find it HERE on Amazon
Does your family have any holiday traditions you do for Thanksgiving? I would love to hear about them so please leave a comment sharing what your traditions are.