Wednesday, November 27, 2019

12 Delicious Thanksgiving Leftover Recipes Your Family Will Love

Thanksgiving is a cooking marathon! You get up early, pop the turkey in the oven, chop, slice, stir, mash and prep the side dishes, set the table and greet your guests. Exhausting isn't it? But as you look around your table at all who are gathered to celebrate a day set aside for reflecting on what we have to be thankful for, it makes the work totally worth it. 


This post contains affiliate links which means if you click on a link and make a purchase I may receive a small commission at no additional cost to you. For more information please read my Disclaimer page. Thanks for your support!

While the post-feast turkey coma sets in on you and your guests don't forget about the leftovers! 

Thanksgiving food leftovers are almost as good as the original meal. That's is why I try to make a little extra of the side dishes so I can box up a meal for each of my guests to take home with them. 

Not only will your guests be thrilled to take home some leftovers but your overflowing fridge will be grateful for the extra space! 

Boxing Up The Leftovers

I LOVE these affordable, reusable, microwavable, and freezer-safe plastic containers to pack up leftovers for my guests. There is plenty of room to pack a sizable leftover meal in them and the lid snaps on securely so no worry about it popping off on their trip home. 

Oh, and don't forget to prepare a separate to-go container for leftover desserts too! Nobody wants their gravy mixing with their pumpkin pie! 

via: Amazon


Once all the leftovers are boxed up and packed into the fridge it can be so hard to tell what is in each container. Who wants to spend time pulling out container after container from the fridge, popping open each lid only to find that the one you opened isn't the leftover dressing you're craving. 

I've got the perfect solution to this problem - customizable printable labels! 

via: wikibuy

Print off several sheets of these FREE labels from Wikibuy.com and fill them out as you pack up the leftovers. Not only are the labels super helpful but they add a little extra elegance to your guest's to-go containers too. 


12 Easy Recipes For Thanksgiving Leftovers 


Turkey Leftover Recipes


Fall Harvest Turkey Pot Pie


recipe via: Fairlife.com

Comfort food at it's best! Piping hot pot pie with mixed vegetables, cubed or shredded turkey in a seasoned creamy sauce make this meal the perfect leftover dish. It whips up quickly since the turkey meat is already cooked! 

This meal tastes amazing baked in a cast iron skillet! If you don't have one I recommend this cast iron skillet. I use mine ALL the time!

Turkey Shepherd's Pie


recipe via: Yellow Bliss Road

Leftover mashed potatoes plus leftover turkey are the stars of this tasty casserole dish! This rustic dish is similar to pot pie except for the crust. Instead of pie crust or puff pastry topping, mashed potatoes and a generous sprinkle of cheddar cheese top off the dish. 

Turkey Noodle Soup

recipe via: The Recipe Rebel.com

Soup is the perfect fall food. It is warm, filling and full of flavor. This turkey noodle soup is a great meal to make for dinner on a busy night especially since the turkey is already cooked. Just toss the ingredients into your soup pot and let the stove do its magic!


Leftover Mashed Potato Recipes


Mashed Potato Balls


recipe via: Rasa Malaysia

Here is a recipe that will take your leftover mashed potatoes to a whole new level! Mashed potato balls are simple to make and you can customize the seasonings and flavors by adding your favorite ingredients like bacon or diced peppers. Serve them as a side dish, appetizer or make it the main course. They are best when served warm. Beware these are sure to be gobbled up quickly!

Loaded Mashed Potato Cakes


recipe via: Belly Full

This recipe can be made ahead of time and kept in the refrigerator for when you are ready to fry them up. These loaded mashed potato cakes would make the perfect side dish to a leftover turkey meal. Adjust the flavor by adding bacon, ham or pepper jack cheese. 

Leftover Mashed Potato Gnocchi 


recipe via: Life As A Strawberry

This recipe is by far the most creative use of leftover mashed potatoes! Have you ever made your own homemade gnocchi? It is quite simple and makes a wonderfully comforting meal. The recipe from Life As A Strawberry walks you through the process step by step! 

Leftover Stuffing Recipes


Leftover Stuffing Breakfast Casserole


recipe via: Sweet And Savory By Shinee

This is the perfect day after Thanksgiving breakfast recipe! If you are a die-hard Black Friday shopper you are going to want to have a slice of this casserole before you hit the stores! Packed full of protein, veggies, and flavor you would never know that the night before it was the dressing or stuffing as some call it. 

Chicken (or Turkey) Stuffing Bake


This weeknight winner is sure to please your family as a post-Thanksgiving day meal. Simple on-hand ingredients mixed with your leftover turkey and stuffing (a.k.a. dressing) add flavor to this dish. It can be made in one pan so no worries about more dirty dishes piling up in the sink. I think your family will love this recipe! 

Leftover Stuffing Waffles 


recipe via: Best Recipe Box

Does this recipe surprise you? What a creative and tasty way to use up that leftover stuffing from Thanksgiving dinner! The surprises don't end here because these stuffing waffles are topped off with maple gravy. 

My family loves all things waffles! I make them all of the time in my waffle iron. This twist on a traditional waffle will really be a hit with my crew. 


Leftover Cranberry Recipes


Oatmeal Cranberry Bars


recipe via: A Few Shortcuts

Whip up a batch of these sweet oatmeal cranberry bars using your leftover cranberries from Thanksgiving. These can be a sweet breakfast treat or an after-dinner treat. Use gluten free oats to make this a gluten-free treat!

Leftover Cranberry Sauce Bread


recipe via: Oh My Veggies

Bake up a warm loaf of this cranberry sauce bread using your leftover cranberry sauce from Thanksgiving. Cranberries give this sweet bread a little tang of goodness in every bite. Spread some of the sauce on the bread to get even more cranberry goodness!

Leftover Cranberry Meatballs


recipe via: Life Made Simple Bakes

You already have leftover cranberry sauce so why not make these flavorful meatballs using the cranberries plus a few additional ingredients as the sauce? Homemade or frozen store-bought meatballs work perfectly for this recipe. Plugin your crockpot, toss in the meatballs and sauce and you are all set for dinner tonight. This is a great way to use up your leftover cranberries too! 

Enjoy your leftovers!

After finding all these great leftover recipes I'm almost as excited to make the leftover recipes as I am to make the original Thanksgiving feast! I'm sure my family will be blown away by the creative dishes I'm going to be serving them post-turkey day!

Follow me so you don't miss future posts including crafts, parenting tips, and fun DIY projects! 

Do you have any delicious leftover Thanksgiving recipes you can share with me? What is your favorite? I'd love to hear from you. Please leave me a comment below!

More Thanksgiving Themed Ideas You Will Love


Check out these other Thanksgiving-themed posts! Teach your kids how to be thankful and Thanksgiving craft round-up. 

Tips To Teach Your Kids How To Be Thankful - click HERE to read more. Includes a free holiday printable.


click HERE to read more

Is your family crafty? These 5 easy to make Thanksgiving crafts are fun for all ages to make! Click HERE to get the instructions for the projects. Also, included is a free Gratitude Game printable you can print and play as a family. 


Thursday, November 21, 2019

Top 10 Family Friendly Board Games

The weather outside might be cold and frightful but game night at home is so delightful! Don't let the cold and snowy weather get you down, keep your mind sharp and cabin fever at bay by playing a board game together.


This post contains affiliate links which means if you click on a link and make a purchase I may receive a small commission at no additional cost to you. For more information please see my disclaimer page. Thanks!

Family game night is always a favorite time at our house. A little healthy competition over a board game or card game between friends and family is a great way to spend an evening. Shoot, even Candy Land, a classic kids board game, can bring out your inner competitor! My young son is known for his Candy Land and Shoots and Ladders trash talk. He is a fierce competitor and loves to play hard.

The best part about board games is that there are so many great ones to choose from that kids and adults of all ages will enjoy. My kids ages range from teen to kindergarten age and playing board games together provides them with an activity that they can all enjoy together whether it is a quick round of Slamwich or a lengthy game of Monopoly.

Every year for Christmas my husband and I make sure that there are a few new games gifted to the kids as a family gift. We always end up playing the new game several times on Christmas Day as a family. I've got such great memories each year of the games we have played.

Don't forget to Pin for later!


This year I'm once again on the hunt for a new family board or card game to give as a gift. Since I've been doing a lot of shopping online and in the store searching for the perfect game I thought I'd share some new ones I've come across as well as some of our family's favorites.


Family Favorite Board Game Ideas Everyone Will Love


1 - Ticket To Ride


Players - 2-5 |  Difficulty - Easy | Ages - 8+

Players score points by creating train routes across the continental United States. The winner is the person who finishes with the highest store including bonus points for completing specific routes or longest continuous train route. This game is also a great way to teach kids geography, strategy and basic math. There is also a popular European version too!

2 - Pinch 'N' Pass

click HERE


Players - 3-6 | Difficulty - Easy | Ages - 12+

Quick wits and quick responses makes this naming game fun for a group to play. Perfect game for a party! Start the game by selecting a "Pinch" card where you are given a category like "Tom Cruise movies". Anyone can join in by calling out an answer to fit the category earning a card for themselves. If the random timer hasn't run out any other player can call out another suggestion to fit the same category thus stealing the card. Whoever has the card in their hand when the timer runs out gets a point and moves one space on the board. "Pass" cards have the opposite effect where the goal is to get rid of the card and the person left holding the "Pass" card when the timer runs out moves back a space. Game time can range fro 10 minutes to 40 minutes.

3 - Articulate

click HERE

Players - 4-20+ | Difficulty - Moderate | Ages - 12+

Another great game for a large multi-age group to play! Super straight forward rules make this classic so easy to play. Players take turns describing as many words from a category as they can within thirty seconds except they can't say what the word sounds like or rhymes with. If you have good communication skills this game is for you! If you don't it is still a lot of fun.

4 - Apples to Apples 

click HERE

Players - 4-10 | Difficulty - Easy | Ages - 12+

This is an easy to learn fast-paced card game that everyone will love to play! Each round is filled with surprising and outrageous comparisons from a wide range of people, places, things and events. Every round of the game has a new judge, deciding which one of the person, place, thing or event cards played by the other players is the best apples to apples comparison to the description card. The player who collects five description cards first wins! This game is bound to become your family's favorite!

5 - Monopoly - Fortnite Edition

find it HERE

Players - 2-7 | Difficulty - Moderate | Ages - 13+

Inspired by the popular Fortnite video game this edition of Monopoly isn't about what players own but rather how long they can survive. Battling your opponents and avoiding the Storm to survive is what makes this version so much fun.  Instead of Monopoly money players earn Health Point chips to stay in the game. Last player standing wins!


6 - Catan Junior

find it HERE

Players - 2-4 | Difficulty - Moderate | Ages 5+

Are you a Settlers of Catan fan? This Junior version is the perfect way to introduce this great game to kids ages 5+ who are ready to explore Catan! Players use resources to build ships and hideouts on a ring of islands or get help from Coco the Parrot. Watch out for the dreaded Ghost Captain who lives on the Mysterious Spooky Island!

7 - Yeti In My Spaghetti

find it HERE

Players - 2+ | Difficulty - Easy | Ages 4+

This is silly, easy-to-play game the whole family can enjoy together! Simply place the noodles across the top of the bowl and sit the Yeti on top. Players take turns removing the noodles one-by-one trying not the let the Yeti fall. The player who makes the Yeti fall loses.

8 - Clue Game

find it HERE

Players - 2-6 | Difficulty - Moderate | Ages 8+

A classic game of Who Done It? Players become detectives as they try to solve a murder through deductive reasoning and luck! Was it Mrs. Peacock with the rope in the study or maybe it was Professor Plumb with the wrench in the study? The player who correctly guesses the room, weapon and guest wins!

9 - Uno Attack

click HERE to find it

Players - 2-10 | Difficulty - Easy | Ages 7+

Uno Attack has all the fun of the classic version but with a twist! The new Hit card forces the next player to hit the button on the random roulette Card Launcher and wait and see if any cards are shot out at the player. Will they get a couple of cards? Four? A whole pile or brand new cards? This exciting new twist makes Uno Attack feel like a whole new game!

10 - Disney Villainous Board Game

find it HERE

Players - 2-6 | Difficulty - Moderate | Ages - 10+

Choose your favorite Disney villain in an all out race to finally end the story as a winner. Each player sets out their villain card that has different story scenes, a villain deck and a fate deck of cards. One your turn, you'll move your villain to one of the locations on your card to preform a variety of different actions. Gain resources to use your villain powers and gain items or curse the other villains with terrible conditions. Find allies to help you sent heroes to hinder your opponents. Gain the victory points to prove that your villain was right all along! 


Snack Ideas For Family Game Night

As the saying goes: families that play games together stay together and have more fun! Make some lifeline memories with regular family game nights. 

Of course no game night would be complete without a good snack! I've got the perfect snack ideas for you to serve at your next family game night - carmel corn, kettle corn and cinnamon sugar soft pretzels! 

Is your mouth watering yet? Whip up this delicious carmel corn or kettle corn in no time at all and enjoy it as a family as you gather around the table to play your favorite board games. Oh, and you can't go wrong with soft pretzels now can you? 

My whole family loves these and I love to make them! 

Easy Kettle Corn Recipe
get the full recipe HERE

Easy Carmel Corn Recipe
read the full recipe HERE


Cinnamon & Sugar Soft Pretzel Recipe 
click HERE to get full recipe


Love to Read? Sign up for Kindle Unlimited and get your first month free!

Tuesday, October 29, 2019

How To Make Homemade Cinnamon & Sugar Soft Pretzels

Homemade soft pretzels are such a delicious and easy treat to make at home. As the weather turns colder do you find yourself craving all those wonderful comfort foods like pot pie, hot chocolate, apple pie and warm soft pretzels? At our house we are in full comfort food mode. The crock pot is churning out meals while tag teaming with the oven! 


Our latest comfort food recipe is homemade soft pretzels. At first this seemed so intimidating since pretzel making is a three step process, but once I made my first batch I realized there is nothing to be intimated about homemade pretzel making! They are quite simple and easy to make at home thank goodness, otherwise I was considering buying stock in Auntie Anne's due to our frequent stops there for warm soft pretzels. 

I am a participant in the Amazon affiliate program which means if you click on an affiliate link within this post and make a purchase I may receive a small commission at no additional cost to you. For more information please see my Disclaimer page. Thanks

If you have never made anything with dough before, making soft pretzels is a great one to start with. As I mentioned before making soft pretzels is a three step process broken down as follows:

  • Make the dough and let it rise, 
  • Shape the dough and give it a quick water/baking soda bath
  • Bake the pretzels
Let's make a batch together shall we? Here is the recipe I used to make mine that I think you will love:


Easy Homemade Cinnamon & Sugar Soft Pretzels


Ingredients
  • 1 cup warm water
  • 1 pkg dry active yeast
  • 1 Tbsp sugar
  • 1 Tbsp melted butter
  • 1/2 tsp salt
  • 2 1/2 cups all purpose flour
  • 2 Tbsp vegetable oil
  • 1 egg white

Baking Soda Bath

  • 6 cups water
  • 1/4 cup baking soda

Cinnamon & Sugar Topping

  • 1/4 cup melted butter
  • 1/4 cup sugar + 1/4 tsp cinnamon mixed together


Step #1 Make the Dough

In a metal mixing bowl pour in the warm (see Tip below) water, yeast and the tablespoon of sugar. Let the yeast activate or proof (technical term) for 10 minutes. The yeast will feed off of the sugar and begin to foam and get frothy. 


Tip: If it bubbles up and gets frothy you know your yeast is active and well. Causes of "dead" yeast can be too hot water, too cold water, old yeast or too much sugar. The water should feel warm to the touch on the inside of your wrist - not hot. 


After the yeast is proofed add the melted butter, salt, flour and cinnamon and mix for about 10 minutes. I find it easiest to mix everything in my Kitchen Aid mixer starting with the mixing paddle then switching to the dough hook once the ingredients come together. Using the dough hook is how you are going to kneed the dough. 

If you don't have a stand mixer you can do all of the mixing by hand using a solid wooden spoon and then once the ingredients come together dump it out onto a lightly floured surface and kneed it by hand. (if you need a quick lesson in how to kneed dough here is a great video). The dough should not stick to the bowl at all and feel smooth and elastic. 


The dough needs to rest and have time to double in size. We don't want the dough to stick to the bowl so you should pull the dough out of the metal mixing bowl, pour in the vegetable oil and spread it around the inside of the bowl with a kitchen brush and then place the dough back in the bowl. 

Completely cover the top of the bowl with a piece of saran wrap or a towel. It is best to put the bowl in a warm location to help the dough rise. The dough should be doubled in size after 60 minutes.


Tip: Since it is super cold where I live I like to turn my oven on low for about 15 minutes then turn it off and set the bowl with the dough on it to rise.  

Once the dough is double it's size pour it out onto a lightly floured surface and divide it into 8 to 10 equal size pieces. If you want huge pretzels go with 8 pieces otherwise for medium size pretzels divide the dough into 10 pieces. 


Step #2 Baking Soda Bath

Pour the six cups of water into a large pot, mix in the baking soda and turn the stove top on medium high temperature. You want the water to come to a full boil. 


While you are waiting for the water to reach the boiling point you can use this time to shape your 8 or 10 pieces of dough into pretzel shapes. 
  • Shape your dough by rolling each piece into a long rope about 24 inches long. 
  • On your work surface lay the dough rope into a "U" shape.
  • cross the ends of the U two times to make the center twist
  • fold the top of each U shape down towards the bottom of the U and pinch the ends down. 
The dough should now resemble the shape of a pretzel. You can easily adjust to dough into the proper shape of your liking. 


Tip - If you don't want to make the traditional pretzel shape you can cut the long rolled rope of dough into small 1" pieces to make pretzel nuggets instead. 


Once the baking soda water bath is boiling carefully drop one pretzel at a time into the water. You do not want to crowd the pot so you may only be able to bathe one pretzel at a time. Remove the pretzels from the water after 30 seconds and place them on a parchment lined baking sheet. 


Mix the egg white with 1-2 tablespoons of water and brush each pretzel top with this mixture. Since we are making Cinnamon pretzels I don't recommend sprinkling salt on the unbaked pretzels. 


Tip - if you want to make traditional pretzels, skip adding cinnamon to the dough in the first step. After the pretzels are brushed with the egg wash sprinkle salt on each pretzel to your liking. 


Step # - Bake The Pretzels & Add Toppings
Bake the pretzels in a 425F oven for 10-12 minutes. Allow the pretzels to cool on a wire rack for 5 minutes before serving. Melt the 1/4 cup of butter in a small dish. Brush the baked pretzels with melted butter then sprinkle the sugar & cinnamon mixture over the pretzels. 

Enjoy!


Tip - if you aren't going to eat the pretzels right away (or within an hour after baking) I recommend flash freezing the pretzels then storing them in a Ziploc freezer bag to keep them fresh. When you are ready to eat place the pretzels on parchment paper on a baking sheet and put them in a 425F oven for 10-12 minutes until thawed and warm.
Wasn't that easy? There are so many different toppings you could put on your homemade soft pretzels like - poppy seeds, drizzled chocolate with chopped nuts and Parmesan cheese.
What's your favorite pretzel toppings? Share your favorites in the comments or follow me so you don't miss out on future recipes, crafts and useful parenting tips.
While you're in the kitchen in full comfort food snack mode why not whip up a batch of this amazing carmel corn? I have the perfect recipe for you that is fast, easy and YUMMY! 

Thursday, October 24, 2019

How To Make A Rag Strip Quilt - Full Tutorial

Rag Strip Quilts are the perfect starter quilt for beginners. Rag quilts are very forgiving and actually look best when made with a few crooked stitches. They whip up fast and look fabulous when done!


My husband's boss is having a baby in a few months and he asked me to make a baby gift for her. After pouring over various baby blankets and quilt ideas on Pinterest I decided to make a soft and cuddly rag strip quilt. Rag strip quilts are easy to make and always turn out beautiful. Rage quilts are a perfect project to do if you are a quilting or sewing beginner. 

Since I don't know the baby's gender I stuck to gender neutral fabric colors for the quilt. My favorite part is picking out the fabric! Here are my choices:

There was one more additional print fabric that I also included in my rag strip quilt that isn't pictured here. It was a last minute addition! The missing fabric has mini mint green stars on a white background. You can look for it in the completed pics of my quilt! 

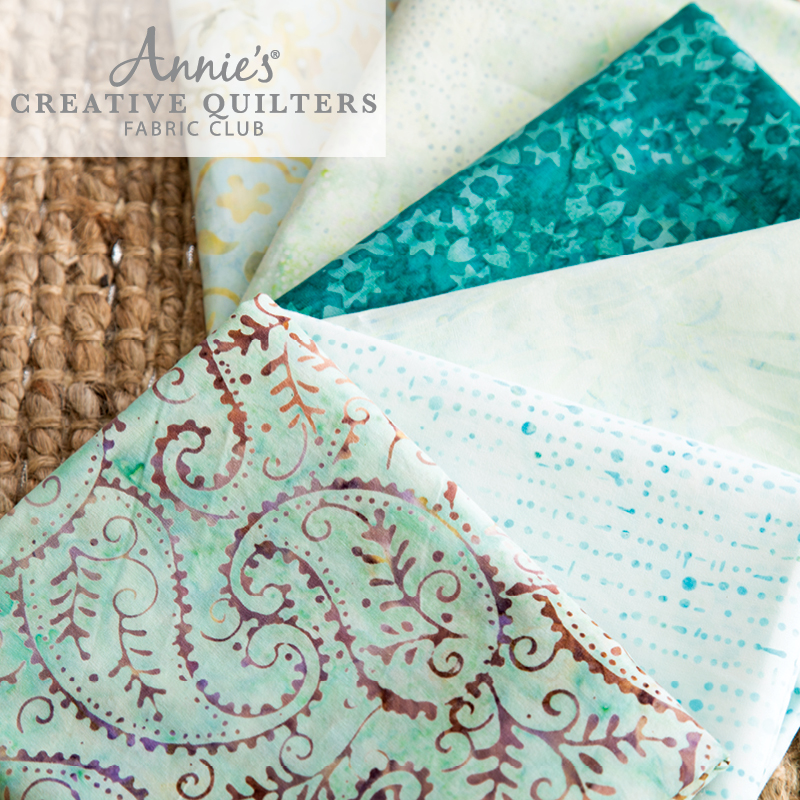
Not sure where to get color coordinated quilting fabric? I suggest giving Annie's Creative Quilters Club a try. Annie's offers color coordinated fat quarter kits! They also offer a monthly subscription club option that includes 6 fat quarters (18" x 22" inches) of 100% cotton coordinating quilting fabric from top American fabric companies. Also included is a bonus pattern that includes a step by step instructions.


To see where I found my inspiration check out my Pinterest board HERE and follow me so you can see what else inspires me. I loved the rag strip quilts that had varying size strips so I decided to do that with this quilt.

Want to make your own rag strip quilt? Don't worry if you have never made a quilt before - you can do this! This is a great quilt for beginners because it is such a forgiving kind of quilt. Follow along with me as I take you step by step through the process of making a strip rag quilt.

Supplies needed:
It is debatable as to whether you should or shouldn't pre-wash your fabric. You will hear pros and cons for both. I prefer not to pre-wash my fabric especially for this kind of a quilt partly because I just don't have the time and don't want to press it out after washing. This is your choice as to whether you want to pre-wash the fabric or not.

1. Cut Your Fabric Strips

To begin we will be cutting the fabric into long strips. I chose to make my rag strip quilt with two different fabric strip widths. If you choose to make your quilt with fabric strips that are the same width then you will want to cut your printed fabrics all the same width. Otherwise if you choose to make the strips vary in sizes then you can mix up the widths of the fabric strips. Make sense?


Tip - the wider your strips the faster the quilt will be finished since there will be less sewing and cutting

Here is a chart to show the sizes I cut each of my fabrics. I only used two different widths, 5" and 7".
I had a total of 15 strips so that the total width, once they were all sewn together with enough seam allowance to trim the edges to get that lovely fray was 44". My finished quilt measured 44" x 40" (standard crib quilt size is 40" x 42").


When cutting strips of fabric it is easiest to fold the fabric with the longest sides matched up and then measure your desired width and cut a straight line with your rotary cutter down the fabric using either a quilters ruler or a durable straight edge as a guide. You may have to fold the fabric twice to get it to fit on your self healing mat or table. Just make sure there are no wrinkles in the fabric when it is folded or you will have uneven strips.

2. Cut The Backing Strips

Now that you are finished cutting strips from the printed fabrics it is time to cut strips from the solid fabric that will become the backing to your quilt. You will need the same quantity of strips in the same sizes you cut from your printed fabrics. For example my quilt has 7 strips that are 5" wide and 8 strips that are 7" long therefore I cut a matching number of strips for each width for a total of 15 strips.

3. Cut The Batting/Fleece Strips (optional)

This next step is optional. Since I live in a state that gets super cold in the winter I wanted to add extra warmth to the blanket which means it needed an extra layer. I used white fleece fabric sandwiched between the printed top layer fabric and the bottom solid layer fabric. You could use a thin layer of batting (I recommend this one by Warm & Co.) instead of fleece but I just like the feel of the fleece so that is what I used. If you choose to add this extra layer you will need to cut the fleece or batting into the same number of strips as you have for the the top layer of the quilt - for my quilt I needed 15 strips of batting. The batting should be cut 1 inch narrower than the printed fabric so if you follow the same widths as I used you will need 7 pieces cut into 4" x 48" and 8 pieces cut into 6" x 48".

4. Time To Sew - Quilt Your Strips

Place one 7" strip of solid backing fabric face down then spread the correct size batting/fleece (6") on top of it in the center and finally take a 7" print strip and lay it face up on top of the batting matching the edges of the bottom layer to the edges of the top layer. Pin the layers together in several places down the center of the strip to make sure the layers don't shift when you bring it over to your sewing machine or while you are sewing. Sew straight down the middle of the strip long ways. I love the look of more quilting so I sewed two more lines down every strip about 1" apart from the center  stitched line. This stitching will keep your layers all together and give the the quilt that quilted look. Do this for all of the strips.

5.  Sew The Strips Together

I like to lay our my quilt strips into the pattern that I plan on sewing them together. It helps me stay organized as the quilt starts to take shape.


Grab the first two strips from one end of your quilt. Place the strips with the solid bottom sides facing each other. Pin the two strips together matching the outside edges together. Sew the strips together with a 1"  or 1/2" seam allowance (or however much you want to leave and snip for the rag effect). I used a 1" seam allowance for the blanket I made because I wanted a lot of soft rows of texture. Repeat this step sewing the third strip to the second strip and continue sewing the strips together until all of the strips are sewn together.


6. To Bind Or Not To Bind

No Binding Method:
Remember how I said this quilt was super easy for a beginner? To keep it simple you can choose not to add binding to the quilt and instead allow the edges of the quilt to have that same great rag quilt look that the strips will have. The quilt will still look great if you choose to leave it binding-less. 

If you choose not to bind your rag strip quilt you still will need to sew around the perimeter of the quilt with a 1/2" to 1" seam allowance (again your preference). This adds a little more stability to all of the sewn together strips and gives you a guide line to use when cutting the little slits. 

After sewing around the perimeter it is time to cut the slits into all the seam allowances and outside edges of the quilt. I recommend using these wonderful spring action rag quilter scissors to save your poor hand from all the squeezing it will have to do to snip all the slits. If you don't have these scissors make sure whatever pair you use are super sharp! Cut small slits about 1/2" apart on all edges and all seam allowances between each strip. Make sure you do NOT cut through the stitches!! 

Binding Method:
I chose to bind the perimeter of my quilt and to do so I made my own quilt binding from the same yellow fabric I used in the quilt strips. If you have never made your own binding before I recommend following this tutorial HERE from Simple Simon & Company. After your binding is finished it is time to sew it onto your quilt. Again, if you have never sewn binding onto a quilt don't worry I found this great tutorial HERE from Love Patchwork and Quilting that will walk you through it step by step. 

Once your binding is attached you will need to start cutting the slits into all seam allowances between the quilt strips. See above (in the not binding section) for instructions on how to do this. 

7. Wash, Dry, Repeat

Yeah, you made it to the last step! It is time to let your washer and dryer do their magic and start to turn your quilt into an actual rag quilt. This step will create A LOT of lint and small bits of fabric thread - be warned! I recommend washing and drying your quilt in cold water on the normal cycle at least twice so that all the stray threads come off and the slits you cut in the seam allowances begin to take on the classic soft rag quilt qualities that make this quilt a real rag quilt. The rag effect will continue improving every time the quilt is washed and dried. 

**Make sure to clean your lint trap out after you dry the quilt since it will probably be full and you don't want the extra lint to become a fire hazard. 

Congratulations! You did it - you made a Rag Strip Quilt. 

I'd love to hear how your quilt turned out! Please leave your comments below and a picture of your final quilt would be great too. These quilts make great baby gifts, Christmas presents and birthday gifts. 

More Rag Quilts + Tutorial

If you liked this tutorial, head on over to this popular post I wrote about a different type of rag quilt. Now that you have conquered the rag strip quilt it is time to try the traditional rag quilt with squares. 

click to read entire post