Sunday, May 20, 2018

4 Relaxing Ideas To Do When You Get Time Alone

So my kids are gone with my husband for a few hours and I am home alone!

ALONE!

I actually can't remember the last time I had a few hours all to myself at home.

The big question now is - What should I do? The list is long and I find myself debating in my head what to do first. Ever have this happen?

mommysuburbia.blogspot.com

I feel like a six year old in a candy store staring at the endless bins of sugary sweets trying to decide which one he wants. I just don't know. I can't decide, and I'm wasting precious time!

Panic, I am actually feeling a little anxiety over this whole dilemma. The clock is ticking people and I need to decide something soon otherwise before you know it the hubby will be pulling into the garage with the kids and I will once again resume the role of Mom.

OK, deep breath.

Here is my top five list of things to do when the rare occasion presents itself and the house is all mine!

1. Watch a TV show - uninterrupted, holding the remote because yes I am now queen of the remote control. Cooking show? Reality show? Movie? Yikes more decisions! My go to is the Pioneer Woman on Food Network. Love her recipes.

2. Pinterest and actually read the links I have pinned. Pinterest is sometimes my gap filler, you know those five minutes here or there that you fill scrolling through the eye candy on Pinterest. I have great intentions to click to visit the actual site but I don't always have the time to read the full text once I get to the site.

3. Home school planning. I have a high schooler next year for the first time so the anxiety to plan is always looming over me these days.

4. Sew or craft. I love to sew but hauling out the supplies, cutting up fabric and then having to put it all away seems a little more than I want to get into with these valuable hours of tranquility. I need days, people, yes, days to myself to tackle some of the sewing projects I want to try out.

5. Clean and organize something, anything. I could have a clean house for more than 5 minutes if I get right on this while the family is gone. Satisfying but short-lived.

Getting used to a break from a busy, noisy, full house is harder than I thought it would be. It is so rare that I don't exactly know what to do. But one thing for sure I know is by the time this moment comes to an end I will have a better appreciation for my kids, husband and our life. Like the cliche says - you don't know what your missing until it's gone.

Is it possible to miss them in such a short time? Yep, but I will cherish this quite house and enjoy it just a bit more than usual when it is once again filled with giggles, loud footsteps, tattling, crying, endless questions, and many "I love you"'s.

My family is precious to me and I love being with them. Sometimes stepping away (or having them leave for a few hours) allows you to regain your perspective and remember what a treasure each moment with those you love is.

Enjoy your Sunday friends! I know I am going to enjoy mine.

Friday, May 18, 2018

How To Make a Painted Brick Paver For Your Garden


Customize your garden with a personalized painted brick paver. Follow this tutorial to make your own custom paver.

mommysuburbia.blogspot.com

Spring is here and with it comes that seemingly never ending “to-do” project list. One of the projects on my list is to plant a vegetable garden with the kids. We have a corner in our backyard that needs an overhaul and would make the perfect spot for a vegetable garden. This spot receives a lot of direct sunshine and is already framed in like a raised bed garden. Currently it is filled with various flowers with stones for the mulch. The stones will be removed so we can start planting.

Since this will be the kids vegetable garden I wanted it to have something special in it besides vegetables that reflect their own unique personalities. What I came up with was personalized painted brick pavers to add to the garden! We can use the pavers as stepping stones or even small borders within the garden.

The kids and I just finished studying the book of Genesis through our Community Bible Study (CBS) class and thought it would be cool to use this book as inspiration for our paver project. I challenged the kids to select either their favorite verse, an attribute of God or something they are thankful for to use while decorating their brick.


Here is how we painted and decorated our pavers:

Custom Painted Brick Paver Tutorial


SUPPLIES:

1.       Brick paver – we got our bricks from Home Depot for about $0.89/ea. We used the red pavers but you could use the gray ones too. Any size will do. Just select the paver size that will work best with your project.
2.       Interior / Exterior semi gloss enamel white paint
3.       Foam paint brush
4.       Sharpie markers
5.       Spray acrylic sealer (I used Aleene’s brand in matte finish)
6.       Newspaper


HOW TO TUTORIAL

The first step was to wipe off the bricks with a damp cloth getting all the dust and other debris off of the surface of the brick paver. After you wipe the paver clean put the brick on top of several pieces of newspaper and apply your first coat of paint to the brick.

I painted all sides of our brick except the bottom then waited for the paint to dry, flipped the brick over and painted the bottom side. It is important to let the paint cure according to the directions on the paint you use. 

Once the paint is good and dry you could sand the edges to give it a “rustic/antique” look or you can start decorating it.

Now it is time to decorate the bricks! We used sharpie markers in a variety of colors to decorate our bricks. I have a lot of cool plastic letter, number and shape templates I let the kids use while decorating their bricks. 

If you are brave and have a steady hand you could just free hand your design. The sky is truly the limit here! The best part is that there are 6 sides to each brick that can be decorated!

Be careful not to touch the bricks where you draw with the sharpie markers since the ink is probably still wet and will smudge.


Once the decorating is complete it is time to seal the brick along with the decorations and base paint coat. In a well ventilated area (outside is best) spray the acrylic sealer to all sides of the brick except the bottom. Once the sides you sprayed are dry flip the brick over and spray the bottom of the brick with the sealer. 

You may want to put two coats of the sealer on the brick to ensure it is weather proof if you intend to have your brick paver displayed outside.

Here is our finished project!

mommysuburbia.blogspot.com


Go on, give this simple project a try! If you like this I’m sure you will love the ebook I wrote, Secret Garden Crafts: 10 Nature Inspired Craft Projects, that includes 10 simple and fun craft projects. You can get your copy on Amazon today! (affiliate)


Wednesday, May 9, 2018

Awesome Gift Ideas for Mother's Day

mommysuburbia.blogspot.com
picture credit

I know all you mamma's out there would love a day of relaxation, reading your favorite book in a clean house after a good meal (not cooked by you). But this isn't the reality for most of us moms. There are no days off! Especially Mother's Day.

My husband is very capable of taking care of our family and making sure all the kids are fed, dressed and clean - and he does a good job, but he just isn't Mom.

"Mom" isn't just a name it is a badge of honor you earned over the years of caring for your dearest little treasures. Kissing boo-boo's, wiping snotty noses, hugging a hurting child or one who just needs a little TLC and whipping up a meal to feed your clan are all duties a mom willing and joyfully accepts.

Daily.

Momming isn't easy. Don't kid yourself, as your littles get less little the momming doesn't get easier, it gets harder, especially when teen hormones kick in. But you love them anyway because you are MOM.
mommysuburbia.blogspot.com

So this Mother's Day let's spoil her rotten! Let's celebrate Mom! Shower her with gifts, do the dishes, make her a meal and give her a relaxing day. Or maybe just maybe let her use the bathroom for once in private - that ought to make her day. It sure would make mine!

Kidding!!

kind of?

I found some great Mother's Day gifts you might want to consider for your mom this year. If you see something you like click on the image and you will be directed to the website you can purchase it from. Super simple!

Mother's Day Gift Ideas


Feed Mom's Chocolate Obsession 

Oh, and don't forget mom's love for all things coffee & chocolate! No mom could survive without one of these (or both).

I'm a dark chocolate kind of mom. Apparently the love of chocolate is a genetic trait that can be passed down from one generation to the next. How do I know this you ask? Well each one of my four kids, especially my oldest daughter, LOVES chocolate and would do practically anything to get it.

Click HERE

I'm serious folks - it has become a real problem around here. At least for me it is a problem because they are eating my chocolate!

I have to hide chocolate in my house. I don't mean just tuck it in the corner of a cabinet, that is child's play here and no longer a viable hiding place since they all caught onto this trick long ago. I've had to get really creative and stash bars in all sorts of weird places like the laundry room cupboards, slipped next to books on our bookshelf, under cans of canned goods in the pantry and even in my sock drawer.

Chocolate is a serious obsession around here! Chocolate Trading Co. has a great assortment of chocolate gift boxes and other great chocolate products your mom would love.

Coffee Lovin' Mama!

Blue Bottle Coffee Co.

Coffee is another great gift for mom. A gourmet bag of the finest beans and a cute coffee mug make a good Mother's Day gift for your special mommy. You could even get a plain white coffee mug and let the kids decorate the mug with drawings using special Sharpie Markers. After they are done decorating you just pop the mug into the oven for a bit and the ink becomes permanent.

Popsugar.com has a great tutorial showing how to make your own custom decorated ceramic mug with Sharpie Markers!
Click here for Project Details


I found this cool coffee starter box gift set for mom. Inside this box is everything Mom needs to get started on delicious homemade coffee. Throw in a fresh bouquet of flowers, and there’s no better way to start off a lazy Sunday morning. Find this set at Blue Bottle Coffee.


click HERE Gift Set
No matter how you celebrate Mother's Day I'm sure it will be wonderful! Happy Mother's Day mama - kick your feet up and ignore those dust bunnies collecting under the couch, I guarantee they will be there waiting for you tomorrow.

Tuesday, May 1, 2018

DIY Faux Potted Cactus Craft Tutorial

A cactus craft project that is cute, easy, and fun to make!

My oldest daughter loves to decorate and redecorate her room to reflect her current style (which is continually changing). Currently, she is in love with all things southwestern, cactus, desert, and sand. Who can blame her? We had a long winter and the poor girl is dying for some hot sunny summer days! 

Decorating her room with a southwestern theme gives her a little escape from the cold and it looks pretty too.


mommysuburbia.blogspot.com
Designed by Freepik


This post contains affiliate links which means if you make a purchase I may receive a small commission at no additional cost to you. See my disclosure on the Disclaimer page.

With a limited budget to spend on her ever-changing decor ideas and themes, the Dollar Tree store has become our BFF. A little imagination and some supplies are all you need to create some pretty amazing accessories. 

She made these adorable and super simple potted cacti in no time at all. Want to make one for yourself? Here are the supplies and instructions on how to make one.

mommysuburbia.blogspot.com

Cactus Craft Project & Tutorial 

Supplies 

We already had craft paint, brushes, and a hot glue gun at home but I'm sure you could grab this at your local craft store or order them on Amazon if you didn't have any on hand.

Instructions:

Step 1
Lightly sketch out your design on the pot in pencil. When you are happy with your design start painting over your sketches. The decoration you make on the pot can reflect your style whether it is modern, contemporary, or like we did - southwestern.


mommysuburbia.blogspot.com


Step 2
If your cactus does not come with an attached piece of craft foam no problem. Cut a piece of craft foam to down to the size of the inside diameter of the pot. Poke the cactus into the craft foam securing it with hot glue.  

Once the paint is dry it is time to add the cactus. If your cactus comes attached to craft foam just squeeze it into the pot. To ensure it wouldn't fall out of the pot run a bead of hot glue around the craft foam to secure it inside the terra cotta pot.


mommysuburbia.blogspot.com


Step 3 
Next, hot glue the polished stones around the cactus filling the space and covering the craft foam. This will make the cactus appear to be planted in the stones as well as keep the stones from falling out if the pot gets bumped. If you don't have stones you could use glass beads or faux moss.


mommysuburbia.blogspot.com


This was such a simple project that turned out so cute! My daughters did this project as a sleepover craft with one of their friends. Wouldn't it be a fun party craft to do with kids at a birthday party or even a fun project for a church social or Cinco de Mayo party?

I hope you enjoy making your own potted succulent! Comment below to tell me what you made or if you have any questions about this tutorial. 

More Easy Crafts You Will Love


Follow me on Pinterest, Facebook, and here at Mommy Suburbia for more great craft projects and tutorials!


Friday, April 27, 2018

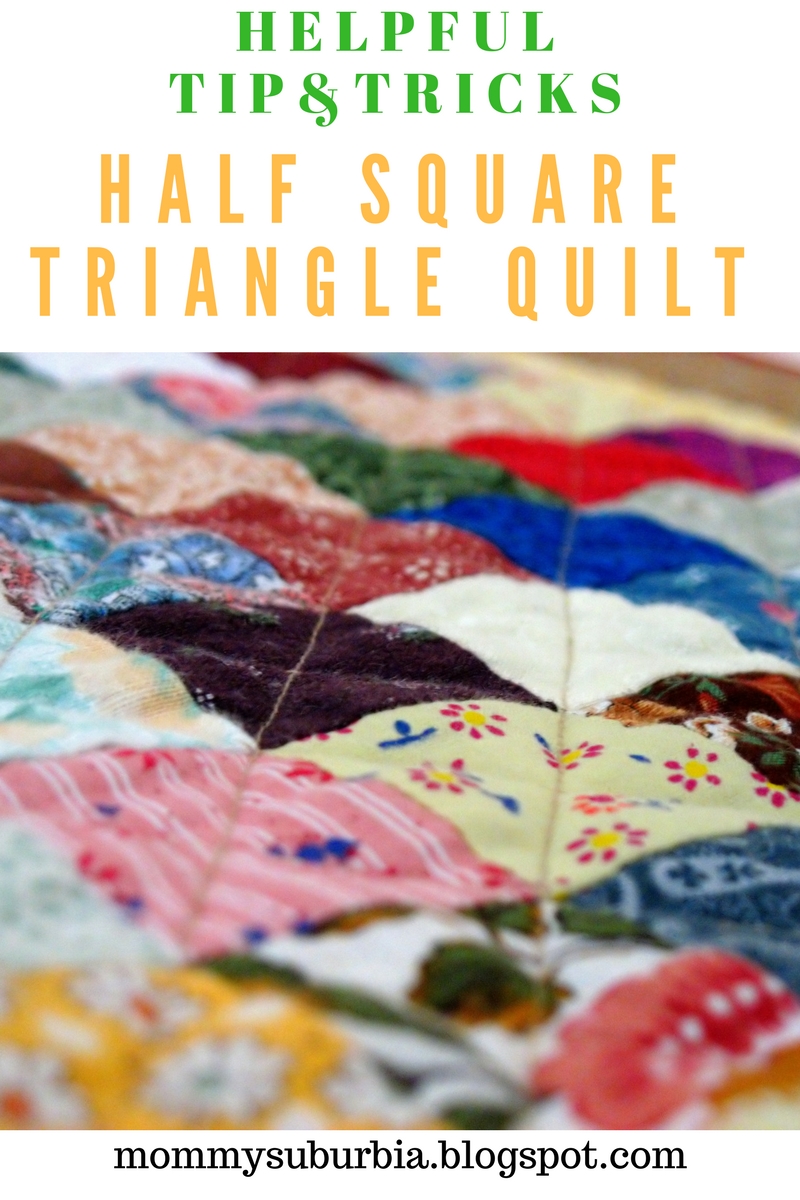
Tips and Tricks to Create a Half Square Triangle Quilt

Looking for a new quilting block? Half square triangle blocks look great and are easy to make. Find out how with this simple tutorial.


mommysuburbia.blogspot.com

Quilting is a somewhat new hobby for me. I'm really enjoying the amazing patterns and creativity a quilt offers. I love being able to use up all the fabric scraps I have stored up in a big tote piecing them together in a new way to create something beautiful. 

My new challenge is learning how to make Half Square Triangle blocks.

In a previous post I showed you the first type of quilting I learned which was rag quilting. If you are interested in learning more about rag quilting you can read about it here: Quilting for the Beginner - Rag Quilts. 


A technique that has troubled me for some time and I have worked hard trying to improve my skills is the half square triangle. 

What is a half square triangle (HST) you ask? Well it is a square made from two different fabric triangles. Picture two triangles sewn together to form a square. Got it?

There is a special way to sew these two triangles together in an easy and efficient time saving way. The key is taking time to cut out your fabric first, marking some lines in pencil or washable pen and then chain sewing the fabrics together.

Half Square Triangle Tutorial 

Would you believe that in order to create the HST you first start by placing two different colored square fabrics together, one on top of the other right sides facing? 

I found a great tutorial I follow showing how to place the squares together, mark sewing lines and how to chain sew them. I used this method and tutorial from Coral & Co. and it worked out very well!


You know the saying "There's more than one way to skin a cat?", well this applies to HST's too! The great tutorial from Coral & Co. has at least 4 tutorials of different methods you can use to make your own HSTs! Try them all and find what works best for you!!

Completed HST Quilt

I am proud to say that I finished my first HST quilt block quilt and I love how it turned out!! I made it for my new niece as a gift. 

The finished dimensions of the quilt were 42"x 36" which for a baby quilt is a very generous size. Here are some pics of the finished quilt I wanted to share with you.


I realize that some of the points don't like up exactly, but that's OK! The beauty of a quilt in my opinion is the little quirks and "personality" the quilt has. I know with each quilt I piece together my skills will improve and maybe, just maybe someday the points will be perfect.


The picture above shows the finished, bound and completed quilt. I forgot to take a picture of the backing which is just a very pale light green solid fabric.

The fabrics I chose for this quilt are so special to me and each one has a specific memorable meaning. Over the years I have made various quilts for others and I'm always left with some scrap pieces from those projects. Since this quilt was going to my new niece I thought it would be cool to include fabrics used in other quilts that have been given to other family members. 

The light green/butterfly print is from my mom who used it to make Christmas stockings for one of her grandkids. The orange and brown fabric is from a quilt I made one of my sisters for her 40th birthday. The orange dot, green dot and white with green dot fabric was from my new niece's older sister's quilt I made a few years ago.

I like to think that this quilt is a way that this new little baby is being sewn into our family as a new "block" as the family grows. 

The story of quilts, even ones we create can carry such rich meaning. I will always look at this quilt and be reminded of the other special people in my family!

I hope you give HST's a try! Let me know how your quilt turns out and if you have any great ideas to share on how you make your HSTs.

Book Recommendation About History & Quilting

The history of quilting and the many patterns is fascinating. The stories hidden within traditional quilt blocks contain rich history, biblical meanings, reflections of nature and many other wonderful meanings.

I recently finished a touching fictional novel set in the 1850's about a fugitive slave named Joanna who creates a hidden map within quilt blocks in hopes to escape slavery. The quilt is her only map to freedom as she travels the Underground Railroad to reach a safe haven. The book, The Lost Quilter, can be found here on Amazon. I enjoyed reading this book and would recommend it to you to read as well.


Here is the description of the story:

Just as Joanna could not have foreseen that, generations later, her quilt would become the subject of so much speculation and wonder, Sylvia and her friends never could have imagined the events Joanna witnessed in her lifetime. Punished for her escape by being sold off to her master's brother in Edisto Island, South Carolina, Joanna grieves over the loss of her son and resolves to run again, to reunite with him someday in the free North. Farther south than she has ever been, she nevertheless finds allies, friends, and even love in the slave quarter of Oak Grove, a cotton plantation where her skill with needle and thread soon becomes highly prized. 

Through hardship and deprivation, Joanna dreams of freedom and returning to Elm Creek Farm. Determined to remember each landmark on the route north, Joanna pieces a quilt of scraps left over from the household sewing, concealing clues within the meticulous stitches. Later, in service as a seamstress to the new bride of a Confederate officer, Joanna moves on to Charleston, where secrets she keeps will affect the fate of a nation, and her abilities and courage enable her to aid the country and the people she loves most. 


The knowledge that scraps can be pieced and sewn into simple lines -- beautiful both in and of themselves and also for what they represent and what they can accomplish -- carries Joanna through dark days. Sustaining herself and her family through ingenuity and art during the Civil War and into Reconstruction, Joanna leaves behind a remarkable artistic legacy that, at last, allows Sylvia to discover the fate of the long-lost quilter.


This book is worth the read! I hope you find some time to read it yourself. 


Friday, April 20, 2018

Easy DIY Collage Art Project For Kids

From trash to treasure - making art from recyclables is a whole lot of fun and easy too! Make Earth day or any day special by making these cool torn newspaper puppy portraits.


mommysuburbia.blogspot.com


Being a good steward to our planet is all of our responsibility. Instilling this into your children from early on will result in people who care and are concerned for the well being of our planet and the natural resources around us.


Recycling and taking care of the planet doesn't have to be drudgery - why not incorporate some fun into an important job? 

Using recyclable materials like newspaper, cans, bottles and empty cereal boxes is an easy way to engage your child in a creative and fun activity all while showing them how to reuse items found around the house for different purposes instead of tossing them into the trash bin.

There are tons of great ideas for creating art from recyclable goods so narrowing it down to one project to do with my kids was a tough task. 

We ended us making newspaper puppy portraits! 

They turned out amazing. This is a fun project for any age and requires only simple household supplies. See below the pictures for instructions on how to make your own.

Here are some pictures of our final projects:


Recycled Newspaper Puppy Print Artwork For Kids


Aren't they cute! Want to make your own? Here is what you need to get started:

1. Newspaper 

2. Thick paper - like cardstock, any size
4. Colored paper - construction paper or colorful cardboard/cereal boxes. We even discovered that our brown grocery bags had great print to use like barcodes and store logos.

Instructions:

To begin find sections in the newspaper with unique print such as word searches, sudoku games and sections with lots of printed text. Then cut out some simple shapes such as circles, ovals and rectangles. 

Since we have a range of ages in our family (5 yrs to teen) I used the time to teach shapes to the younger kids while letting the older ones make their own shapes.

After cutting out the main body shapes a puppy arrange the newspaper shapes on the large piece of cardstock to look like a dog's body. Once the newspaper pieces are arranged glue them to the card stock.

Next use the construction paper, cereal boxes and grocery bags to make the ears, face, legs and tails for your puppy dog. I had my kids cut out different shapes, placed them on the dog body and rearranged them until they were happy with how the dog was looking. Glue these pieces to the puppy dog body and "walla" the little dog is done. 

Don't you think they turned out "frame-worthy"? Definitely going to be framing these cute puppies!

My kids really enjoyed this project and so did I! I think we will be doing this again in the future maybe making different animals next time - like zebras or giraffes. 

I would love to hear how this project worked out for you and what kind of animals you made. Please leave me a comment (and picture) of your final project. New ideas are always welcome!!


More Nature Inspired Recycling Arts & Craft Projects:


Looking for more recycling arts and craft projects to do with your kids for Earth Day? I am happy to offer you this great ebook that has 10 fun nature inspired craft projects I'm sure your kids will love doing! You can find the ebook, Secret Garden Crafts - 10 Nature Inspired Projects on Amazon.

mommysuburbia.blogspot.com
Click here to find this ebook.

Thursday, April 19, 2018

Must Have Spring Jean Jackets For Women

I remember years ago when I was a teen getting my first jean jacket. It buttoned up, had a collar I could flip up and the best part - it was stone washed. Remember stone washed jeans? I love how there would be some small leftover pieces of stone in the pockets to prove the jeans were washed with stones! And that cool rough pattern created by the stone washing made each item unique.

mommysuburbia.blogspot.com

*This post contains affiliate links. See my full disclosure on the Disclaimer page.

My stone washed jean jacket from the late 80's may not be in style today but jean jackets are still very popular, practical and stylish for women today.

They are a great accessory to have in your closet. You can dress them up with a cool scarf or jewelry or just keep it casual over a tee shirt. The style of the jean jacket has come a LONG way since the 80's! (thank goodness!). No more boxy shoulder padded shoulders or the baggy jacket look. Today's jean jacket is well fitted to flatter the female curves and comes in a variety of colors or shades.

I'm on the hunt for the perfect spring jacket that provides me with a lot of versatility and style. I put together what I have found so far and want to share my findings with you. Take a look and let me know what you think. All the pictures are click able and will take you to the online store to see more details for the jacket you like.